In this post, I will guide you How to Install macOS Monterey on VMware on Windows- PC in simple 3 steps. I hope you support me by reading and providing your thoughts reading to the post on the comment.
On the WWDC 2021, Apple released iOS 15, iPadOS 15, WatchOS 8, and finally the macOS Monterey. macOS Monterey (macOS 12) is surprisingly amazing in terms of look and style compared to the macOS Big Sur. I know there are amazing new features of universal control, shortcuts, emojis, and others but you can’t ignore the look and background. With the macOS Monterey (macOS 12), your M1 chip is working perfectly however some Intel Macs won’t be able to use some features.
The same thing goes for the Virtual machine too, some features may not work, but still if you are a developer. You can use the XCode on the VMWare and it will solve your problem although I am 100% sure because currently it is in the beta version.
Besides, you may want to learn how the macOS feels like what are the differences between Windows and macOS 12. How to create bootable USB, How to Install and Install the software on mac, is it even possible to uninstall an App in macOS. These simple curiosity questions will take you to the macOS environment to find out the answers yourself.
Steps to Install macOS Monterey on VMware on Windows – PC
- Make sure to download the required files
- Create a New Virtual Machine on VMware
- Perform the clean Installation of macOS Monterey
- Summary
Step 1. Where to get the Required Files?
There are three requirement to install macOS Monterey (macOS 12) on VMware.
1- Download and Install VMware
You can get the VMware Player from VMware’s official site for free to Install macOS Monterey on Windows – PC. You can also use the VMware Workstation Pro for the trial version, then later you can buy the license. But if you are interested in using the VMware Workstation Pro, sign up, download the trial version of the software. The trial version has a duration of 30 days after that decide to leave it behind or buy the lisence.
2- Download macOS Unlocker and Install it
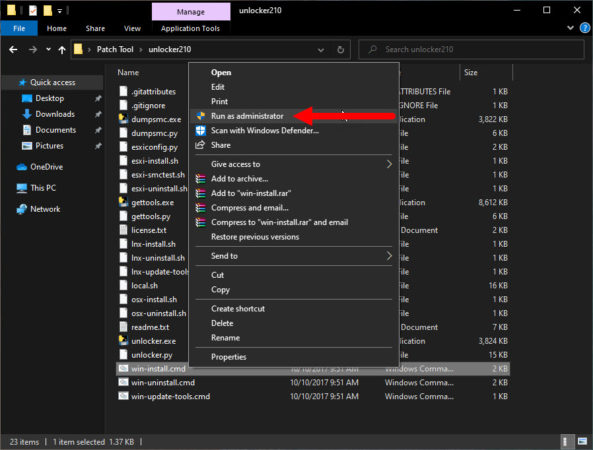
macOS unlocker is a tool needed to enable Apple’s guest operating system services on Windows- PC. You can get the macOS Unlocker from GitHub without any issue. Extract the Unlocker after downloading, then right-click on win-install.cmd and run it as Administrator.
3- Download macOS Monterey ISO File
In windows, you can not install macOS Monterey (macOS 12) on a Virtual machine with a dmg or pkg file. The only extension which works is the ISO file, and you need to download it. If you have the dmg or even the macOS Monterey Installer, simply create the ISO file rather than downloading.
Use the video or the article to create macOS Monterey (macOS 12) ISO file.
Step 2. Create a New Virtual Machine For macOS Monterey
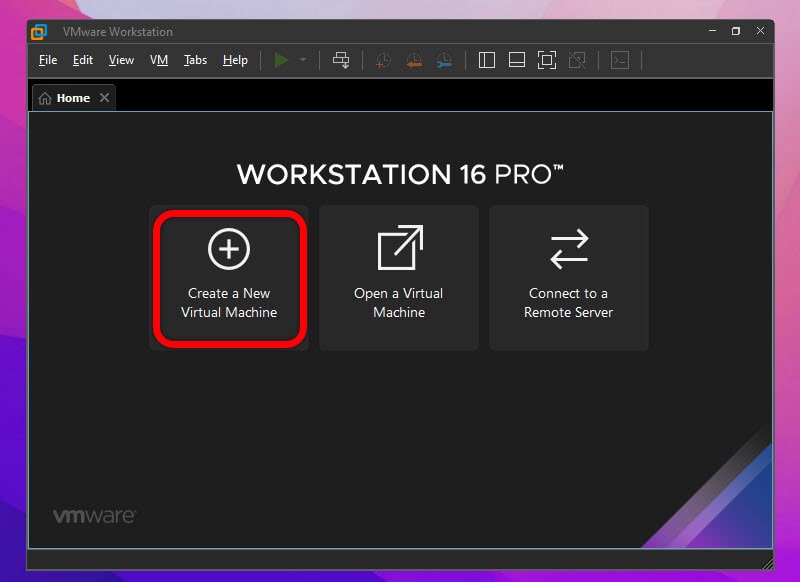
In order to test the new operating system on Windows -PC, you need to create a Virtual machine for it. so, you need to launch the VMware and on the homepage choose the create a new virtual machine. Creating a Virtual machine for the macOS Monterey is an essential part where you have to create it properly. All the steps are easy but some steps need some settings to configure, you need to follow them carefully.
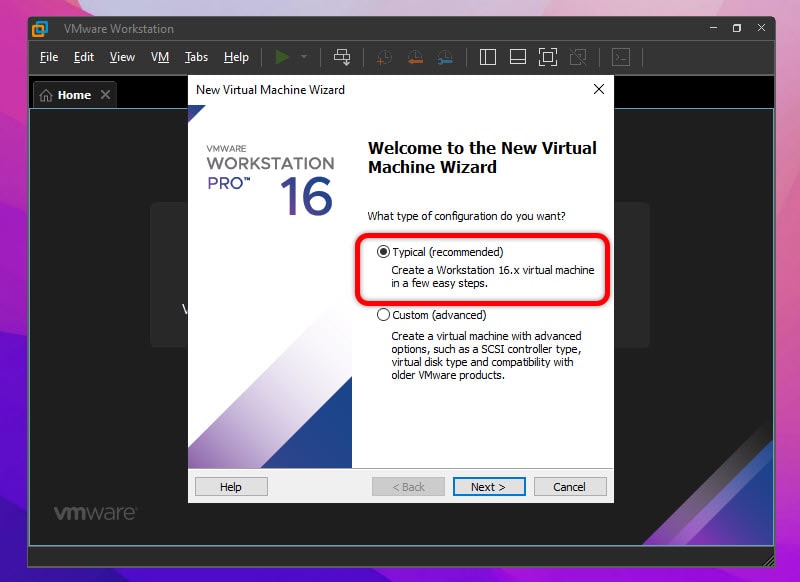
For creating a New Virtual Machine there are two types of configuration, typical and custom. With the typical configuration, the settings for the OS are selected by default but for the Custom, you have to choose every setting one by one. I recommend using the typical configuration.
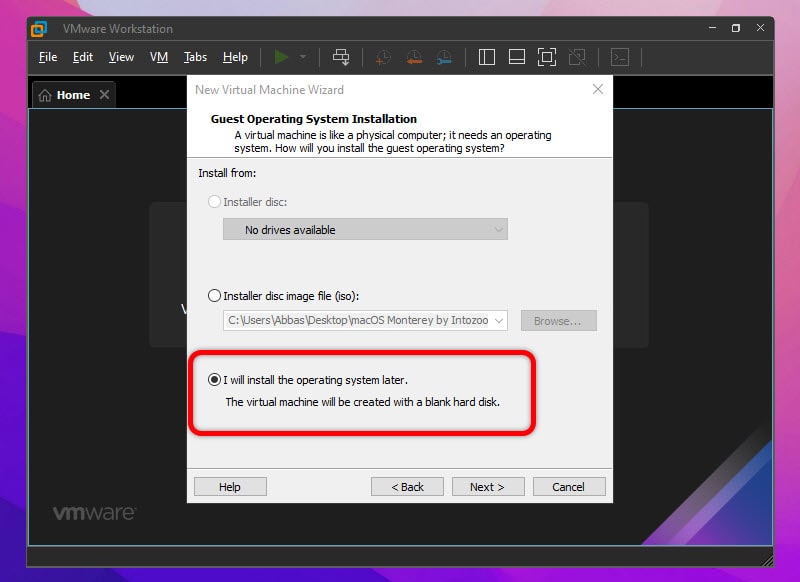
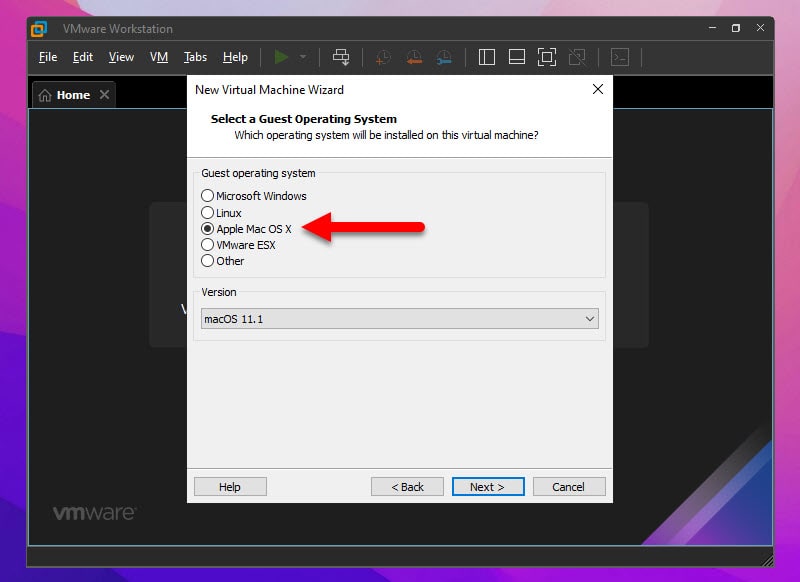
A virtual machine just like a physical computer, and if you are trying to install an operating system you need to add the OS. That’s why here VMware has provided three options but we will go with the last one.
Before getting you need to figure out which operating system you are trying to on the VM. In our case we know it is macOS, so choose Apple Mac OS X and choose the version too. I am using an older version of the VMWare 16 that’s why the latest version of the macOS is macOS 11. You have to choose macOS 12.
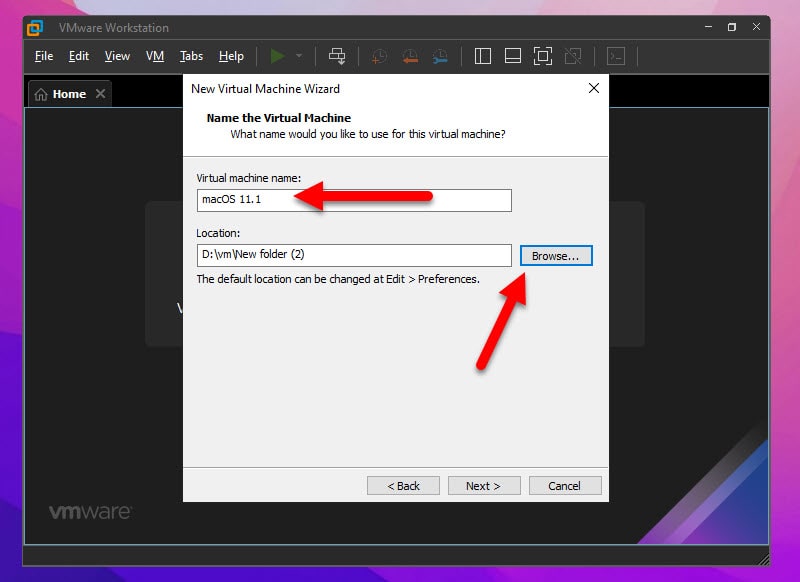
Decide what name you are interested for the VM, after that specify a location to save it. Remember you have to know the path because later we will configure the VMX with a line of code.
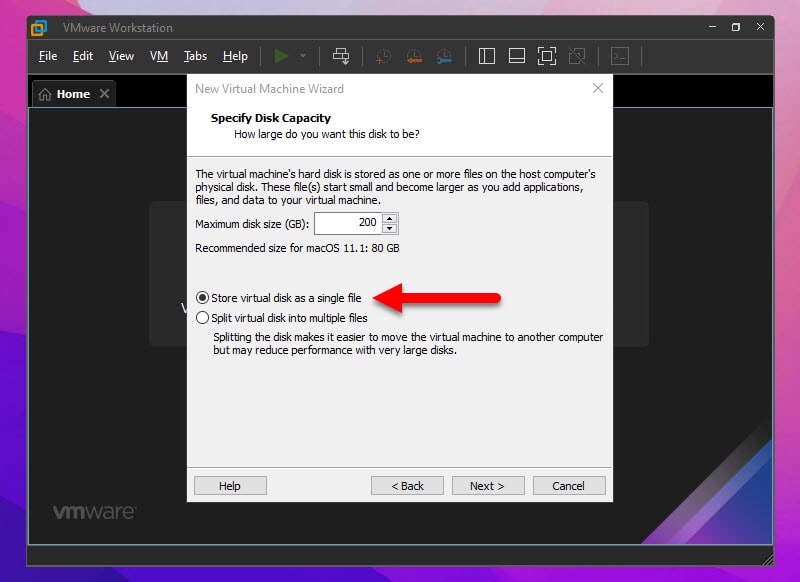
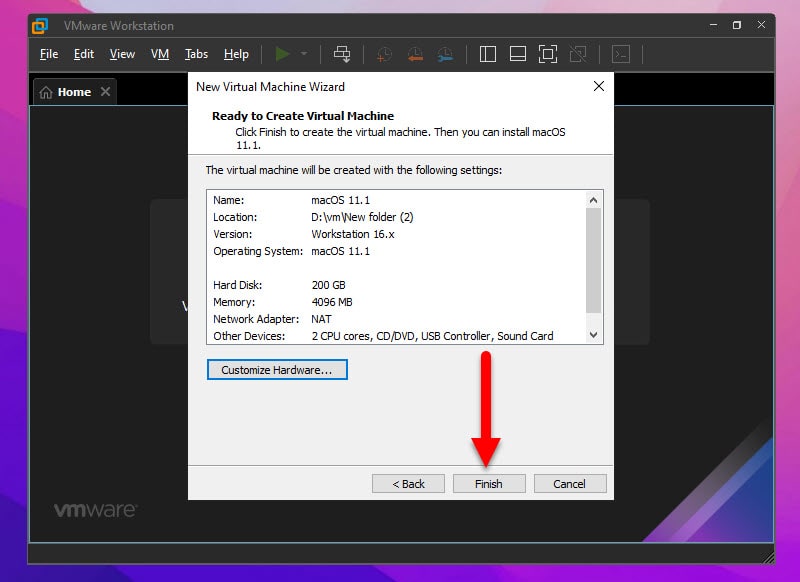
Mention the amount of storage you need for the Virtual machine, I will go with 200 GB. Don’t worry, it is not going to take that much storage on your computer, instead, the more you use the VM, the more storage it will use. Also, you have to mention that 200 GB storage should be in a single file or multiple files, I will go with a single file.
In the last Window, we have to customize the settings of the Virtual machine, so click on customize settings.
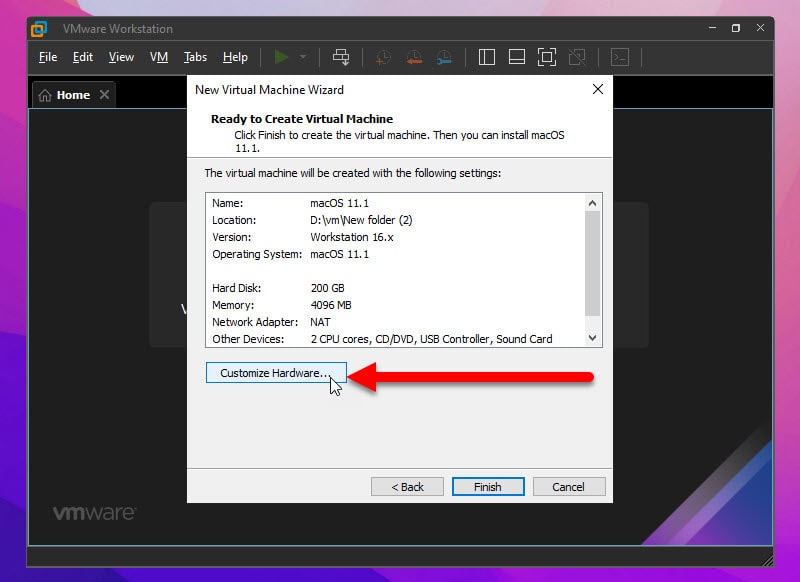
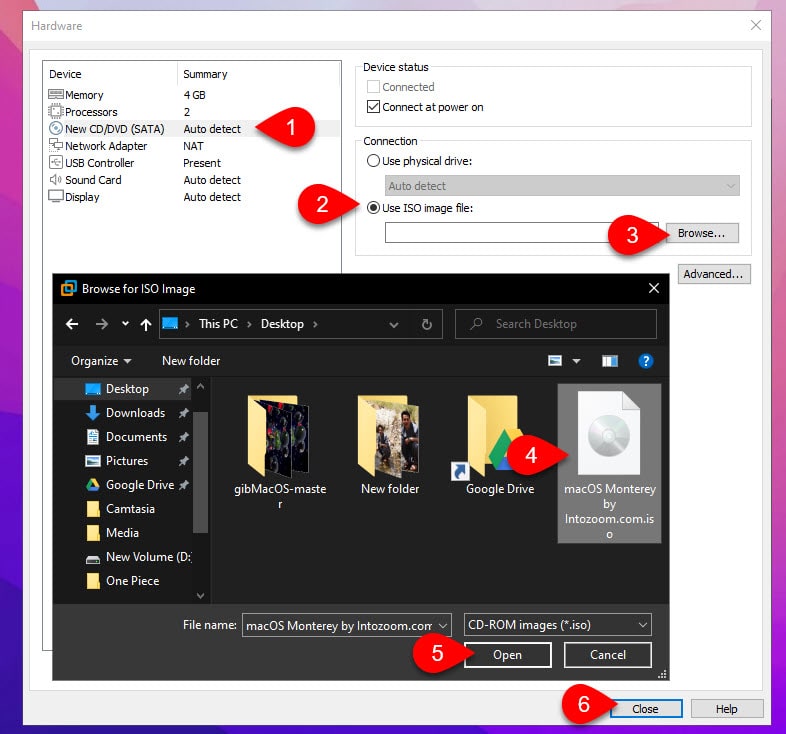
Make sure at least the VM has 4 GB of RAM with two processors. Now you need to attach the macOS Monterey ISO file to the Virtual machine. Go to New CD/DVD SATA, choose the Use Image file, and locate the macOS Monterey ISO file.
Click Finish to end up creating a New Virtual machine for the macOS Monterey.
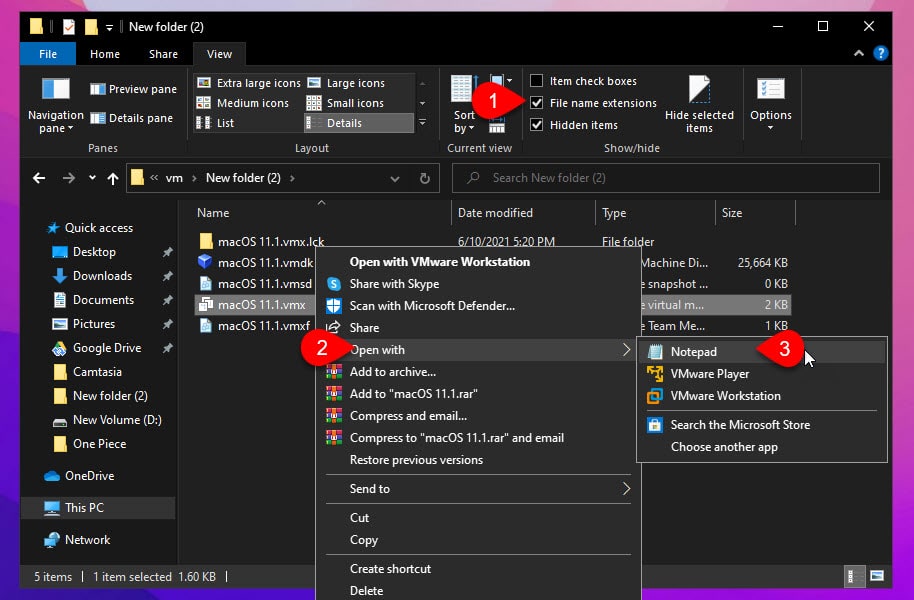
For the next part, we have to apply a small line of code to the VMX file of the Virtual machine we just created. Find the location where you saved the VM while creating it, enable the file extension name from the view menu. Right-click on the VMX file and open with the Notepad.
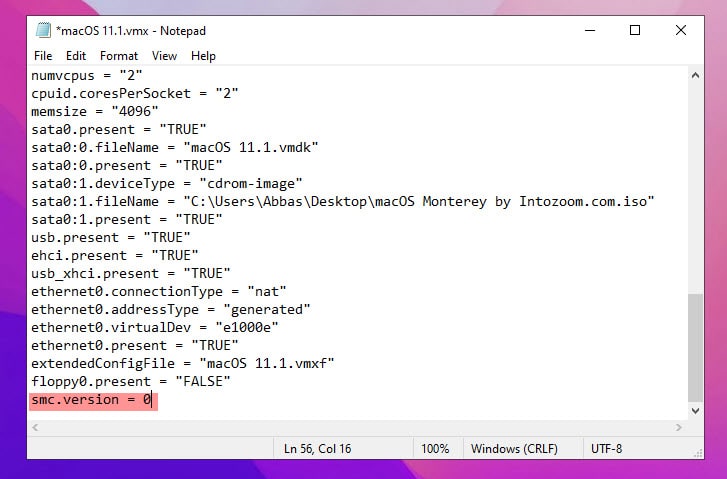
Scroll down to the end and type smc.version = 0 and save it.
Step 3. Install macOS Monterey on VMware on Windows- PC
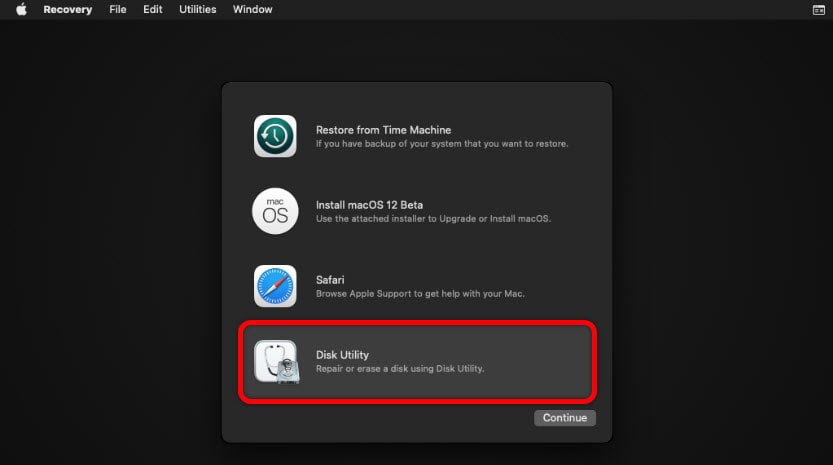
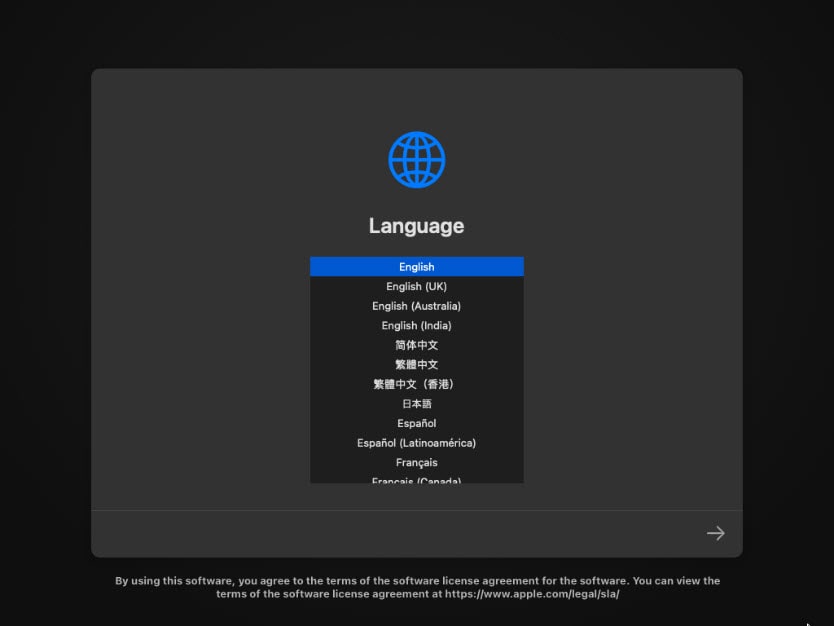
Power on the Virtual machine and wait until you reach the first window which asks you to choose a language. Once you choose your language you will be on the main menu of the macOS Monterey Recovery page. There are four major menus of restoring the mac using the time machine, Install macOS Monterey, open safari for help, and finally Disk Utility. You need to choose Disk Utility to Partition the Virtual hard disk as an Apple file system.
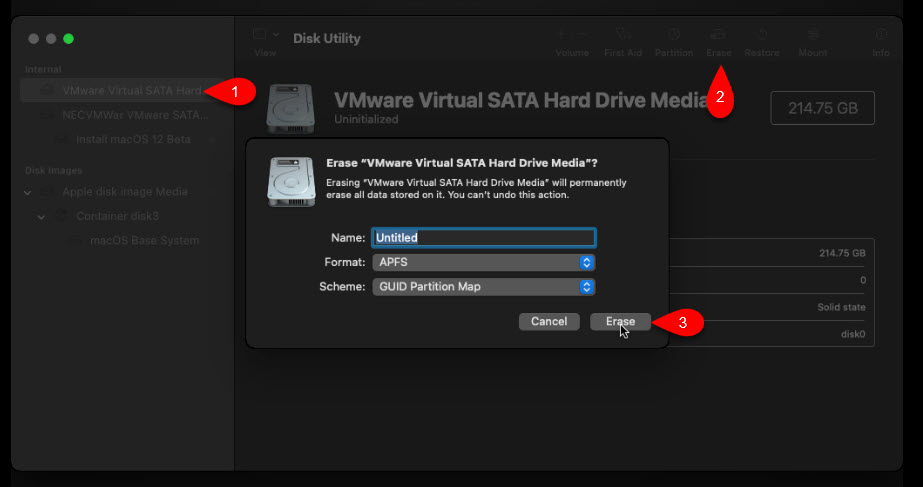
It is time to partition the Virtual machine hard drive so the macOS Monterey should be installed their. To do that choose the Virtual hard disk on the left panel and click on the erase. Provide a name to the disk, choose APFS and finally GUID Partition map and press erase.
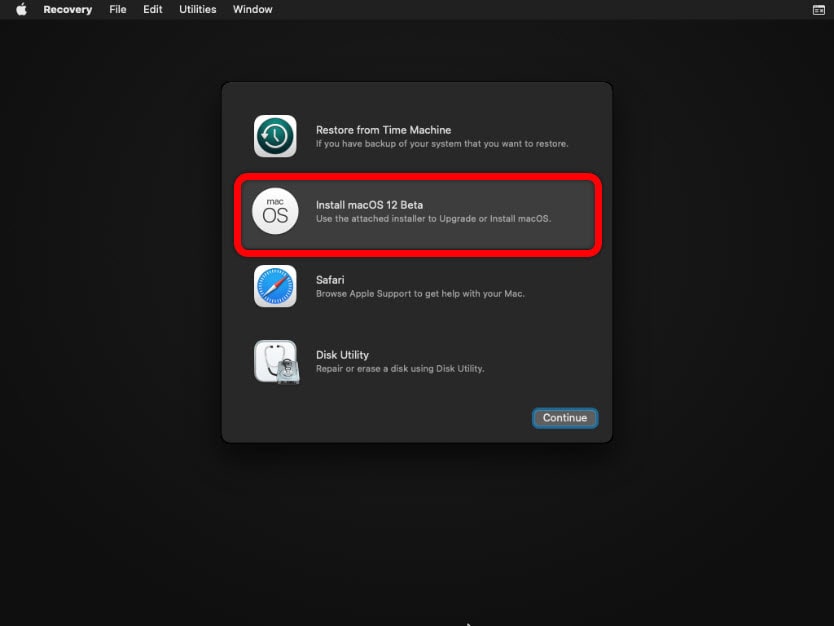
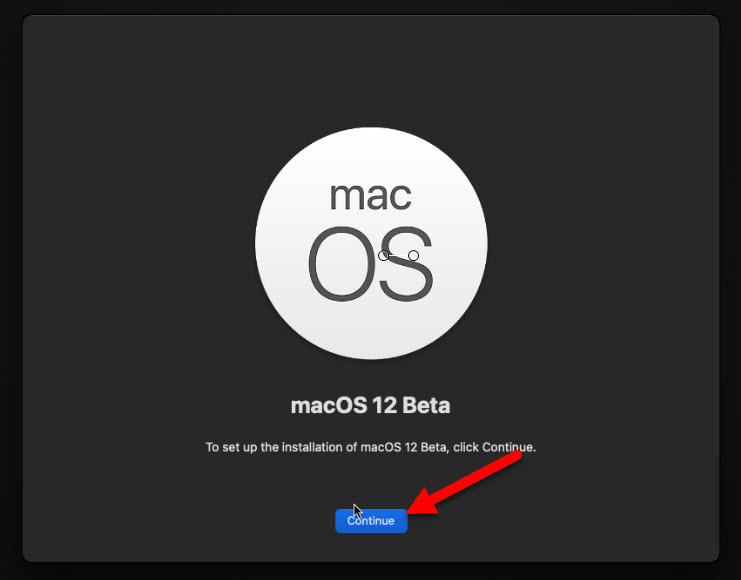
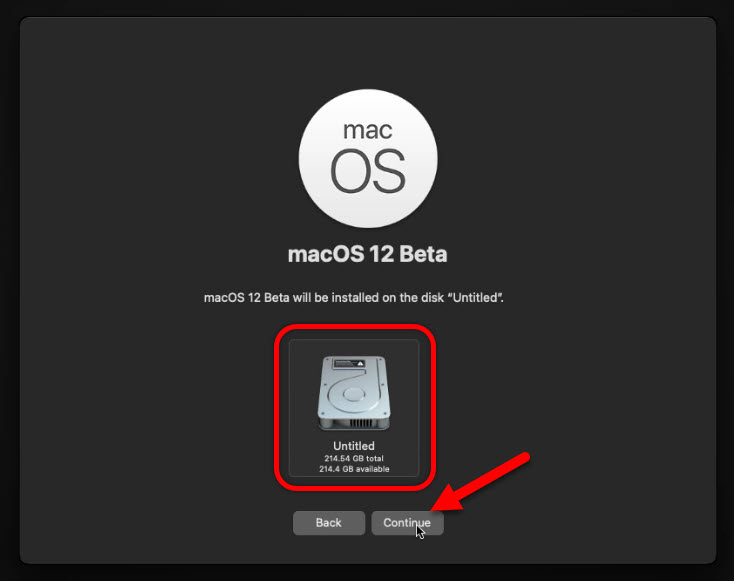
Once you erase the storage close the disk utility, now in the main menu, choose to Install macOS 12 Beta. After that click continues on the next window which is asking to install macOS Monterey. Follow it up by agreeing to the terms and conditions of Apple.

Here choose the drive you just erased to install macOS Monterey on it, once you select it wait until the OS should be installed.
- Choose a language in which you are comfortable.
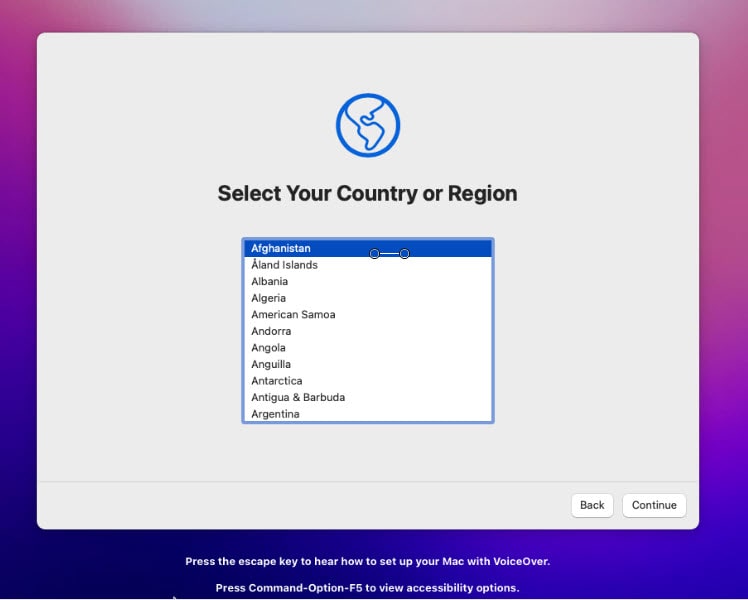
- Choose the country where you live, choose it so that country’s language should be input in the keyboard.
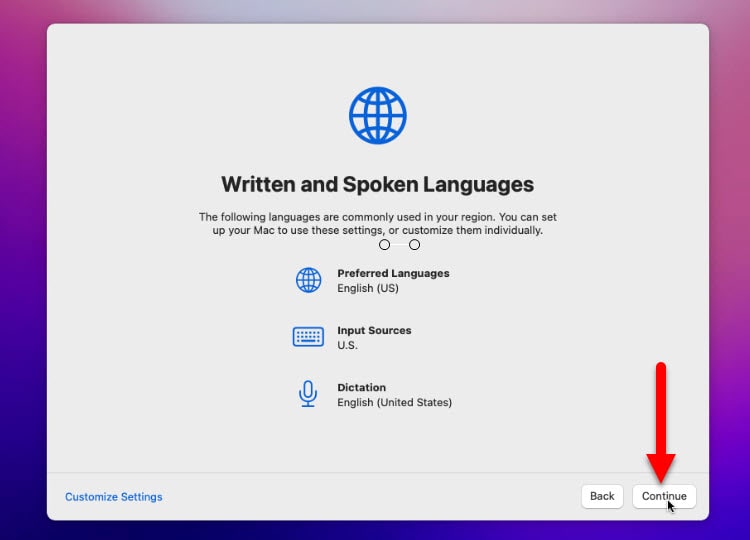
- Based on the country the written and spoken language is looking different. If you choose Pakistan, the URDU keyboard will be available here.
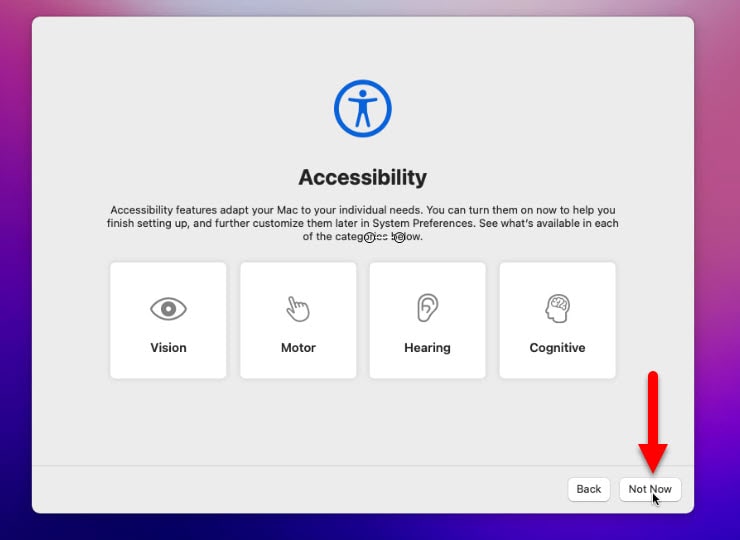
- With the accessibility, you can adapt the mac to your individual needs, if you need it enable it, if not pass it.
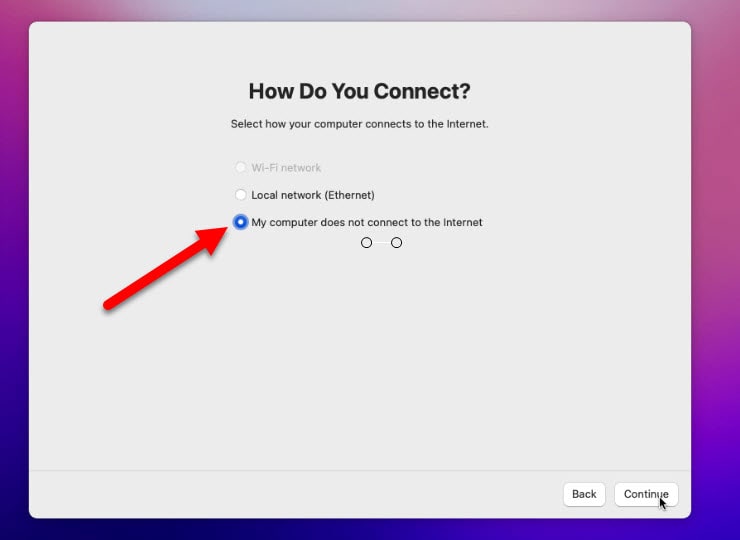
- My computer does not connect to the internet is the next option you have to choose, don’t worry network will work.
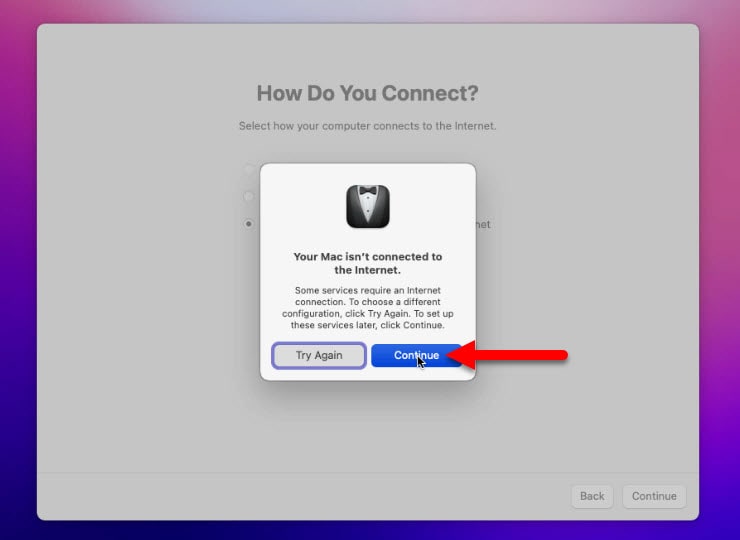
- Ignore the internet warning.
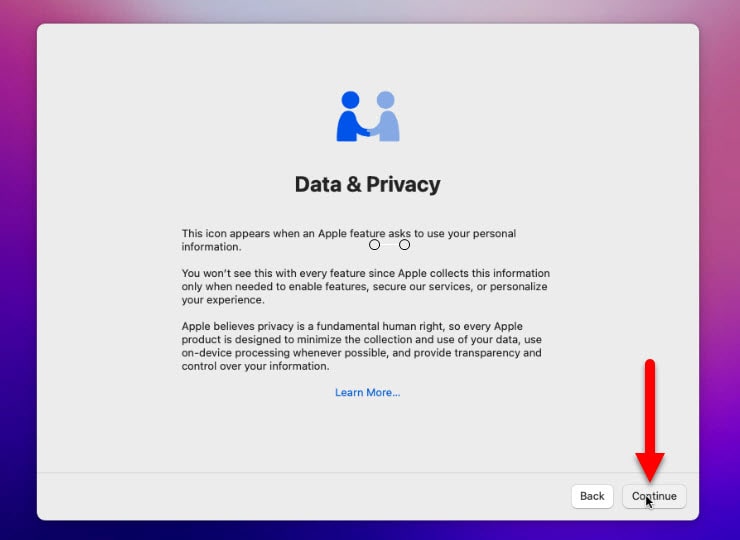
- Continue with data and privacy.
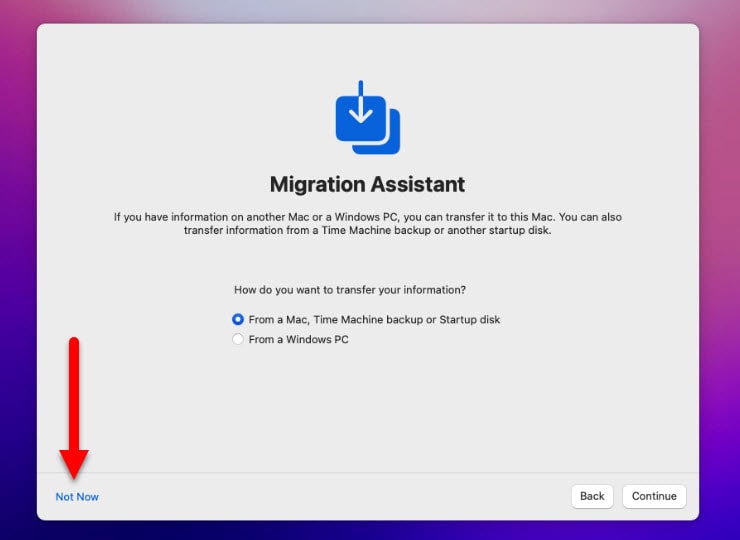
- We are performing a clean installation, so we have no business with the migration, just choose not now and move to the next step.
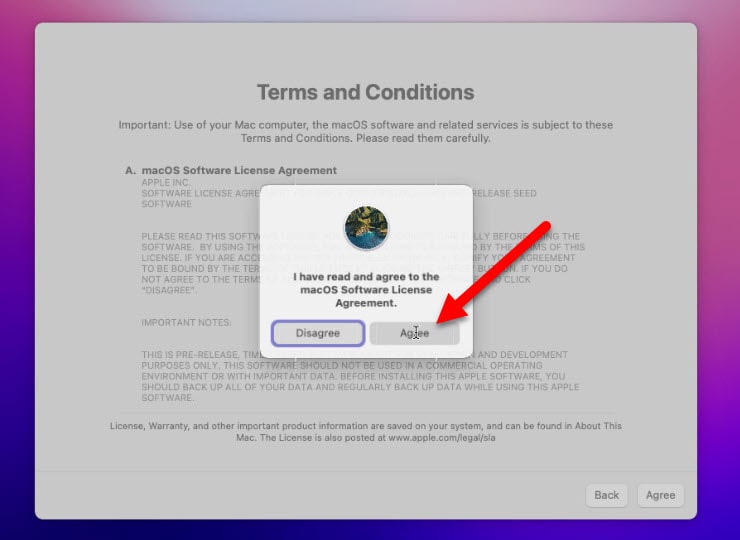
- You need to agree with the terms and conditions to move to the next step.
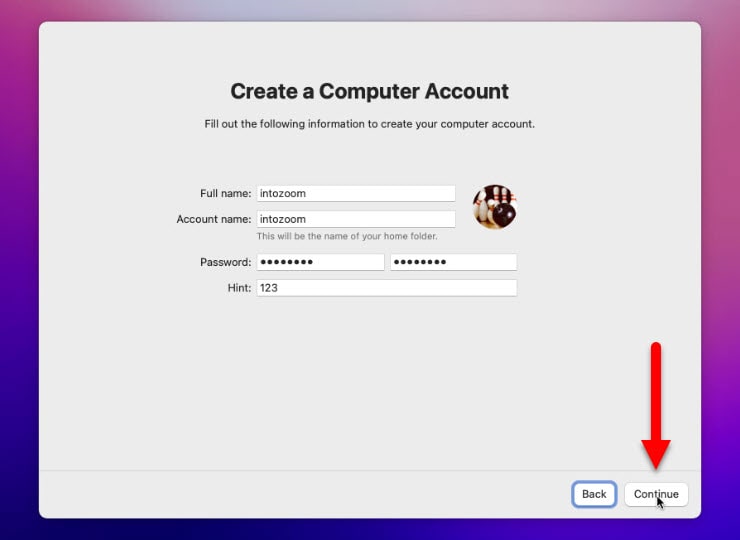
- Create a Computer account with a strong password, so others shouldn’t gain access to it.
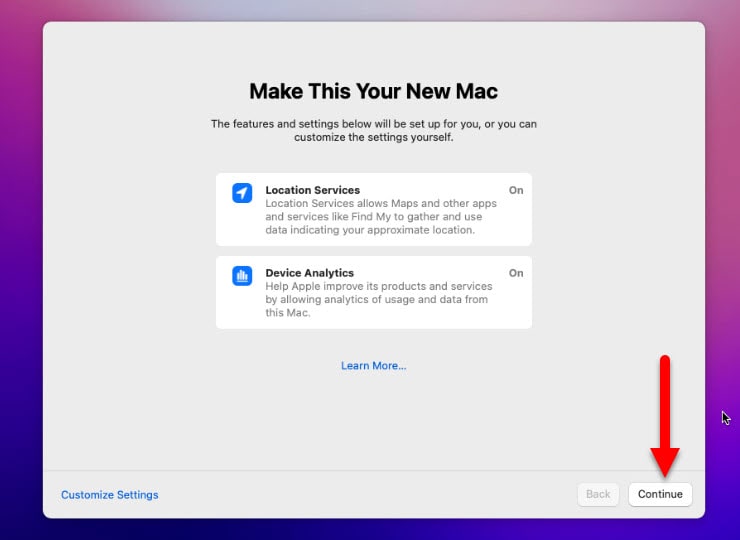
- Click continue on the next window.
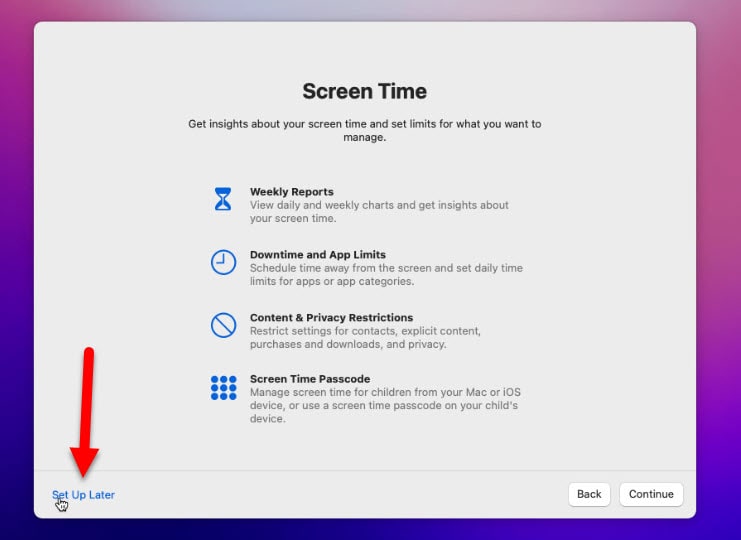
- You may configure the screen time if you are interested in monitoring your weekly reports, app downtime, or uptime. If not choose setup later and move to the next step.
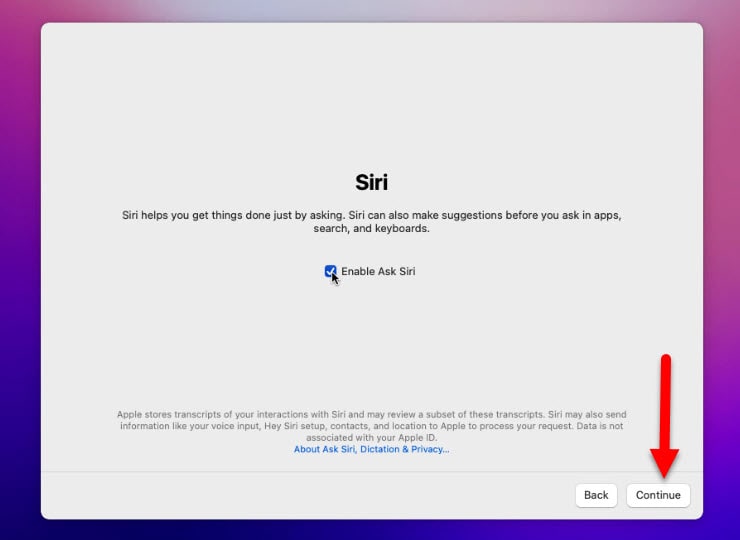
- You can Enable the voice assistant Siri on your mac by clicking continue, if not uncheck the box next to Siri.
- Finally, choose a theme for macOS 12.

Fix macOS Monterey Stuck at black screen after a restart on VMware
Summary:
There are only steps to Install macOS Monterey on VMware on Windows- PC.
- Download and install the required files.
- Create a New Virtual machine and configure the settings.
- Finally, Install macOS Monterey on VMware.
Also Read:
- How to Install macOS Monterey on VirtualBox on Windows – PC?
- How to create macOS Monterey Bootable USB on Windows 10?
- Install macOS Big Sur on VirtualBox on Windows 10
- 6 Steps – Install macOS Catalina with ISO on VirtualBox on Windows
- Install macOS Mojave on VirtualBox on Windows PC