In this post, we will provide the best and step-by-step guide to Install macOS Monterey on VirtualBox on Windows – PC. I hope you will read this post to the end and provide your thought regarding our guidance.
As you know macOS Monterey (macOS 12) is replacing the macOS Big Sur on the market on Apple products. There are not many changes to macOS 12 however some big updates and changes have arrived. Their developer team had added some new features like universal control, Airplay on mac, shortcuts, 3D map design, some updates to notes, and others.
In any case, Apple has provided a new look and a new background for macOS Monterey (macOS 12). The new design contains the curviness on the edges and added a new box in the settings for asking Administrator privileges. Since the universal control has been added to the macOS Monterey (macOS 12), you can use 1 mouse for iPad, iMac, and MacBook. Not just a mouse, you can use the keyboard and other devices.
Today is 9th June 2021, the first beta of macOS Monterey (macOS 12) is available for the developers. Soon enough they will release the beta where you can test it too without a developer account. Also do not forget the final version of the macOS Monterey (macOS 12) will be released in the fall of this year.
As far as I have tested the new macOS Monterey (macOS 12), I am totally satisfied with it, let me know your thoughts on the comments.
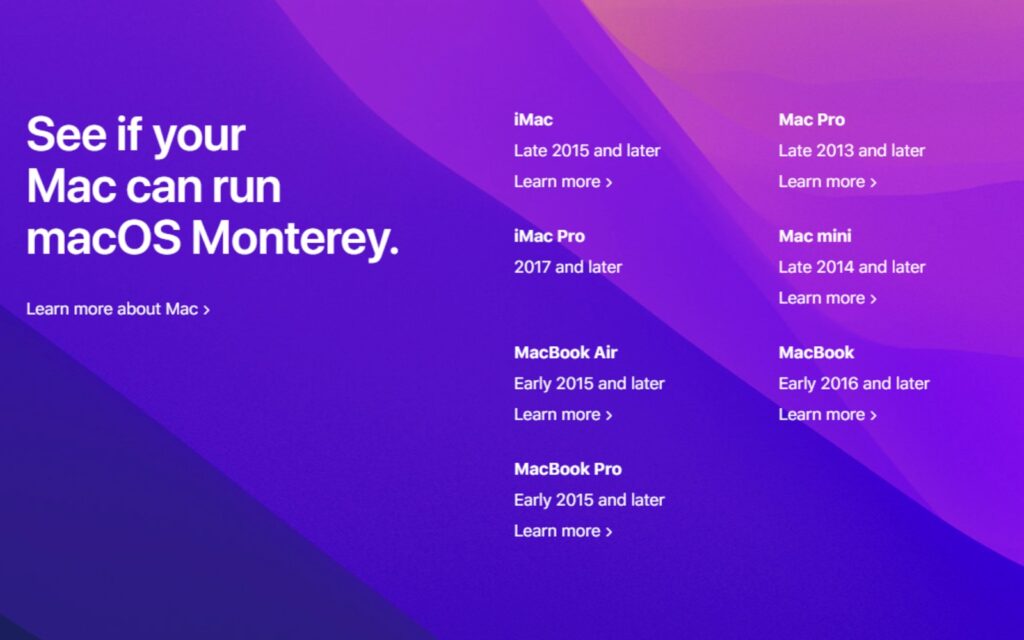
According to Apple, every Apple computer can not support the macOS Monterey (macOS 12), in the screenshot below you can look at which devices are supported by the macOS Monterey (macOS 12).
Steps to Install macOS Monterey on VirtualBox on Windows
- Download Required software and Files
- Install VirtualBox on Windows 10 PC
- Install or Update VirtualBox Extension Pack to solve mouse freezing issue
- Create a new Virtual Machine, then customize the settings
- Run VirtualBox Code on CMD as Administrator
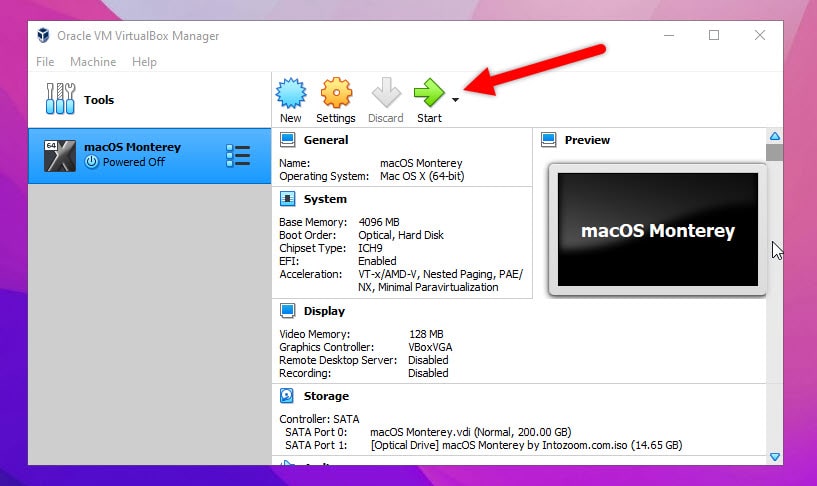
- Power on the Virtual Machine
- Perform the Installation of macOS Monterey on VirtualBox
- Take a Snapshot of the macOS 12 Before shutting down
- Summary
Note and Recommendation:
It is important to enable the Virtualization from BISO otherwise you will face the Failed to Open Session For The Virtual Machine error. In the BIOS it must be listed as Virtualization Technology (V-T), so keep in mind.
I recommend you using SSD on your computer, especially for speed, because most of the users are saying their system is slow while using a Virtual Machine. Also, increase the amount of RAM on your actual computer and you won’t face any issue regarding the speed.
Required Files:
- Download and Install VirtualBox
- Download the VirtualBox Codes.
- Download macOS Monterey (macOS 12) ISO Image
Step 1. Install VirtualBox and VirtualBox Extension Pack
Since VirtualBox the main thing to Install macOS Monterey on Windows – PC, You have to Install it first. I don’t think it is necessary to provide the step by step installation of VirtualBox on Windows. Because for most of the parts the steps are next and install, that’s all. I know you can handle it, in any case of you are facing errors for installing VirtualBox, don’t hesitate to ask it on the comments.
On the other hand, the VirtualBox Extension Pack is another matter, and you have to know to install it. Basically, there are two ways to install the VirtualBox Extension Pack, the simple and quickest method and the import method. The first method is simple, after the VirtualBox is installed, double-click on the VirtualBox Extension Pack and install.
The other method is to go to the File menu and open the VirtualBox Preferences. Now visit the extension category, click on the plus icon, and import the VirtualBox Extension Pack.

Step 2. Create a New Virtual Machine for macOS 12
Here you will be creating the Virtual machine where the macOS Monterey will be booting from. Open the VirtualBox and click new, open the expert mode, provide a name, starting with macOS. Once the macOS is typed the macOS version and type will be automatically selected by the VB.
Next you have to choose the amount of RAM for the VirtualBox, I will with 4 GB, and it is also recommended. In the end choose create a Virtual Hard disk Now and click Create to generate the VM.
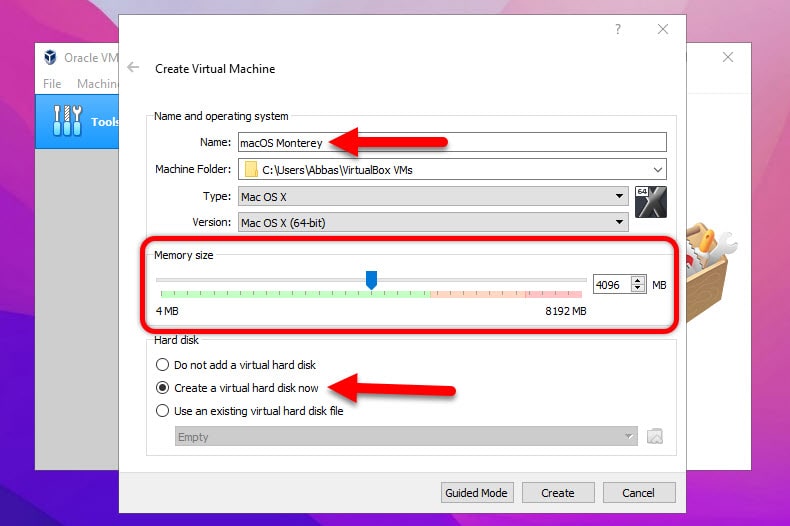
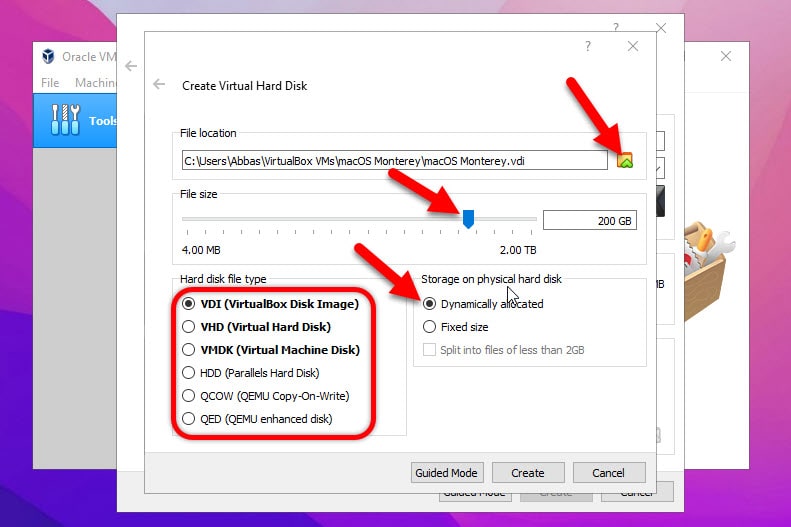
Specify the file’s location to save the Virtual Hard Disk, you can go with the default or you can change it. Specify the amount of storage for the VM and finally choose a Virtual Hard Disk type. You can go with the default hard disk type known as VDI. And finally, remember to choose a Dynamically allocated physical drive.
Step 3. Customize macOS Monterey’s Virtual Machine
Creating the Virtual machine is not a big deal but configuring the setting are, so you better follow them carefully. Once the Virtual machine is created you will be back to the main page of the VirtualBox, their click on the setting of the macOS Monterey.
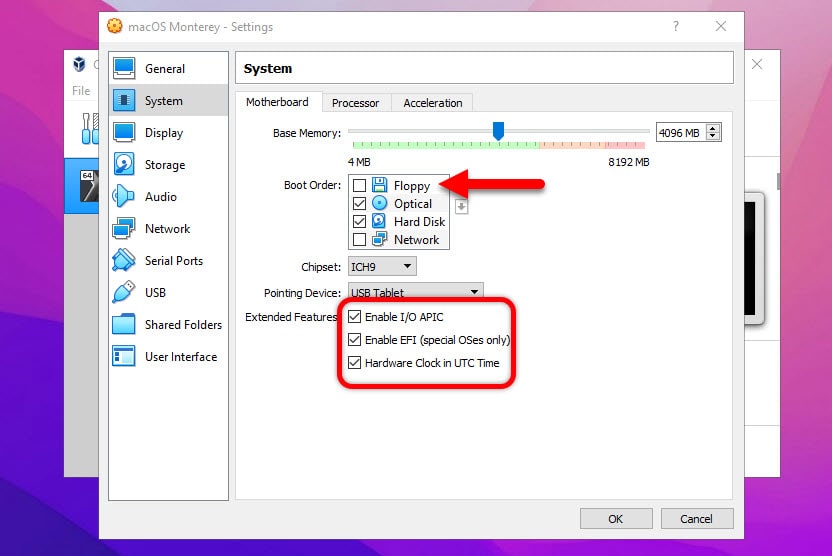
Go to the System tab, uncheck the floppy disk since we are not using it, also make sure the extended features are ticked. There are also other settings like the chipset and pointing device, don’t touch them.
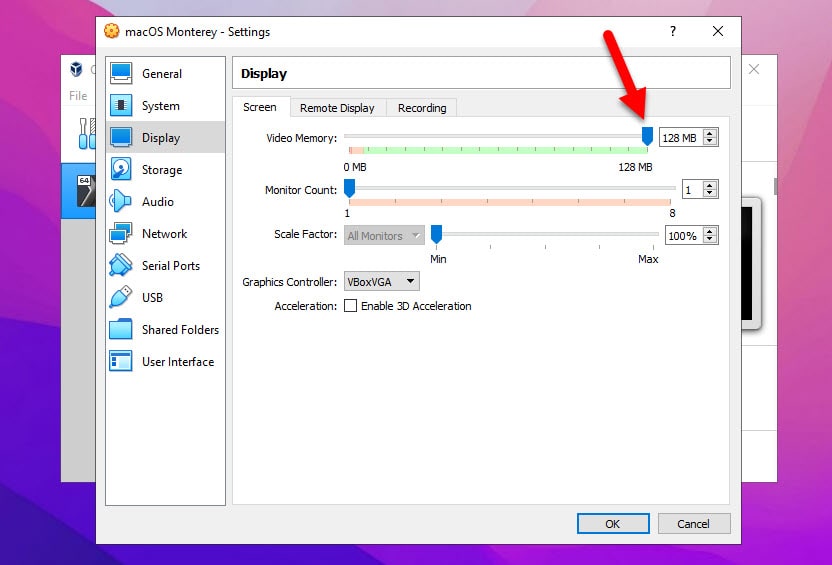
For the Virtual Machine’s Display settings, increase the video memory to 128 MB and leave the wrest as they are. I think it better if you take a look at the screenshot below.
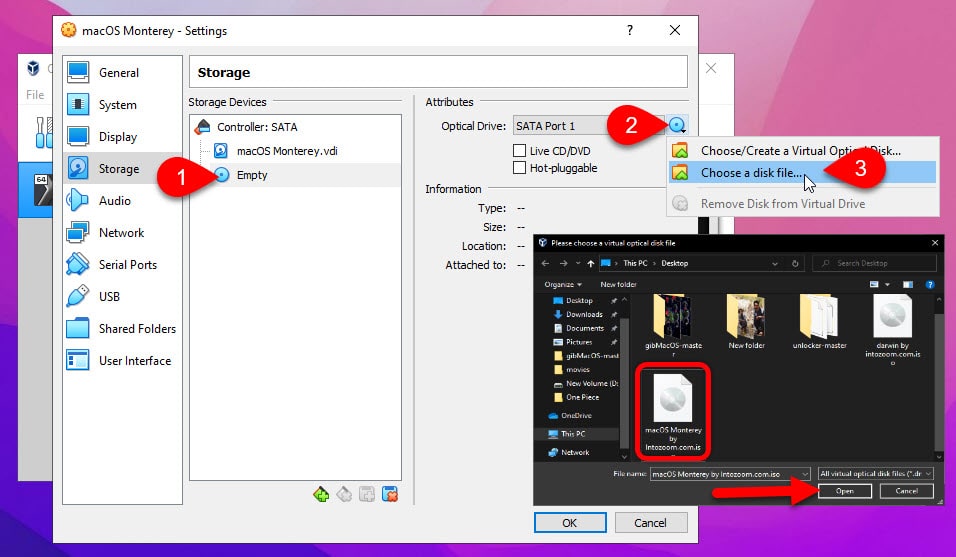
In this step we have to attach the macOS Monterey ISO Image to the Virtual Machine. Go to the storage tab, click on the empty, beside the attributes click on the CD icon and locate the ISO Image of macOS 12.
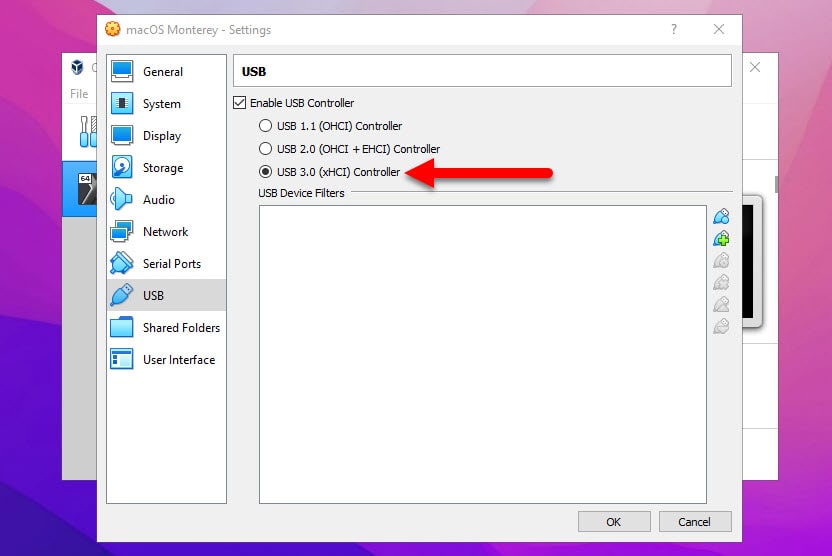
The final setting is simple since you have to enable USB 3.0 to solve the issue of freezing the mouse and keyboard. When we installed the VirtualBox Extension Pack, USB 3.0 is enabled, otherwise, it is turned off.
Step 4. Running VirtualBox Codes on CMD
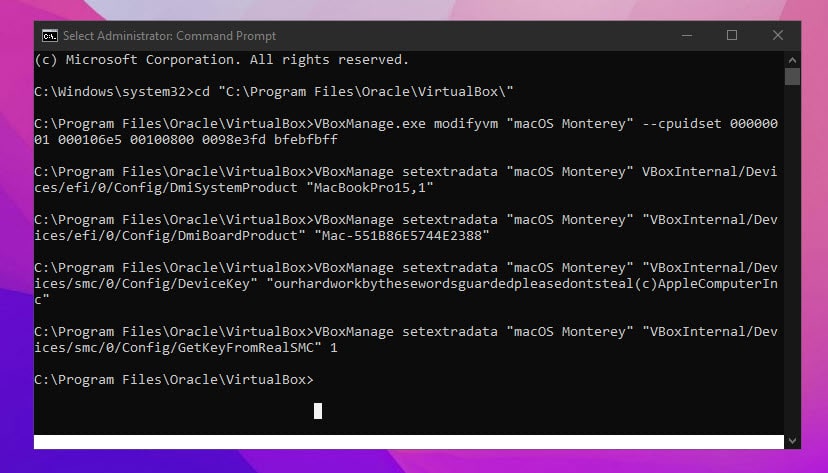
VirtualBox codes are an important factor of using macOS on VirtualBox on Windows 10. Since directly VirtualBox do not have a configuration to set the settings of macOS on Windows, that’s where codes come in. If you don’t apply the codes or it is applied incorrectly, the Virtual Machine containing the macOS will be in the loop. Because of the configuration which are not applied their, so you have to apply them carefully.
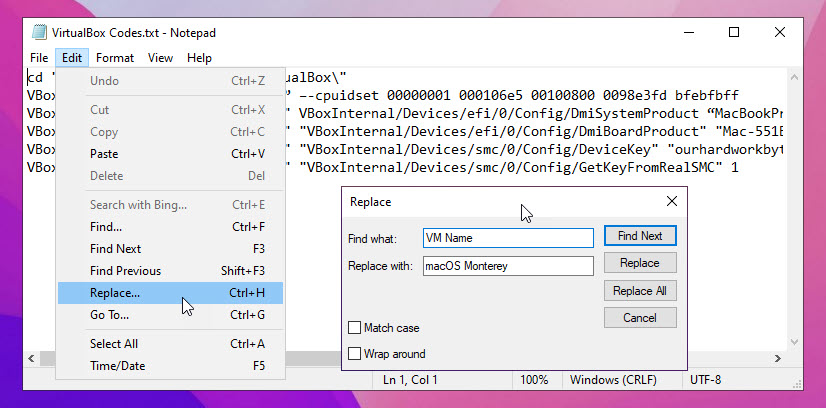
Note: Before you take another step, make to know the name of the VM, and then go to the File menu and choose exit.
Open the codes that you downloaded, go to edit menu and choose Replace, replace the VM Name with the of the Virtual Machine you created a moment ago.
Now run CMD as Administrator and copy the code line by line and paste in the CMD, then hit enter. One more thing, if the codes are entered correctly, you won’t see anything but the next line. If it was wrong, you will face an error.
Step 5. Performing macOS Monterey clean Installation
Finally, we have completed all the prerequisites of macOS Monterey on VirtualBox on Windows 10. Now it is time to perform the clean installation of macOS Monterey on VirtualBox on Windows – PC. So, let’s start the process to Install macOS Monterey on VirtualBox on Windows – PC.
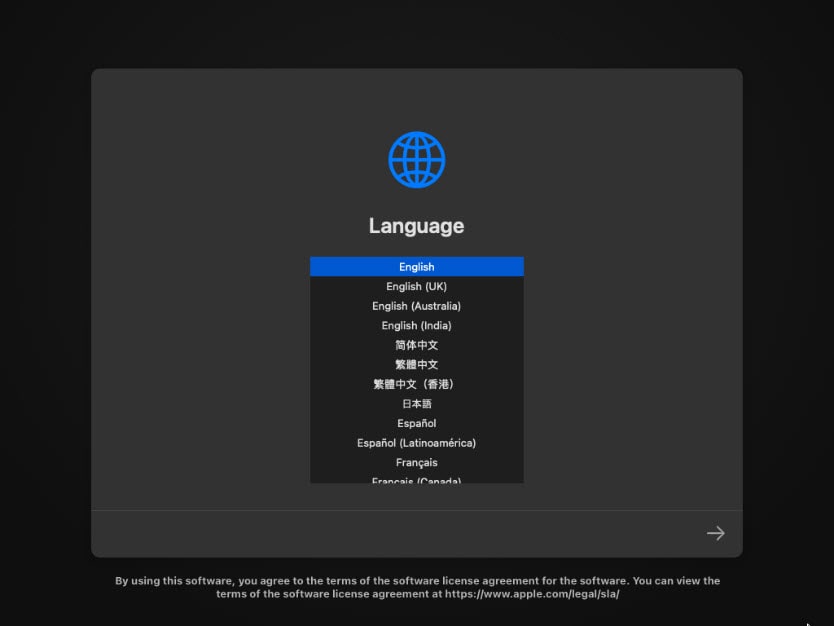
Launch the VirtualBox and start the Virtual machine of macOS Monterey. After that, you will a bunch of codes and finally, you will be on the Apple logo, after that you have to choose your language.
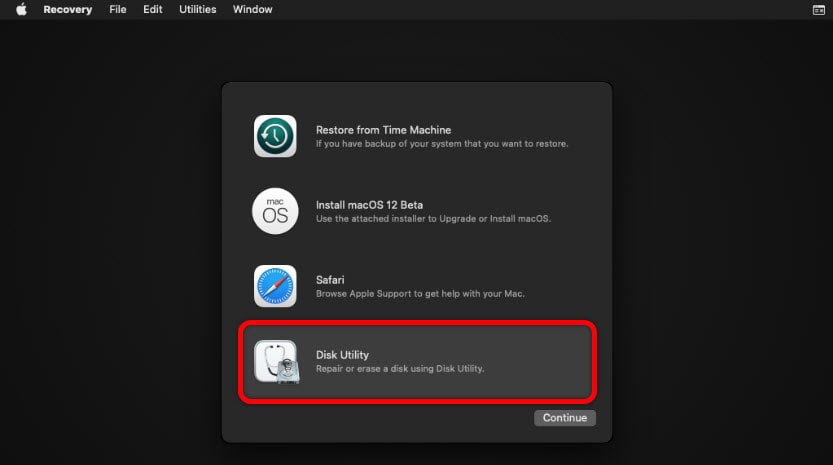
Before installing the macOS Monterey (macOS 12) on the VM, you have to partition the Storage. For that case, you have to go to the Disk Utility and click continue.
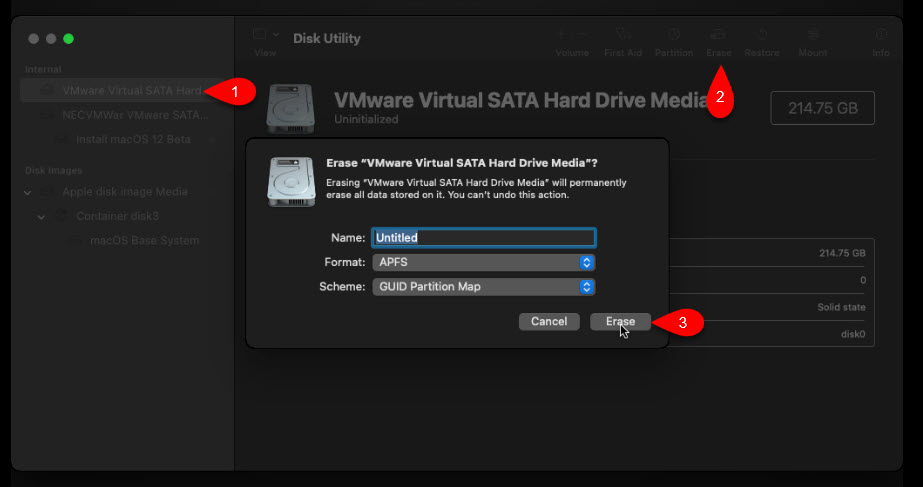
Choose the storage when you created the Virtual machine, then click erase and partition it so that the macOS Monterey should be installed in it.
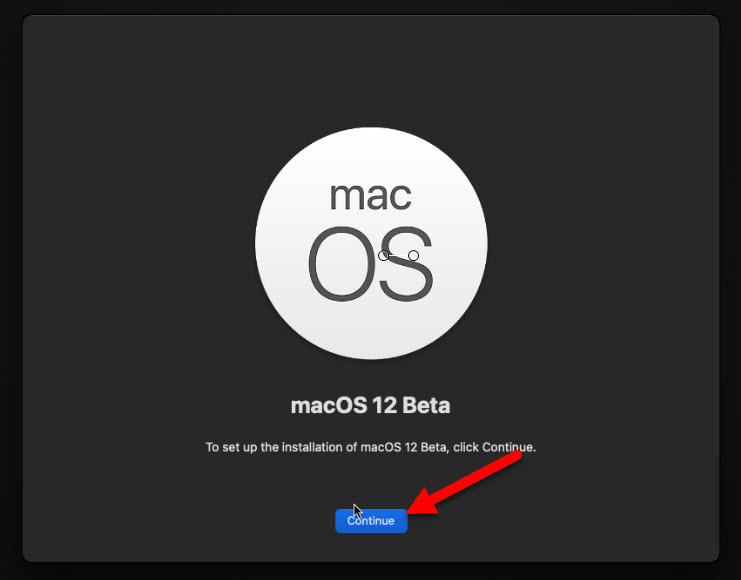
Next Quit the Disk Utility, in the main menu choose the Install macOS 12 Beta and continue.
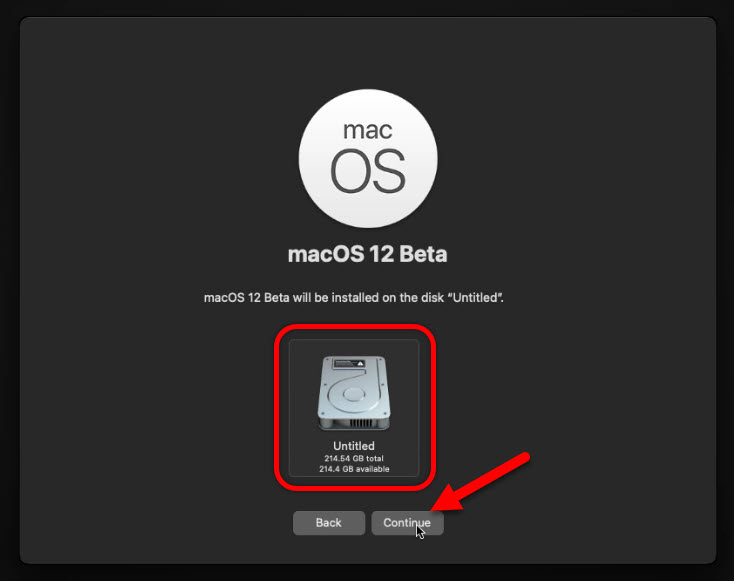
Agree to the terms and conditions the finally choose the disk so the macOS Monterey should be installed.

The below Installation steps are guided both on as a written form and the screenshots are available in the slideshow after the text.
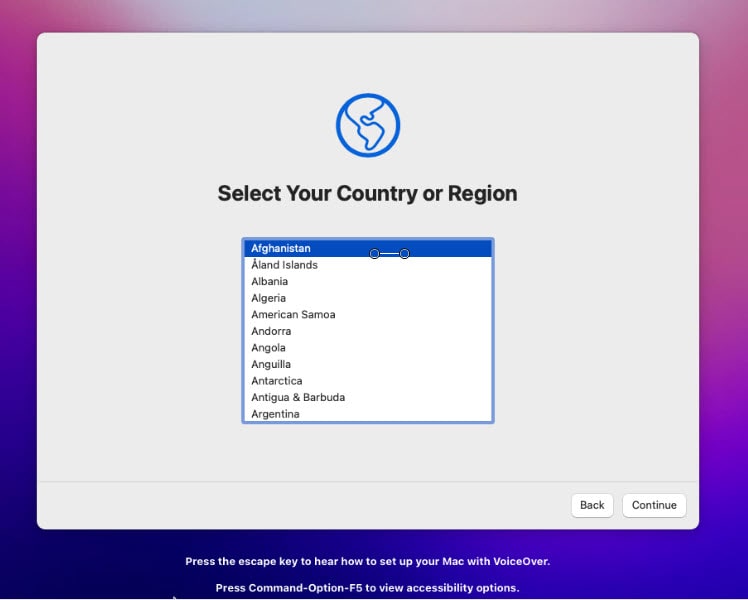
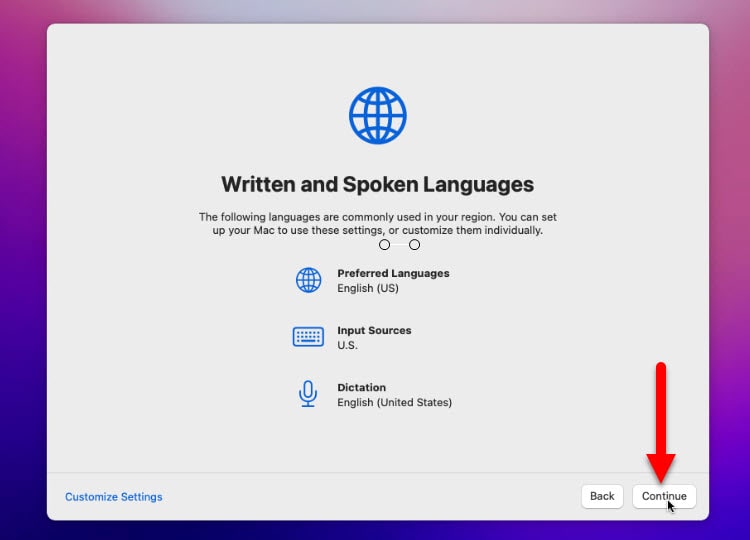
- Based on the Country you are living, choose it so the country input keyboard should be added by default.
- I have chosen the United States of America, and the OS has inserted the U.S input sources.
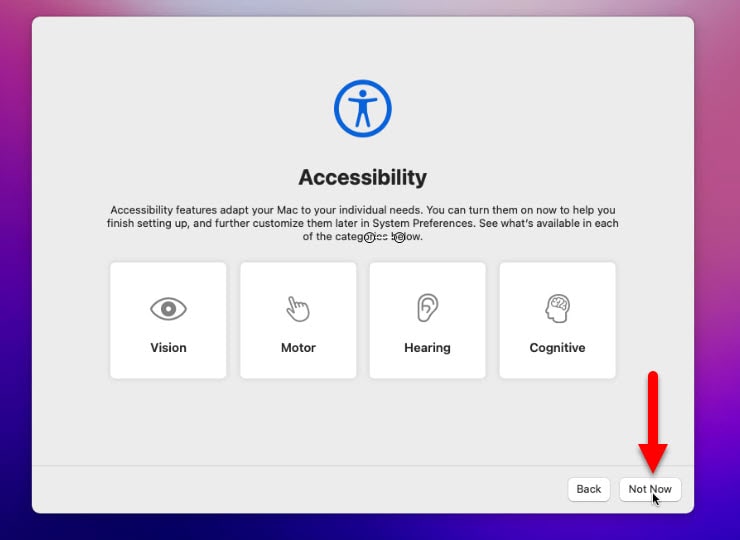
- I’m not interested in Accessibility, So, I will pass this step by clicking Not Now.
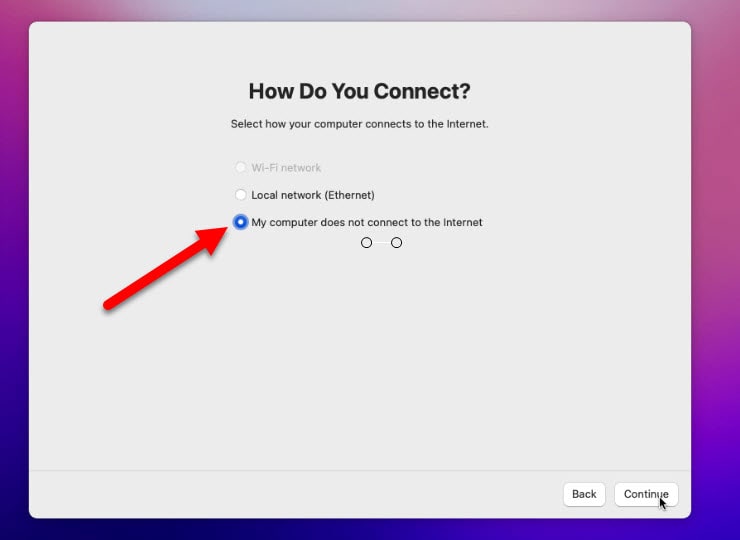
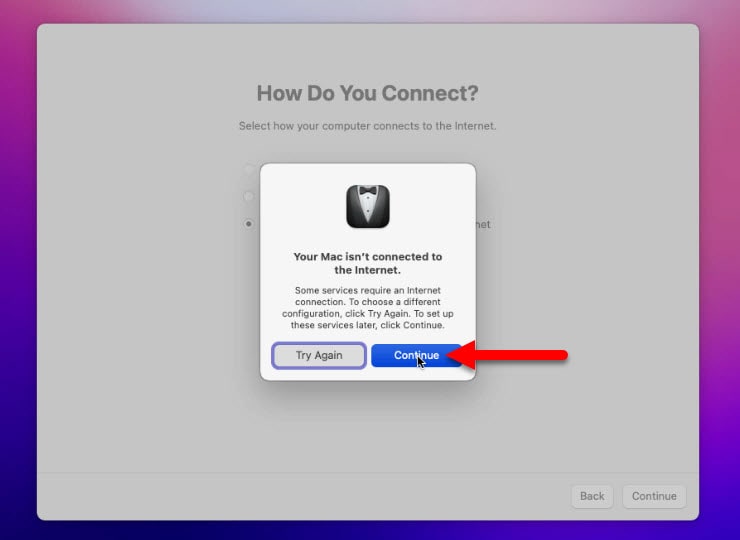
- Choose My computer doesn’t connect to the internet. Since it is a Virtual Machine Wifi does not work, ethernet is not working either because of the Virtual machine. Don’t worry, the internet is working on this type of mac.
- Ignore the alert and continue.
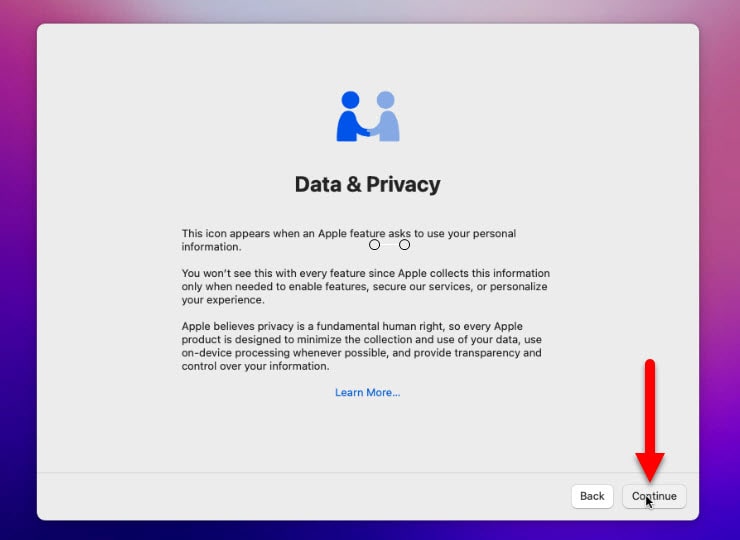
- continue with data and privacy.
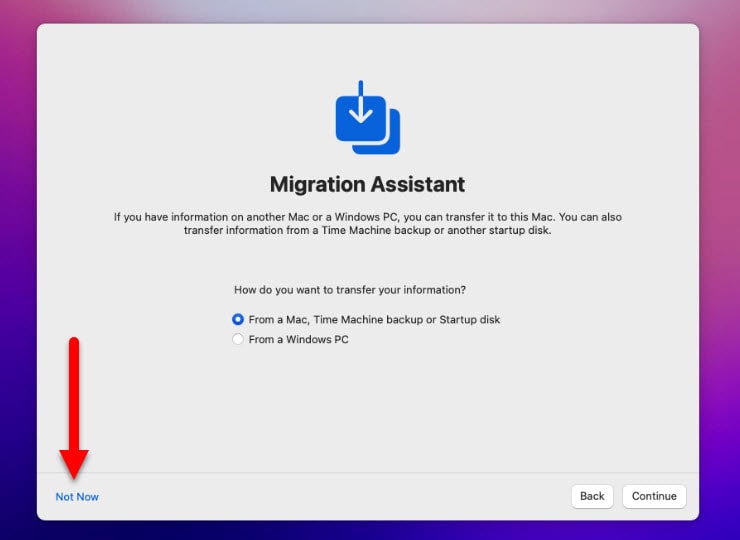
- Apple has provided the Migration Assistant for users who are migrating from another Mac, Windows PC. In simple words, you can transfer your files here. Since we are performing a clean installation, there is no need to configure it.
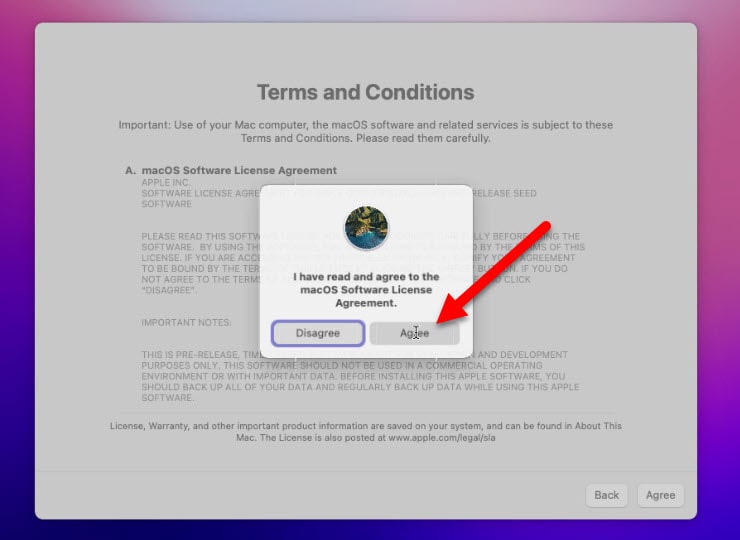
- You have to read and agree to the macOS Monterey’s Terms and regarding the license.
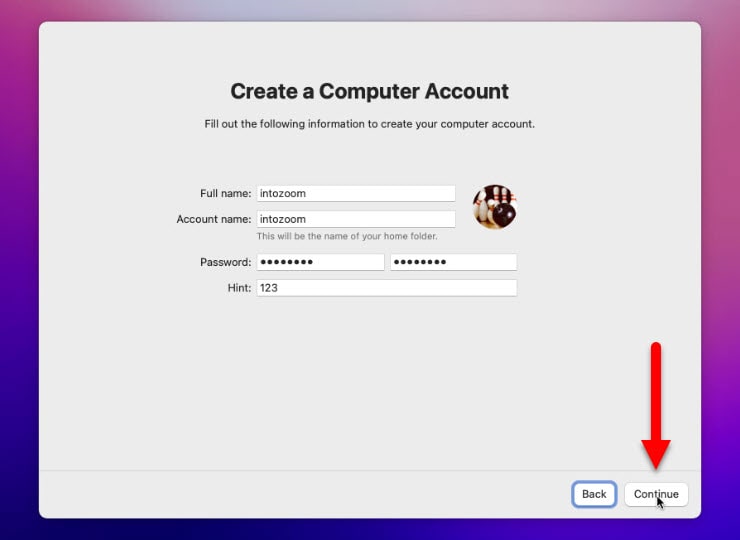
- Create an account for your Virtual machine computer.
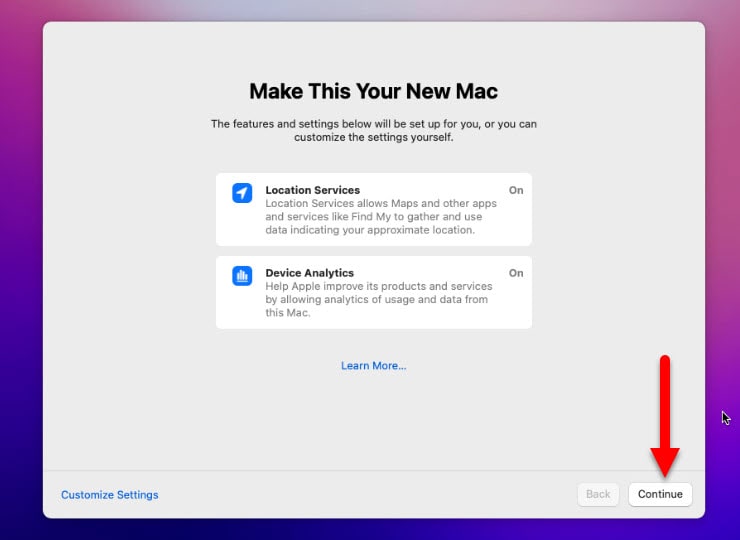
- Apple is showing you that they have already enabled the location services, along with the device analytics. You can turn them off if you are concerned about security and privacy.
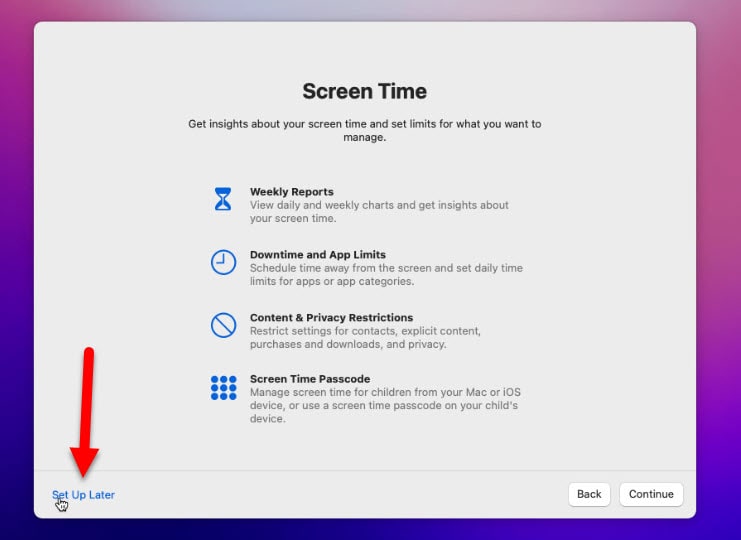
- If you want to monitor you weekly, downtime, content, and privacy restriction, you can enable the Screen Time. Screen Time is actually is good if you are looking to monitor your work.
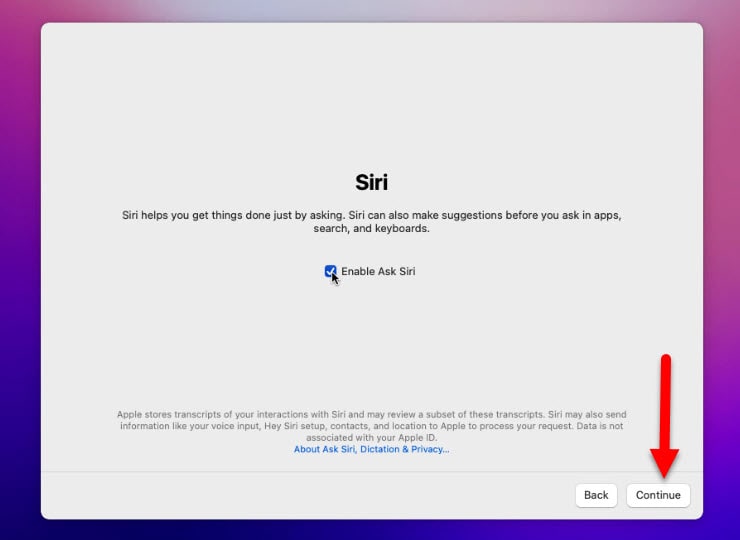
- The voice assistant is another feature for you to decide to enable it or not. Since these days many users are using the voice assistant, you should give Siri a try too.
- Finally, Choose Your desired Look at the macOS Monterey (macOS 12) and continue.

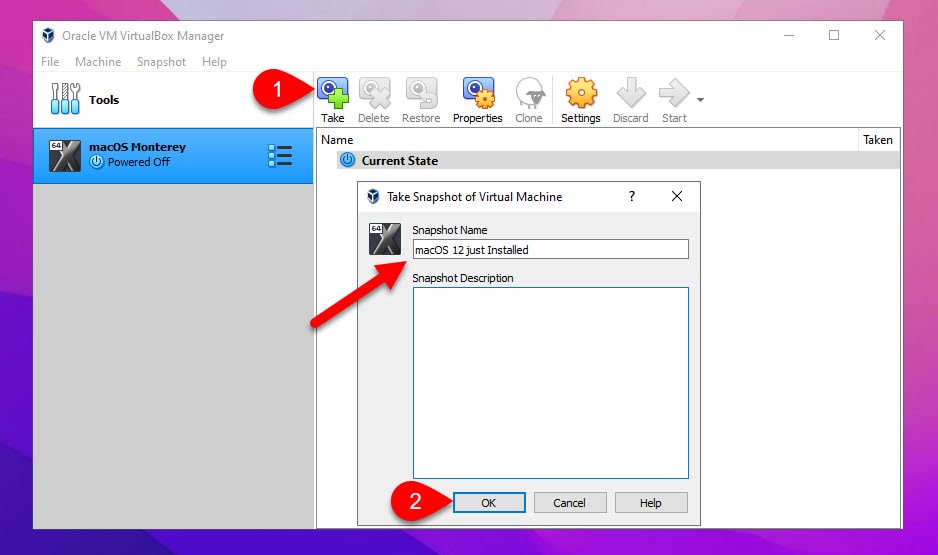
Step 6. Take a Snapshot For Safety
Snapshot is a kind of insurance, in case something is not right or it won’t boot up, you can restore it to the previous state. I have noticed the below error after I restarted the macOS Monterey on VirtualBox.
AppleKeyStore:11149:422: Operation failed (sel: 7ret: e00002bc, -1, 100000)
IOConsoleUsers: time(0) 0->0, lin 0, llk,
IOConsoleUsers: gIOScreenLockState 3, hs 0, bs0, now 0, sm 0x0
Since it is an early release of the macOS Monterey (macOS 12), I sure hope it should be fixed in the next update.
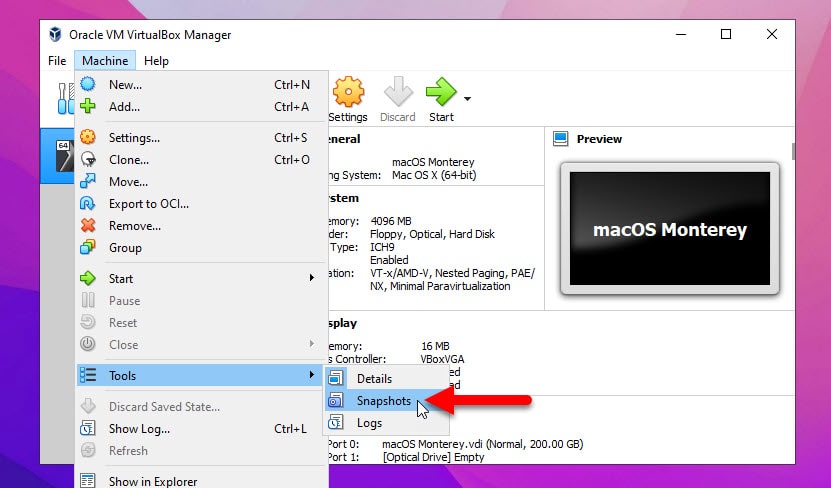
Now to take a snapshot go to the machine menu> Tools and choose Snapshots.
Here you can see every snapshots taken for the virtual machine, even check the size of restore it from here. Since we are taking a snapshot of the macOS Monterey, we need to choose take Snapshot.
Now you can restore it back to Normal if you can not boot to the macOS Monterey (macOS 12) on VirtualBox.
Summary:
This is simple method to Install macOS Monterey on VirtualBox on VirtualBox on Windows – PC.
- Prepare the required files (macOS Monterey ISO Image, VirtualBox Setup and the extension pack, and VirtualBox codes)
- Create new virtual machine for the macOS Monterey (macOS 12) and customize it
- Apply the modified codes in the CMD to the Virtual Machine
- And Finally perform a clean Installation.
Also Read:
- Download macOS Monterey ISO DMG VMDK and InstallAssistant.pkg
- Install macOS Big Sur on VirtualBox on Windows 10
- 6 Steps – Install macOS Catalina with ISO on VirtualBox on Windows
- Install macOS Mojave on VirtualBox on Windows PC
- Fix macOS 10.15 Catalina Installation Error on VirtualBox on Windows PC
- How to create macOS Monterey Bootable USB on Windows 10?