macOS 10.15 Catalina will be released this October alongside the MacBook Pro 16 inch. And since macOS 10.15 Catalina is in beta version, you can test it on the Virtual Machine rather upgrading to the beta version. You know the beta version is not stable and it may encounter you for losing your data and the license of your OS.
Virtualization technology is one of the best environments to screw up everything for testing. It doesn’t matter how much you will screw, you can revert back to default settings. There are multiple, infect several Virtual Machine software and Application which can perform the task. The most popular and easy virtualization software and the app are called VMware and VirtualBox. VMware is not free but for mac, it contains a version with a trial of 10 days but for windows, it has a VMware player and a VMware Pro. The player version is permanently free but the other one is not. Comparing VirtualBox to VMware, VirtualBox is an open-source Virtualization app for Windows and Mac. You can test it any time you want. For this post, I will guide you through the process of How to install macOS 10.15 Catalina on VMware Fusion on macOS.
If you are a windows user and want to learn How to Install macOS 10.15 Catalina on VMware, you are in the right place. The VirtualBox post is also available on this site.
You can perform the installation of macOS 10.15 Catalina on PC-Hackintosh too.
Download Required files:
Install macOS 10.15 Catalina on VMware Fusion
Step 1. Install VMware Fusion
As always, installing VMware on the macOS and windows is never been a big deal but some rare cases it is needed to guide through. The same goes for VMware fusion; I mean you can install it yourself. However, I will guide you through the text in this site but I’m not providing any screenshot for installing except the places where a screenshot is needed.
- The moment, VMware fusion is downloaded, double click on the setup to launch. Wait a moment until VMware validates the VMware fusion on your mac.
- When the installation window, appeared, double click on the VMware Fusion logo.
- The OS asks you to enter your password for bringing changes, so do it. After that wait a moment until the initializing of the VMware fusion is completed.
- Agree to the license and agreement of the VMware fusion for the mac, well if you encounter the system extension select open security preferences.
- In the security preferences; you have to allow the changes that VMware fusion seeks to bring.
- If you have purchased the VMware fusion, select that and enter your purchased details and information, if not; then simply select the “I want to try VMware Fusion 10 for 30 days.”
- The next window is about selecting the VMware Fusion Pro or VMware fusion itself. If you have good knowledge of Virtualization, use the VMware Fusion Pro and leave the other one.
- After deciding which VMware fusion, you are going to use; in the next step, it asks you to enter your credentials again for bringing changes.
- Now, the VMware fusion asks you to join the community, it is up to you, join or not. If you are interested in joining their community, check the box “Join the VMware customer experience improvement program.”
- And that’s all for installing VMware fusion on macOS.
Step 2. Extract the macOS 10.15 Catalina VMDK File
The good thing about the mac operating systems are, they have a built-in zipper however windows have to but not good as mac. When you downloaded the macOS 10.15 Catalina VMDK file, right-click on it and select the unarchiver.app.
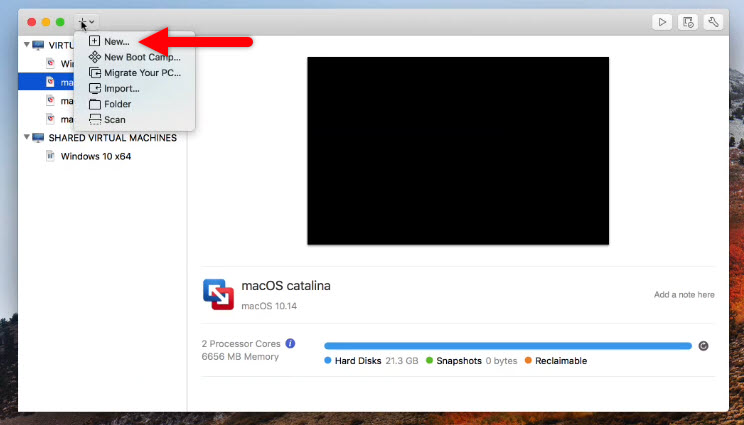
Step 3. Create a Virtual Machine and attach the macOS Catalina
We have to create a new virtual machine for the macOS 10.15 Catalina, and when we are done with creating that. We will attach the macOS 10.15 Catalina to it.
For the first time the install Wizard is open by default but if you have already created a new VM, click on the plus icon so the Wizard should be opened. On the installation method, window select create a custom Virtual Machine.
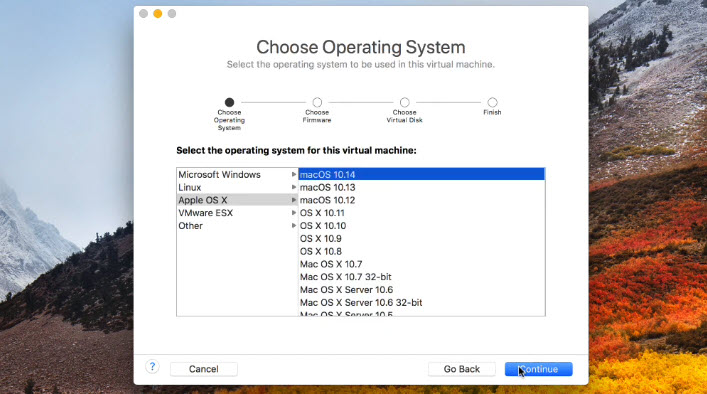
Select the guest operating system, is it windows, Mac, Linux, VMware ESX. In our case, it is the mac, so I will go with the Apple OS X, and then select the macOS 10.14.
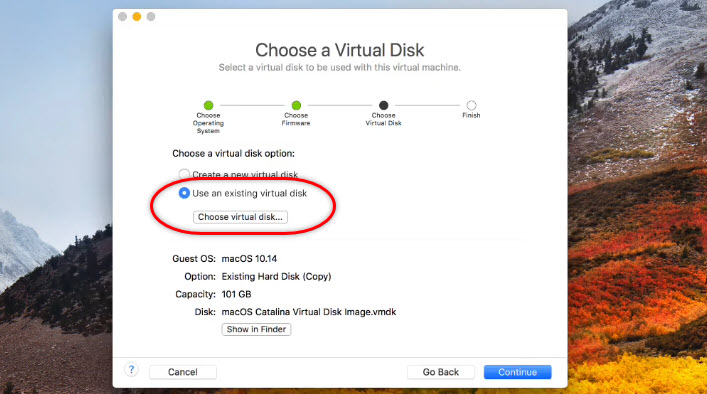
When you reached the ‘Choose a virtual disk’, you are not going to create a new Virtual Disk. Instead, you are adding the extracted macOS 10.15 Catalina to it. To do that, select ‘Use an existing virtual disk’, the click chooses the virtual disk and locate the macOS 10.15 Catalina.
In the last window, which is known as ‘Finish’, you can customize all the settings. Not all the settings but the location where to save it, and what the VM should be called.
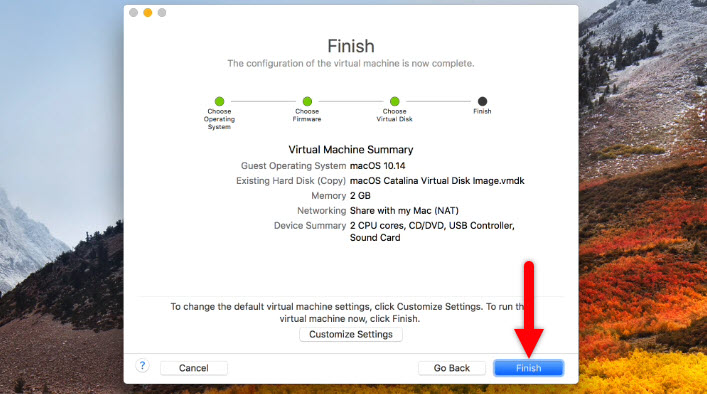
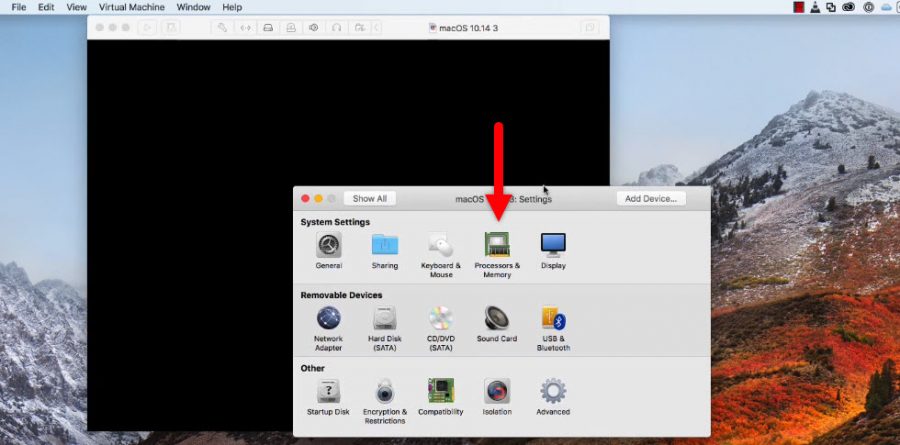
The moment you clicked finish, the Virtual Machine setting box will appear where you can increase the amount of RAM, processors, Hard drive and more. But here you are going to increase the amount of RAM and make sure that it has two processors or more. To increase the amount of the RAM; on the setting, window chooses processors & memory. When the tab is opened increase the amount of RAM as much as you like and also make sure that it has two processors or more.
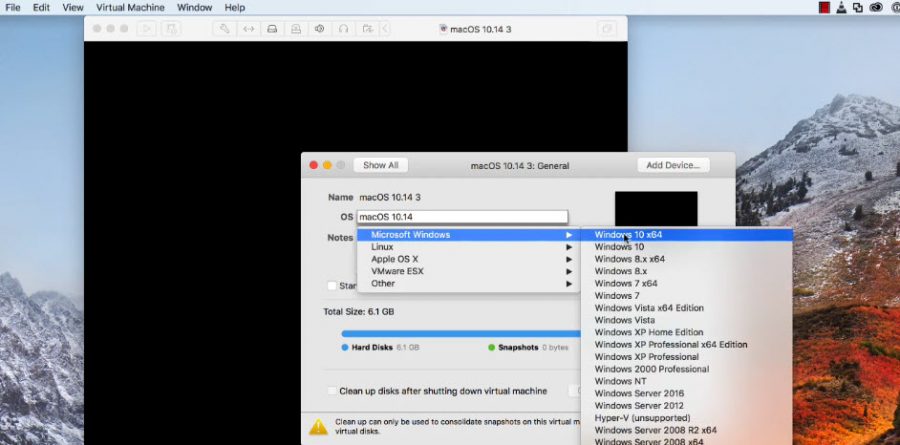
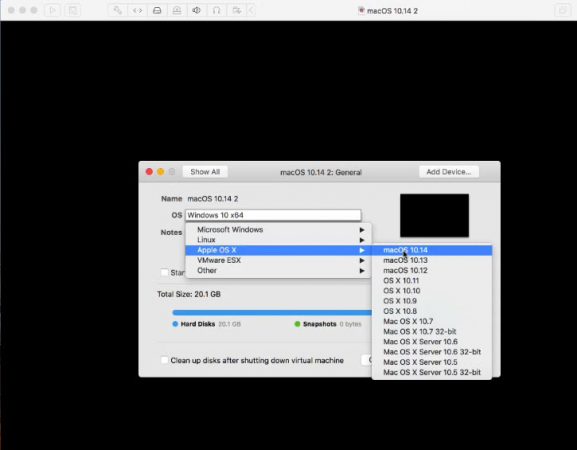
Another thing you will change here is the guest operating system to windows x64. I know you are thinking, while creating the VM, we selected the settings as macOS 10.14 and why to change that here in windows right now. It is because of a problem while installing macOS on VMware, here we will change it to windows later after the OS on the VM reboots we will change it back to the macOS 10.14. To change that; go to the general setting> select OS and change that to windows x64.
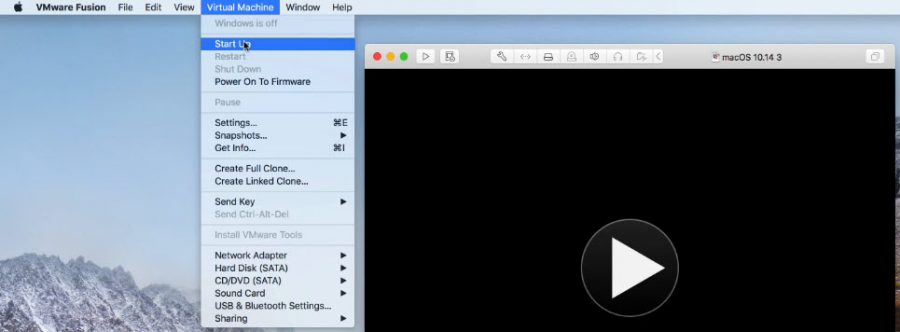
Now go the Virtual Machine Menu and select start-up.
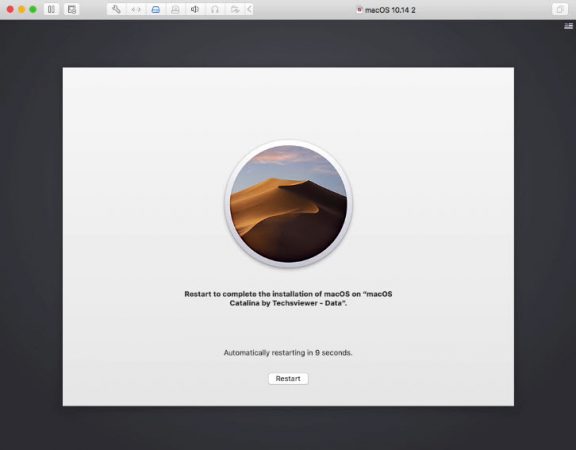
After that wait until the installation is complete after that select restart to reboot the guest OS.
Fix stuck at the Apple logo while installing macOS Catalina
After the guest OS reboots, you will face EFI VMware Virtual SATA error, and here it looks like.
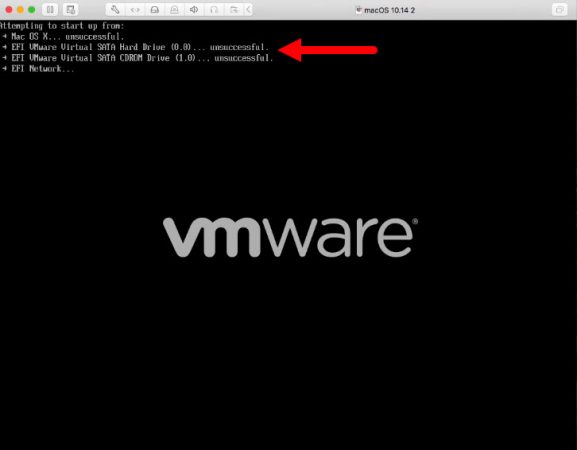
To fix the problem, power off the Guest OS and change the guest OS to the macOS 10.14. To power off the guest OS, go the virtual machine menu and select shutdown.

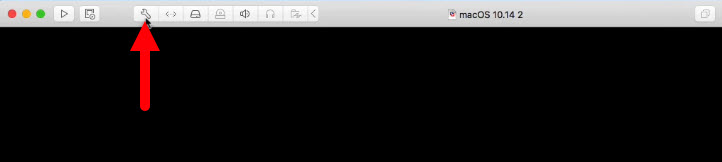
Once the Guest OS is turned off, click on the gear icon which is known as the settings of the VM.
Now go the general tab and change the guest OS from Windows x64 to Apple mac OS X.
Step 4. Install macOS 10.15 Catalina
- Select your country.
- Continue with data & privacy.
- Select does not transfer any information to this mac.
- Sign in with Apple ID or just a local account.
- Agree to the terms and conditions.
- Create a User account.
- Continue with express set up.
- Continue with the analytics.
- Again, continue with Screen Time.
- Choose a look.
- And finally, wait until the window should be ready.
Thanks for writing article. Without your article I could not imagine installing MacOS