macOS 10.15 Catalina is the new version of Mac operating system, introduced for developers on 4th July of WWDC event. iTunes is no more but music has standalone apps of their own known as Apple Music, Apple Podcasts and Apple TV. Sidecar is a new feature which allows you to use the iPad as a second monitor in different ways. Screen Time, the most insane app of IOS is now on the app store to the macOS 10.15 Catalina. Ul Kit framework is making its way to macOS 10.15 Catalina with a different name of project Catalyst. Now developers can port the iPad apps to macOS as quick as possible without any trouble. Windows users can install macOS Catalina on VMware without performing a clean installation, so stay tuned.
If you are using an older version of mac os, then keep the mac os Catalina are supported in the devices.
- 12-inch MacBook
- MacBook Air, 2012 and later
- MacBook Pro, 2012 and later
- Mac mini, 2012 and later
- iMac, 2012 and later
- iMac Pro
- Mac Pro, 2013 and later
However, there are alternative methods which be performed for installing macOS Catalina on your unsupported pc or laptop.
Brief news of WWDC 2019
The yearly developer conference of Apple is always significant as ever which is held each year on the 4th of July. This time Apple has revealed super interesting news about their new upcoming products and services for their users. Eventually, this year’s Developer conference contained announcements, demos with their new technology on the way to the market. iPadOS, iOS 13, tvOS, mac Pro 2019 are so far the stuff, that apple has revealed in the 2019 WWDC event.
Apple Conference started with Apple tvOS updates, WatchOS, iOS 13, Mac Pro 2019 and macOS 10.15 Catalina. Apple tvOS 13 is far greater compared to the previous versions of Apple’s tvOS HD and Apple tvOS 4K. The new Apple tvOS 13 OS has a home screen, Apple Music, Apple Arcade, Xbox, multi-user support, new screen savers and many updates.
WatchOS is also getting more popular and advanced every day, that’s why Apple rolls out a new version of WatchOS 6. The features that Apple has included for watchOS 6 are WacthOS 6 Solar Dial, WacthOS 6 Solar face, WatchOS 6 Sound, WatchOS 6 Sound level, WacthOS 6 sortie. The watches solar face is a dynamic version of visualizing, which is visualizing the sun 24-hour path. Since WatchOS is getting more popular, Apple has included more apps, also browse for more apps using the app store. If you are a developer, then you have a good chance of creating Apps within the watachOS 6 without any companion of the iPhone.
iOS users finally can get the iOS dark mode which I think is not so cool because of it’s completely dark. FaceID can unlock 30% faster, a significant update is on the maps, photos, camera, privacy and security, HomeKit, Siri and more. iPad finally found freedom with its upgraded version iPadOS, it has completely new designed OS with cool new features.
And also there is the macOS 10.15 Catalina too which I introduced for you with starting this post.
Test macOS 10.15 Catalina on Windows without installing on PC
mac users can test windows itself without performing a clean installation on their mac. Parallel Desktop for mac allows the users to test windows, mac, Linux distributed versions in a Parallel dimension. The Virtual options are always available both for mac and windows users who are seeking to explore every version of new OSs. On a Mac, VMware Fusion and VirtualBox is another opportunity if you are not so good with the Parallel desktop.
Windows users have now the ability to test the newer versions of the Mac operating system within the VMware and VirtualBox. But it requires a special macOS software called macOS Catalina Virtual machine disk File (VMDK). Since it is windows which do not support dmg extension, for that the VMDK file must be born inside the mac.
How to Install macOS Catalina Final on VMWare on Windows PC?
Step 1. Download Required Files
- Download WinRAR or 7zip for Extraction of macOS Catalina Final.
- A VMware Workstation Pro or VMware Player is required.
- Download macOS Catalina VMDK File.
- Download macOS Unlocker
Step 2. Install the Downloaded Files
- Install WinRAR: Since macOS Catalina is zipped within WinRAR, installation of its software is required for you. In case you fear of the software is not free, an alternative software to WinRAR is available, known as 7zip. 7zip is open-source software with several similarities to WinRAR, in fact, it is the best choice for you guys.
- Install VMware Workstation Player or VMware Workstation Pro: Vmware Player and VMware Workstation Pro are one of the best Virtualization software designed and developed by VMware. It is very necessary for the sake of testing macOS Catalina on a computer without installing on actual PC. VMware player is a free open source software the limited edition of VMware Workstation Pro is called VMware player. The installation process is as simple as drinking water, however, if you need help please do not hesitate.
- Install macOS Unlocker: Extract the macOS Unlocker from the zip file, then right-click on the win-install.cmd. Wait for it to be installed.
Step 3. Extract the macOS Catalina Zipped File
The Downloaded Vmware from given linked is already patched, on the last step of installation, select licensed.
Step 4. Create a new Virtual Machine (VM)
VM must be configured with settings to install macOS Catalina Final on VMware on Windows PC, otherwise, you are doomed. The moment installation is done with VMware, launch it, then select Create a New Virtual Machine.
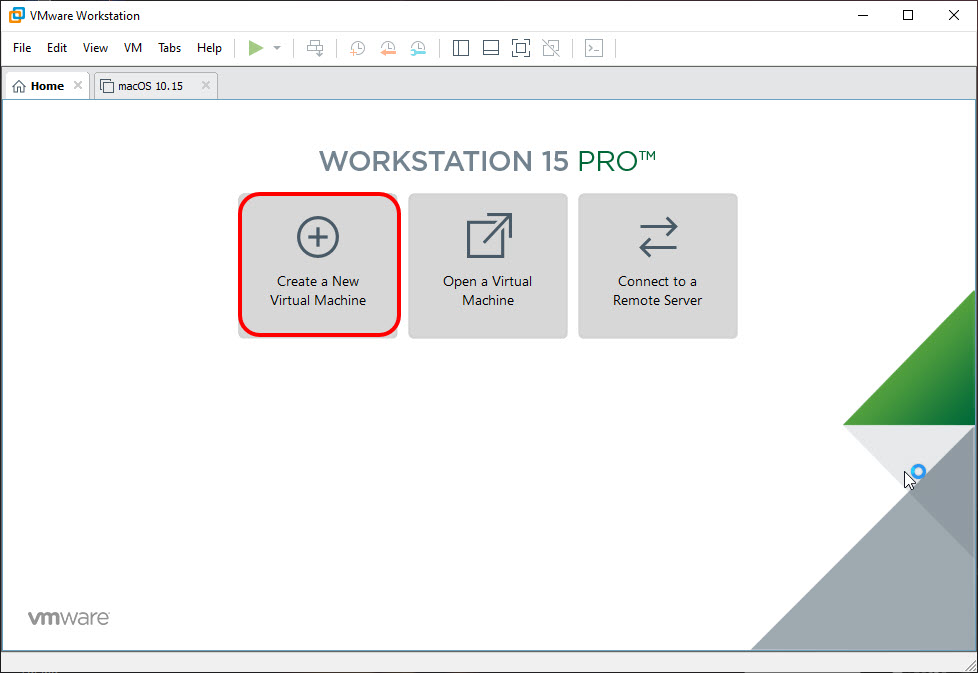
Typical settings can do the job 100%, but that is a little longer way compare to custom settings. Almost all the bloggers recommend you to go with the typical settings, I recommend you to know the below steps.
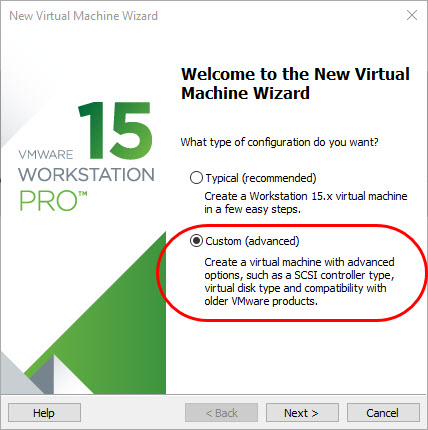
The latest version of VMware supports earlier versions of VMware, I will go with the Workstation 15.x.
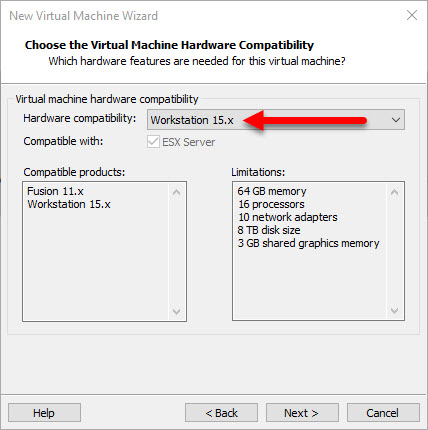
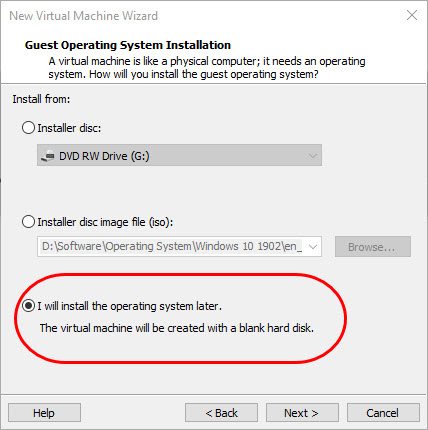
The macOS Catalina OS is not in the format of dmg, ISO and inside the DVD, that’s why you gotta install it later.
macOS Catalina is an Apple OS, so go on with the Apple Mac OS X Guest Operating system with a specific version of the OS.
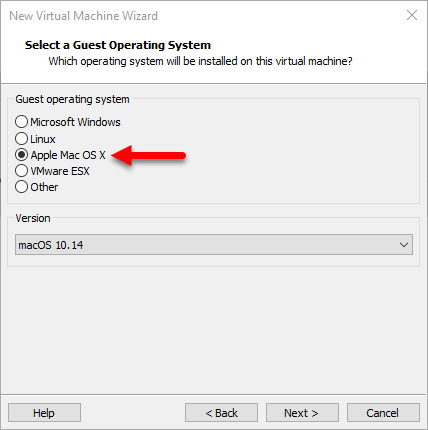
Name your VM, then verify a location where the files have to be stored. Please store it on a well-known location cause further, you must add a specific code to the Virtual Machine’s configuration.
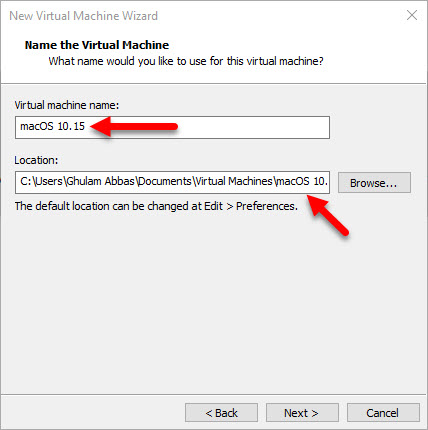
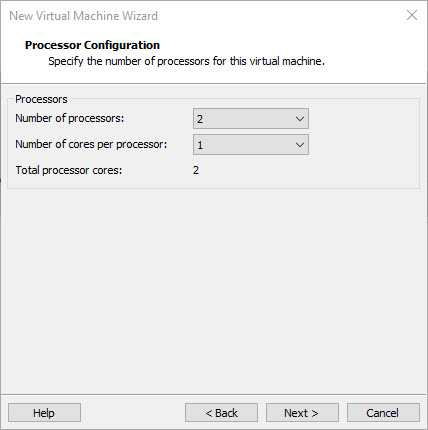
Provide a number of processors, I will go with the default settings of VMware for this step.
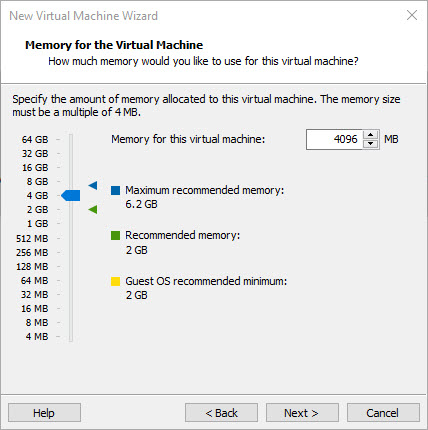
4 GB RAM is pretty much enough for macOS Catalina but the required the amount of RAM is GB for RAM.
For Network type go with the default settings of Network Translation Address (NAT), do the same with I/O Controller type too.
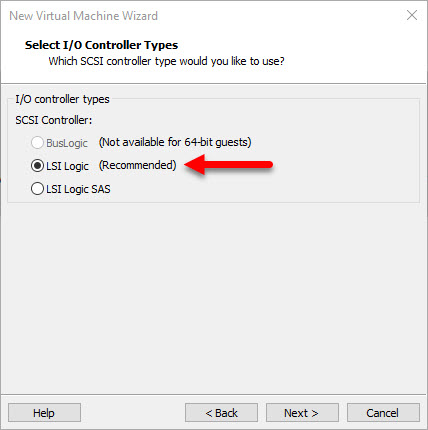
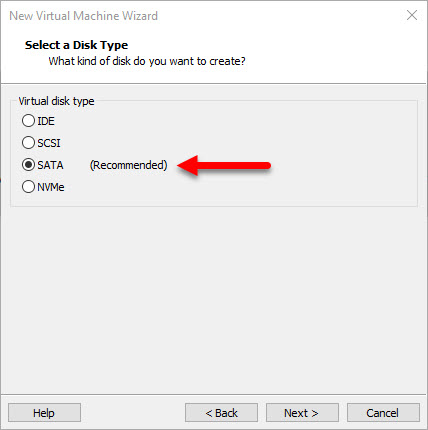
Disk type must be SATA, and for the disk, select use an existing Virtual Disk.
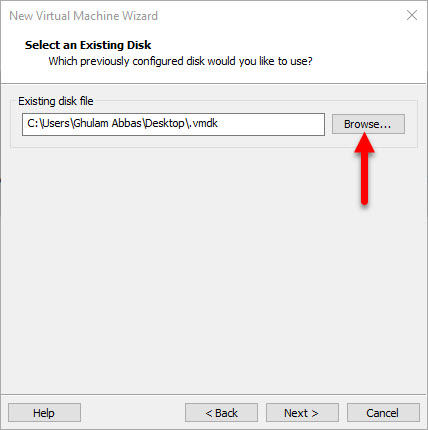
Locate the extracted macOS Catalina Final on the First Step.
Step 5. Bringing changes to the Virtual Machine configuration
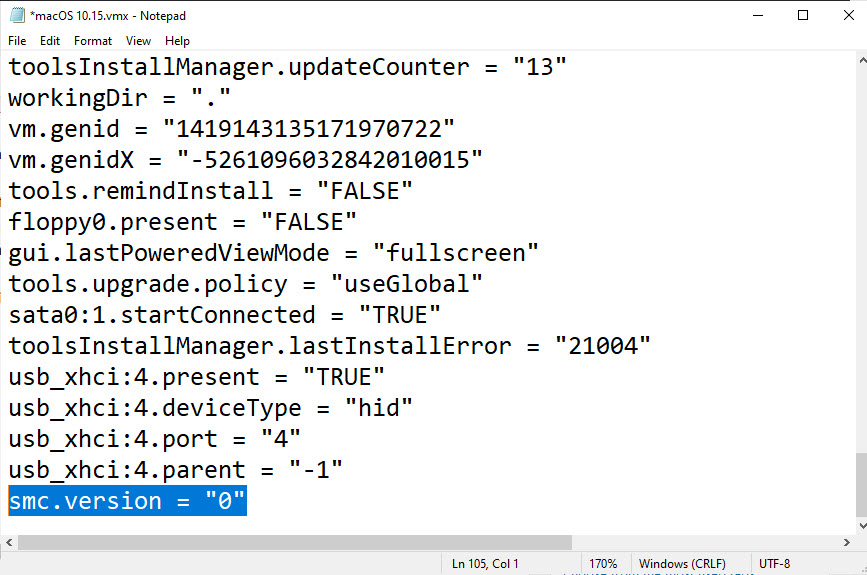
VMX file contains the complete settings of the created VM as plain text format which are consists of property = value. Sometimes the graphical configured settings won’t respond on its own, there you must add a simple piece of settings to it. Before I mentioned to remember the location where the saved the VM, so go ahead of there.
Find their a file with vmx extension, right click> and open it with Notepad.
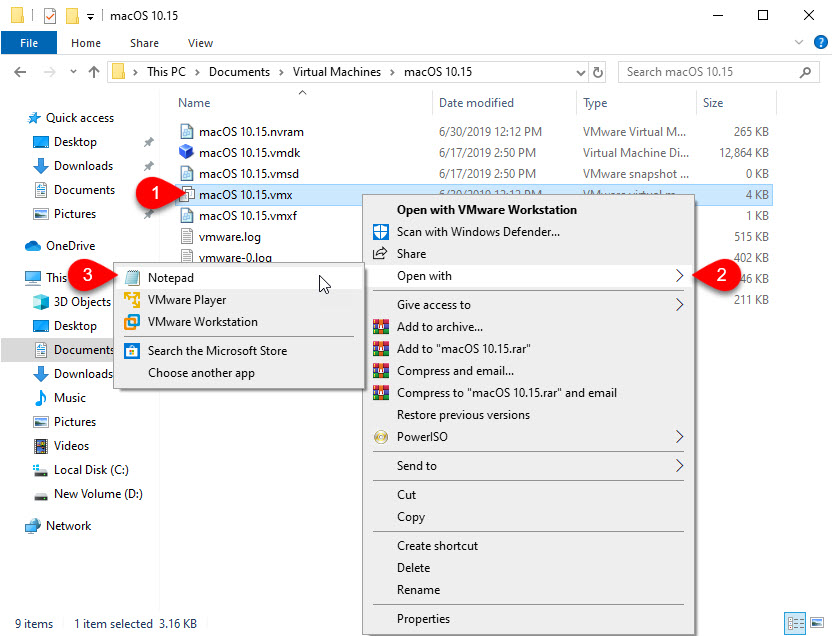
Add smc.version = "0", in case it failed to add smc.version = 0
Step 6. Install macOS Catalina on VMware on Windows PC
Congratulations for passing all the process correctly, the only step which is about to start, is installing macOS Catalina on VMware. on the Home page of the VM, click power on the Virtual Machine.
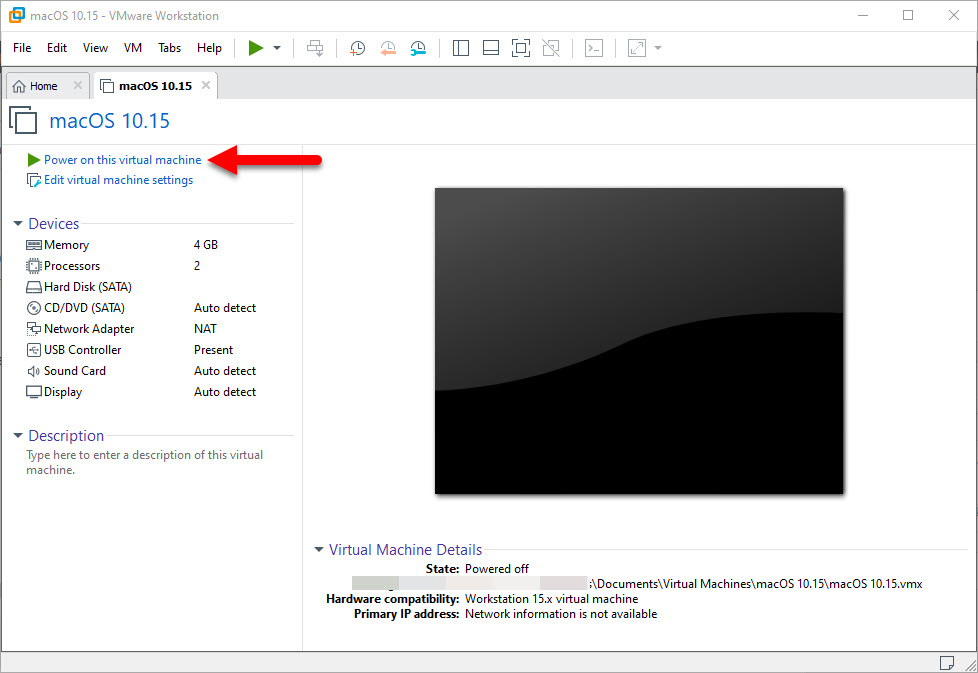
Powering on the VM takes you directly to the Apple loge> then it would automatically start the installing macOS Catalina. The Installation depends on your hardware resources, so you gotta wait a while.
If you are taken to the boot manager on VMware while installing macOS Catalina, shutdown it and follow the below instructions to fix the problem.
Fix Apple logo Stucked while Installing macOS Catalina on VMware
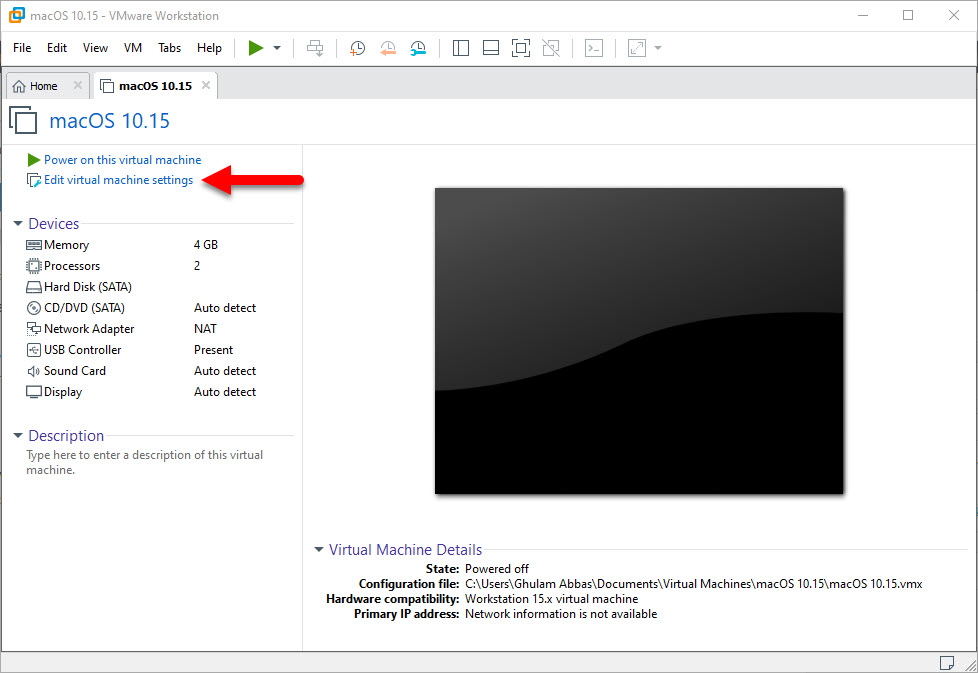
Powering on the VM is not the problem which most of the users face, it is stuck on the Apple logo. To fix this problem, open the settings of your VM. For getting the idea better, have a look at the screenshot.
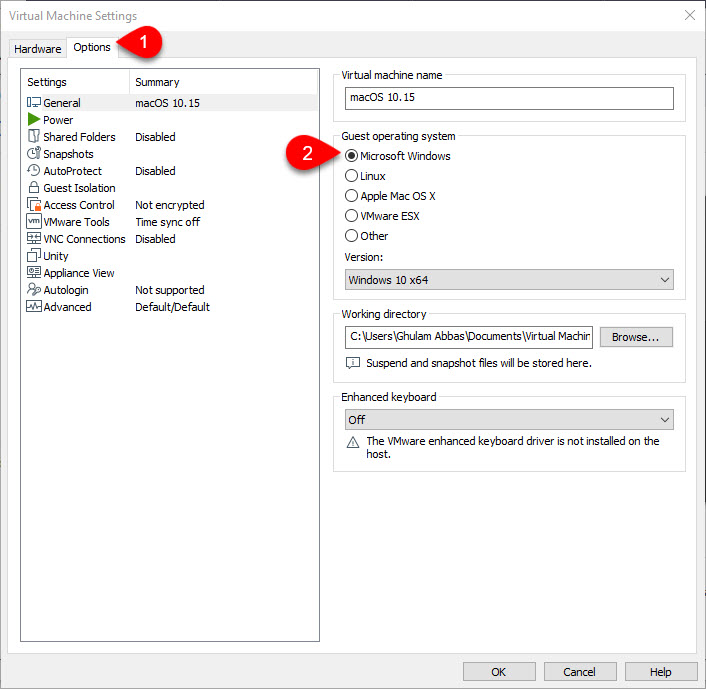
Head over to the Options Tab> General and change the Guest OS from Apple Mac OS X to Windows x64. If again it didn’t work, again change it from Windows to Apple Mac OS X. I did it several times and finally it worked.
- Origin is the first window which has to be configured after the restart of the guest OS.
- The Data & privacy is a little bit longer, you are passing the window by clicking continue.
- Do not transfer any information to this mac is the next windows which you have to pass by clicking continue.
- Downloading any app requires an Apple ID inside macOS if you need that continue with Apple ID. If not go on without the Apple by clicking Setup later.
- Agree with the terms and conditions of Apple.
- Create a User account for the Virtual Machine Guest operating system.
- You can customize the settings of express setup, actually, it configures for your maps, spotlight, and other features.
- continue with analytic window.
- Agree with the screen time.
- Choose a style for your mac.
- Wait a moment until the window should be ready for first-time use.
- Well done, you have completed the installations of macOS Catalina on VMware on Windows PC.
Summary
To Install macOS Catalina on VMware on Windows PC, prepare VMware, then create a new VM inside it. After that add the downloaded VM to it, then start installing macOS 10.15 Catalina on Windows on PC.
Also Read:
- How to Dual Boot Windows 10 and macOS Catalina on PC- Hackintosh?
- 6 Steps – Install macOS Catalina with ISO on VirtualBox on Windows
- How to Create macOS Catalina ISO DMG file?


I did the same for Catalina pre-release, pretty much the same steps.
Boot is failing when setting to Windows 10 x64. Running VMware Workstation 15.0 with Unlocker 3.0.2.
i.postimg/651mDPq8/Capture2.png
Thank you thank you.. I tried switching to Win1064bit at first but it did not work and gave up. I then followed your instruction to the T and low and behold, it booted.
Mine did not boot. I had a error saying that the cpu got disabled by mac os.
Seems that the Virtualization is disabled from BIOS.