Android 12 is the next Android operating system that will be coming on the market with the Google Pixel 6. It is an amazing operating system that has many amazing improvements to layout, theme, icons, style, animation, and more. But fear not, you can test the android 12 beta on your pixel phone but others can use this method to Install Android 12 on PC using Android studio.
Steps to Install Android 12 on PC
- Download Android Studio then Install Android Studio
- Configure Android Studio Setup Wizard
- Create a Android 12 device using the AVD
- Test Android 12 on PC
1. Download Android Studio
Doesn’t matter what kind of operating system you are using, just visit the Android studio’s official website and download the Android studio depending on the OS that you are using. In my case, I am running windows 11 inside my primary computer so I’m going to download the Android Studio for Windows 64 bit.
If you are using Android studio 4 windows then you have to download the dot EXE extension don’t download the other version because it cannot install directly in windows 11.
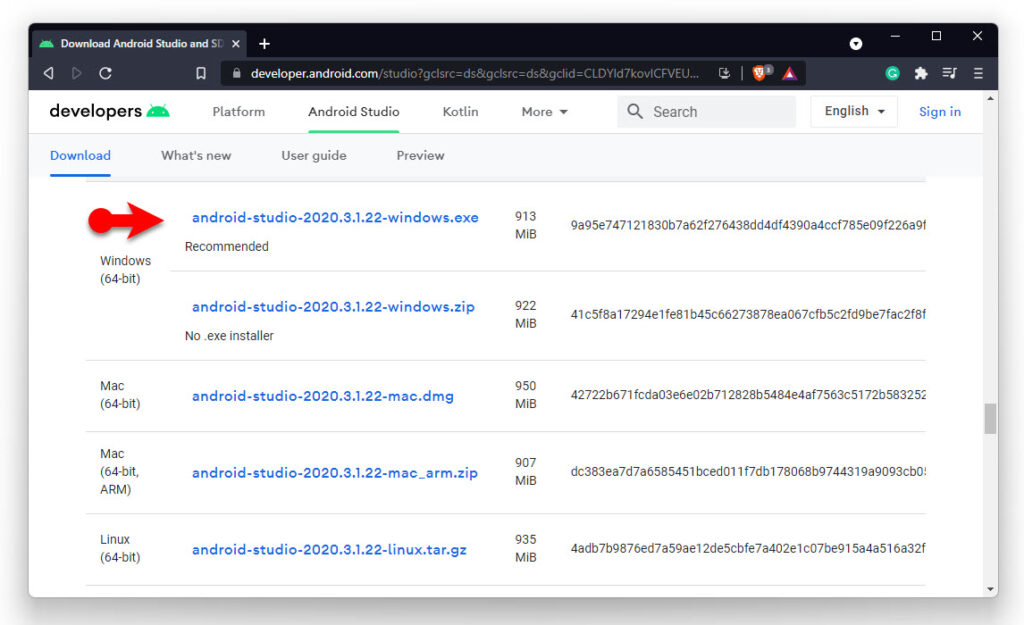
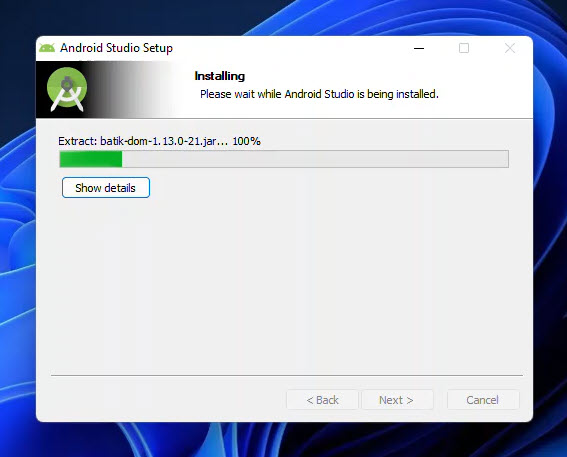
Installing Android Studio on Windows operating system is easy like eating ice cream.
- Launch the installer.
- On the welcome screen click next.
- On the component section also click next and make sure that the Android studio and Android Virtual device boxes are checked.
- Configure the location where you want to install Android and click next.
- Click Install.
- When the installation is done, click next and then click finish.
2. Configure Android Studio Setup Wizard
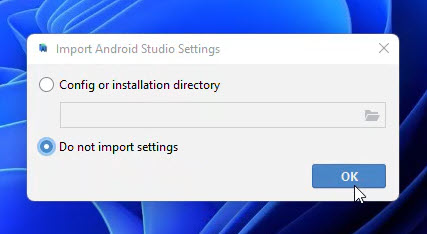
For the first time when you’re opening the Android studio, you’ll have to set up the Android studio settings. For the first step, Android studio is asking you to import the settings. Since we are opening it for the first time we’ll have to choose to not import settings.
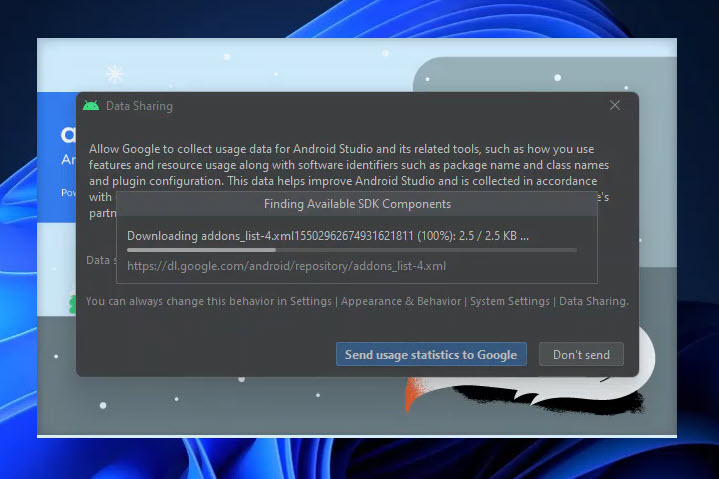
Once you choose to not import settings Android studio is looking for the downloaded Android SDKs. Remember that for this section you will have to have a very good network connection otherwise, it will waste a lot of your time. Also, Android studio is asking to share your data, in my case I’m not going to share anything at all.
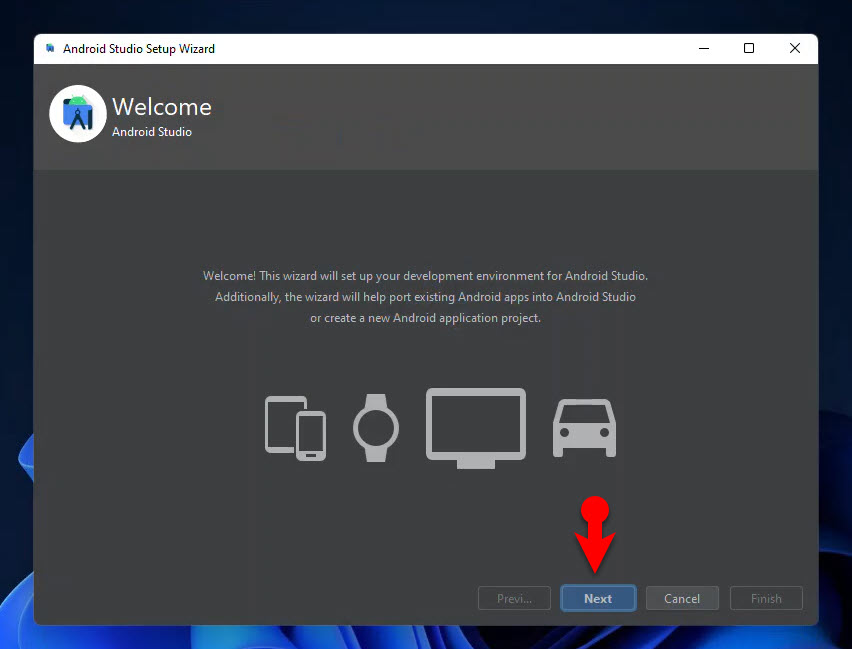
Now you will see that the Android studio is launched, simply click next on the setup Wizard of Android studio to move to the next step.
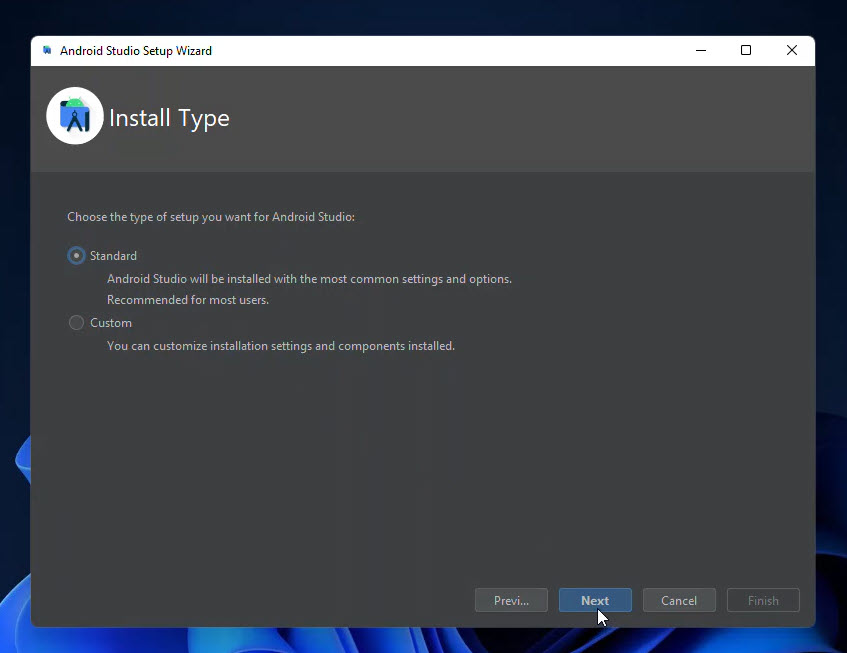
choose a standard on the installation type and then click Next.
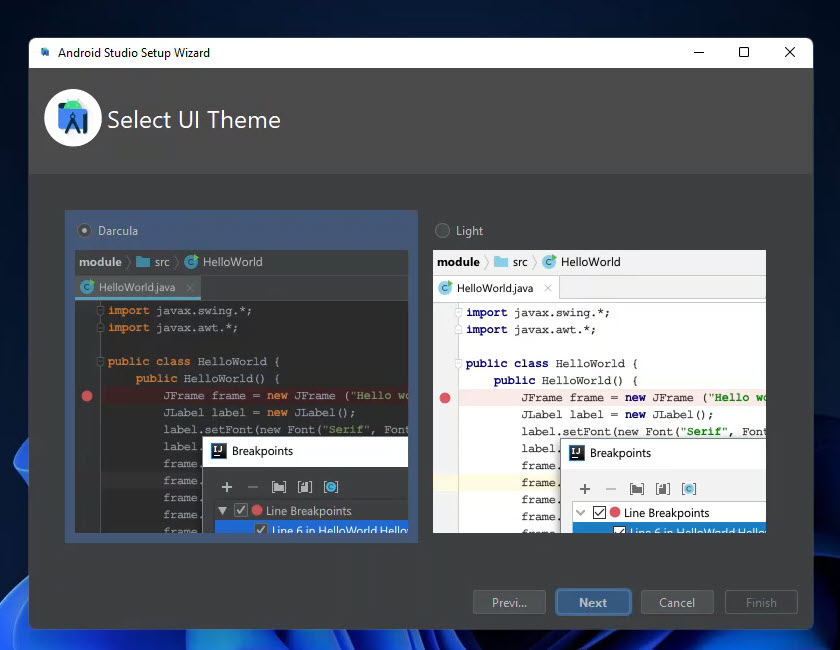
Choose a team for the Android studio, I will go with the dark theme.
You’ll have to verify those settings and then make sure that they are downloaded on the PC.
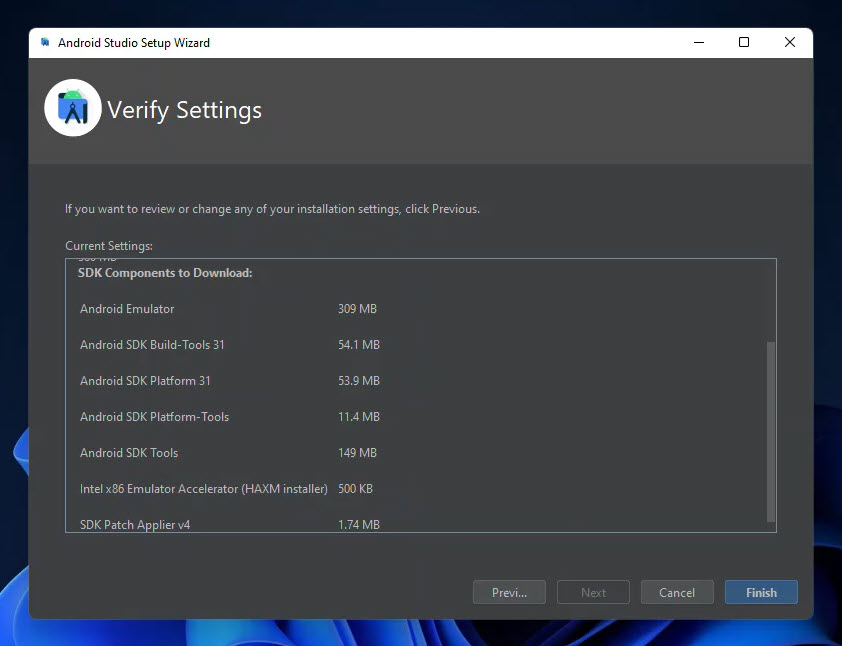
3. Create a Android 12 Virtual Device using the AVD
If you remembered, during the installation of the Android studio I told you to make sure that the Android virtual device box is checked (AVD). If that is checked, simply open the Android studio, click on more actions and choose AVD manager.
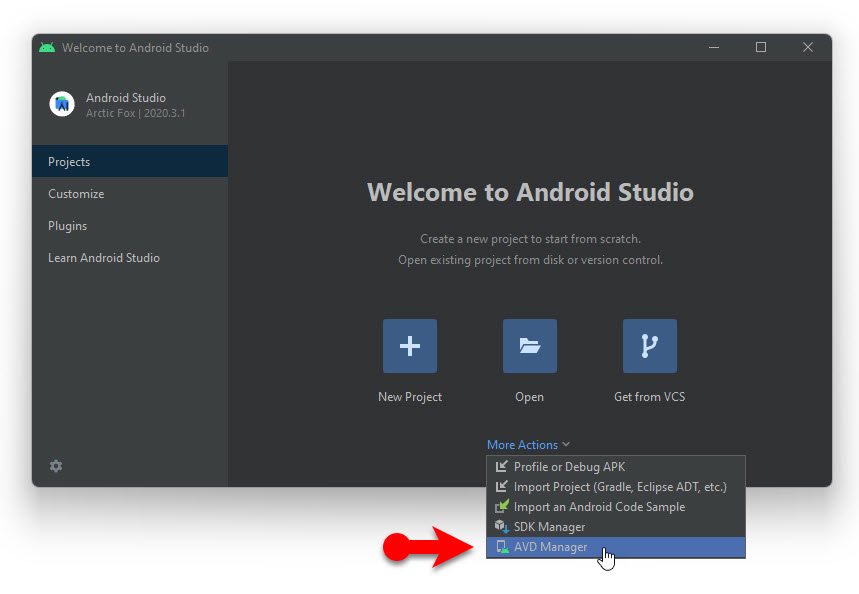
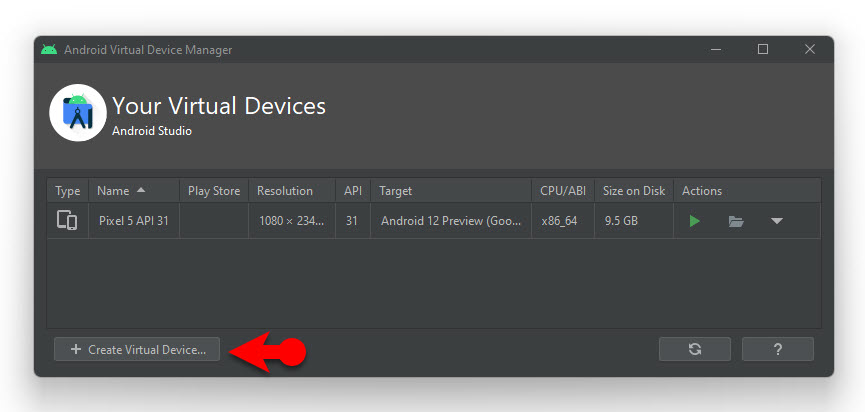
Once you clicked on AVD manager you will see a separate window by the name of Android studio device manager has been opened. To install Android 12 on PC, click create a virtual device at the bottom.
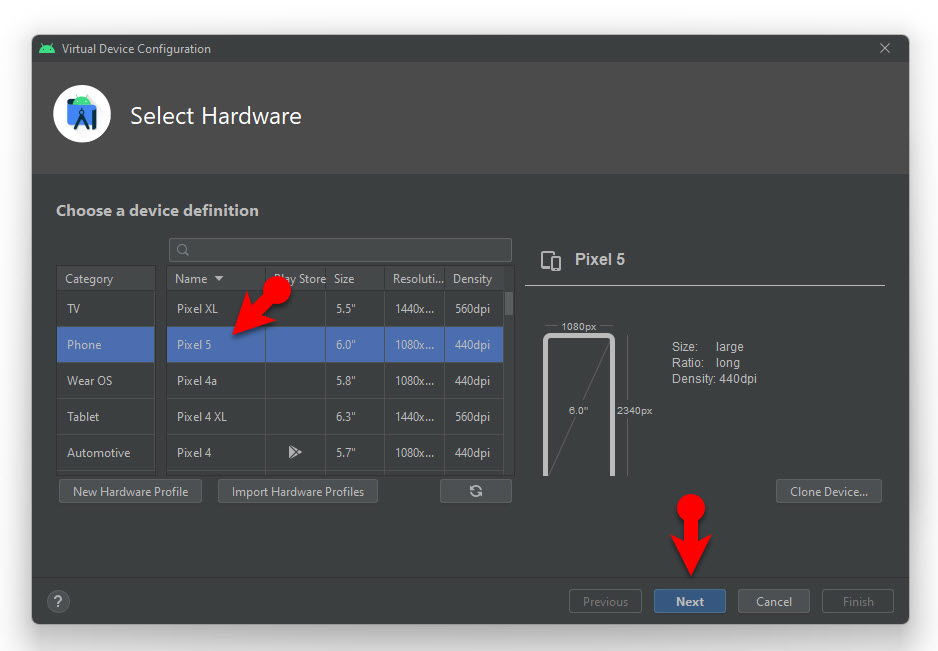
Choose phone hardware to run the Android 12 on PC, in my case I’m going to choose pixel 5 and click next.
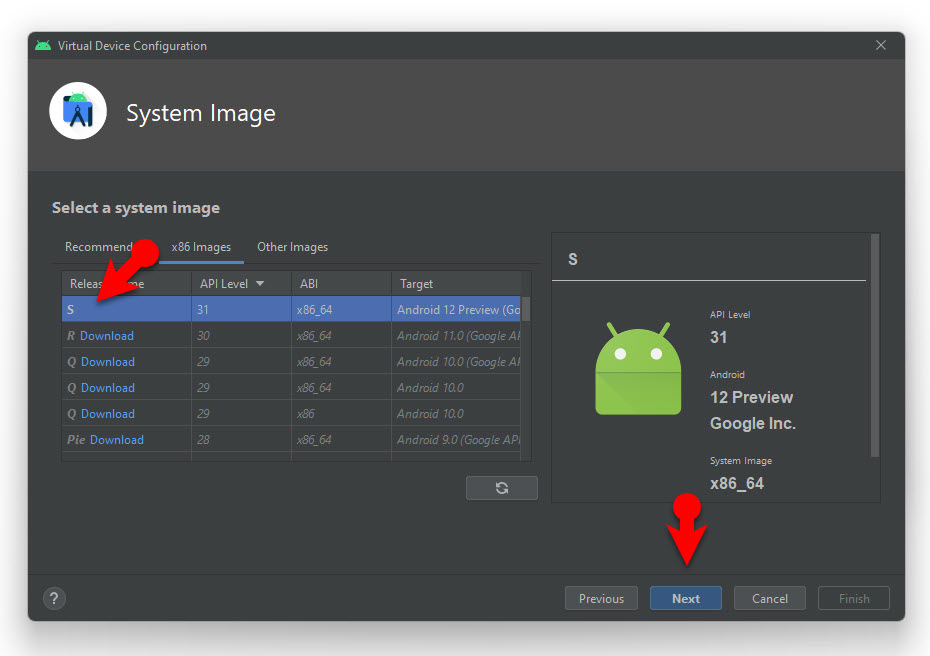
Once you choose the phone’s hardware, you’ll have to choose the system image too. Obviously, I’m going to choose the Android 12, but if you do not see the Android 12 under the recommended section. Go to the X86 images you will see their Android 12 written as S, download it, and click next. Android 12 size is 1.03 GB, so make sure you have a fast internet connection to save time.
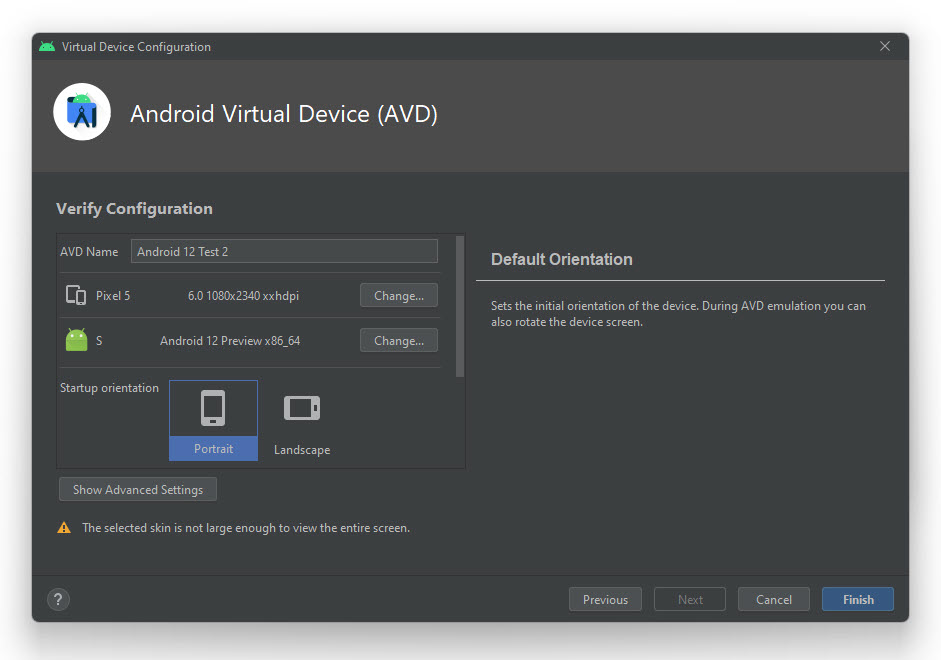
Once the system image is downloaded you’ll have to configure the portrait or landscape settings and then click next.
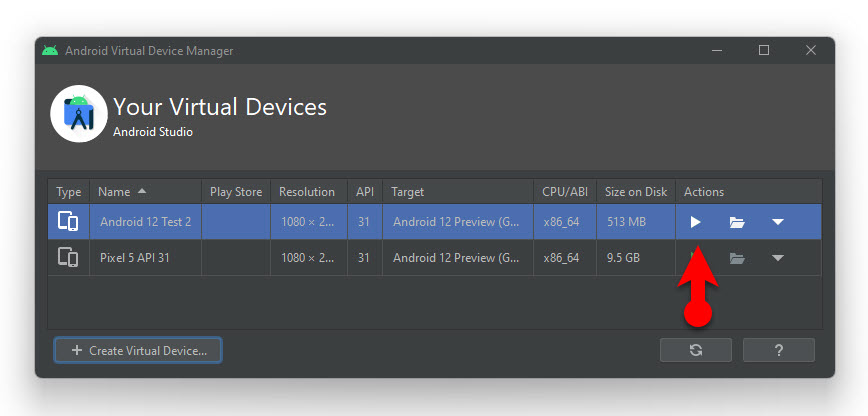
Now everything is ready to go, under the actions click on the play icon and Android 12 will launch.
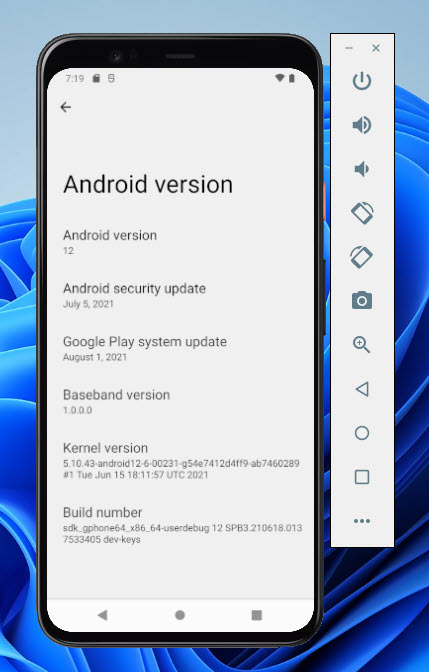
Here is Android 12 Running in Windows 11.
Summary
If you truly wish to test and Install Android 12 on PC, make sure that you have a very good Internet connection and then download Android studio. Configure the settings, create a new virtual device and finally go on and test the Android 12 on PC.
Also Read:
- HOW TO EDIT VIDEO ON ANDROID PHONE?
- HOW TO MAKE ANDROID LOOK LIKE IOS 15 (STEP BY STEP GUIDE)
- HOW TO INSTALL ANDROID 11 ON ANDROID STUDIO ON WINDOWS 10?
- HOW TO WIRELESSLY SYNC PHOTOS BETWEEN ANDROID AND WINDOWS 10?
- BLISS OS: BRING THE ANDROID 10 EXPERIENCE ON COMPUTER
- HOW TO DOWNLOAD INSTAGRAM STORIES ON IPHONE?

