macOS Ventura is full of new features and an amazing look alongside a new design for the settings app. Also, “system preferences” is now called “System Settings”. There are some other cool new features like a stage manager, cool new appears in the spotlight, and many more. If you are a Windows user who wants to try the macOS Ventura Virtualization is a perfect place. You can either use the VirtualBox or VMware Workstation Pro/player. In any case, if you are trying to install MacOS on VMWare on Windows PC, after installation you will face the screen resolution error. For that, you have to install VMware tools on macOS Ventura.
Steps to Install VMWare Tool on macOS Ventura
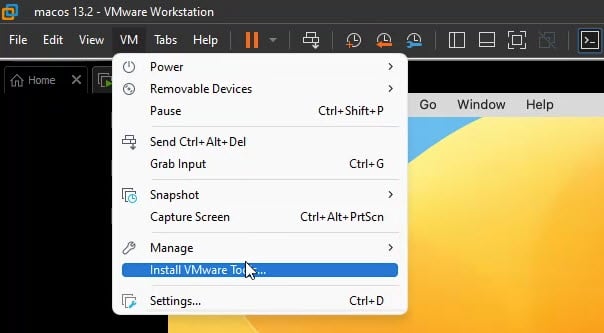
To begin the installation process of VMWare tools on MacOS Ventura, make sure that your Mac is running. Following that go to the VM menu> and choose “Install VMware Tools“.
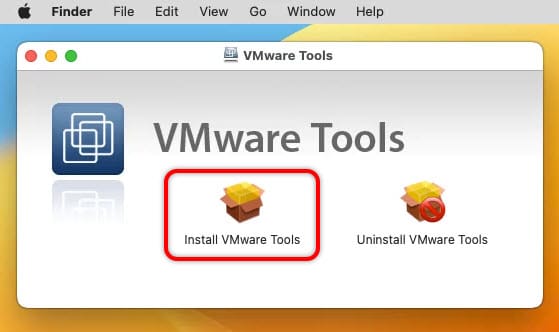
After that, a panel containing the “Install VMware Tools” and “Uninstall VMware Tools” tools will open. Obviously, you have to click on the install VMware tools.
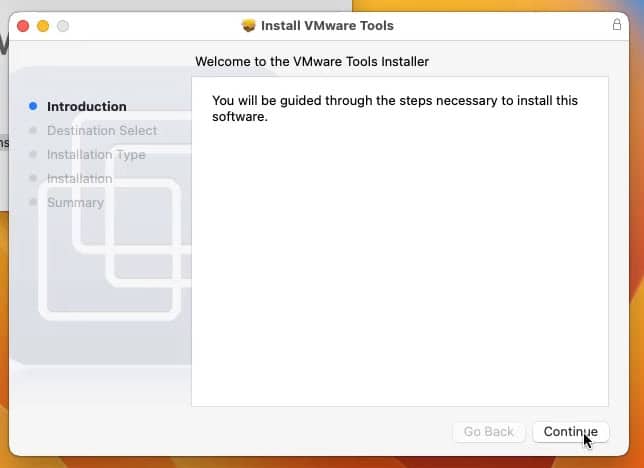
Welcome to the VMWare tools installer page, where you have to click continue.
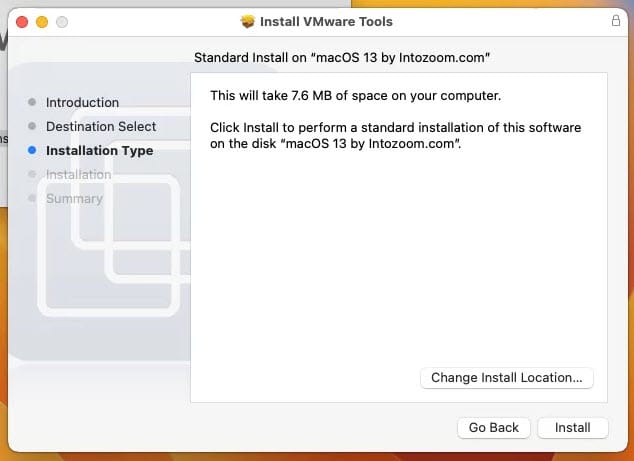
This is just a standard way to install VMWare tools in macOS Ventura. You don’t have to do anything just click install and wait for it until the process is done.
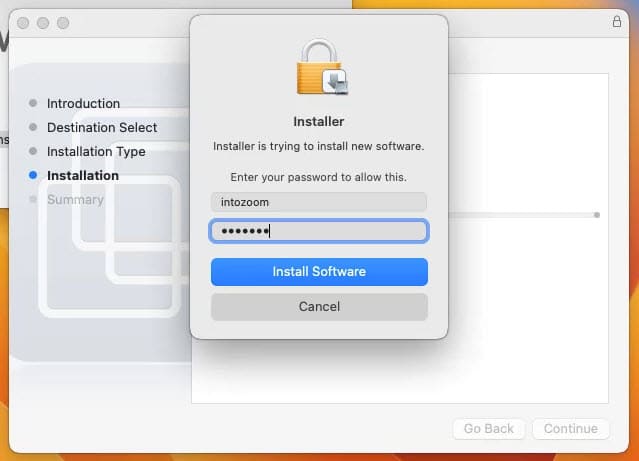
Once you click on an install, it will ask for confirmation to bring changes to your Mac. So you have to insert your password and click Install Software.
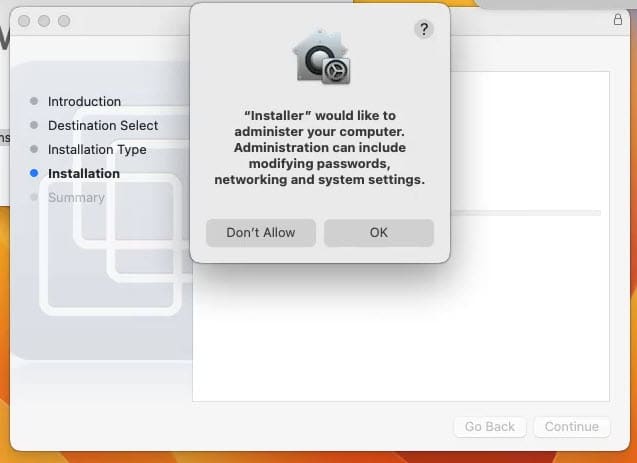
A notification by the installer will appear where it is saying that would you like to administer your computer. The administration includes modifying passwords, networking, and finally system settings. So you have to decide whether you want to allow it or not.
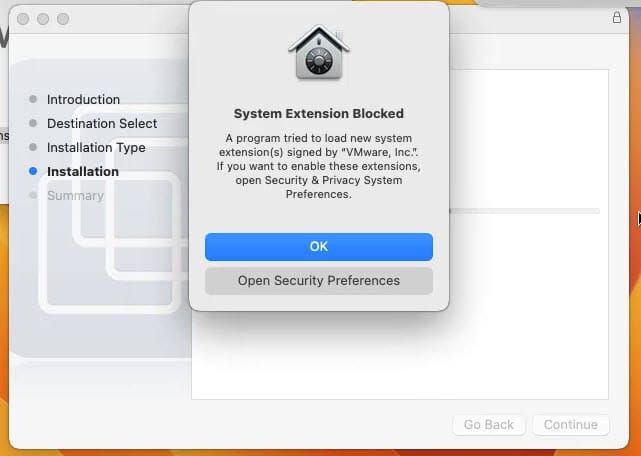
After that, the VMware extension that can be used to fix the screen resolution is blocked by the system settings. Click on open system settings.
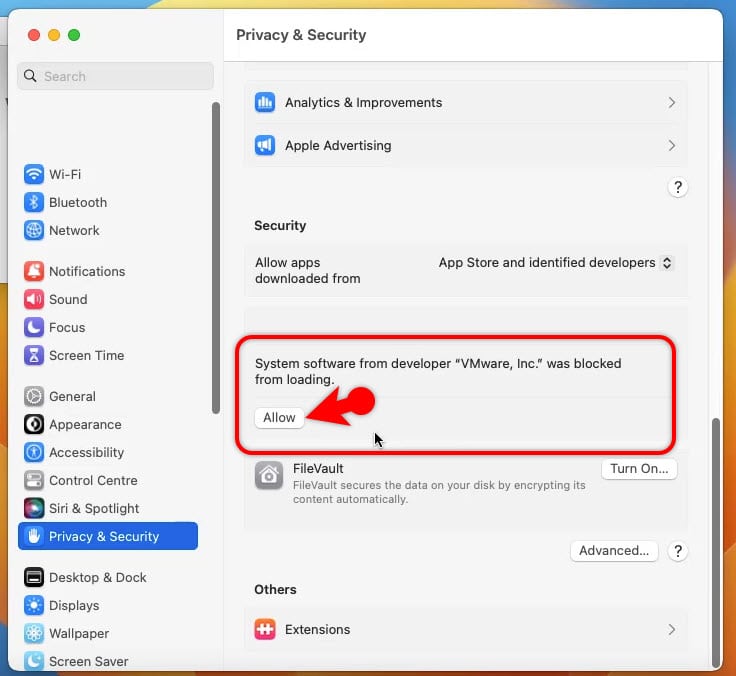
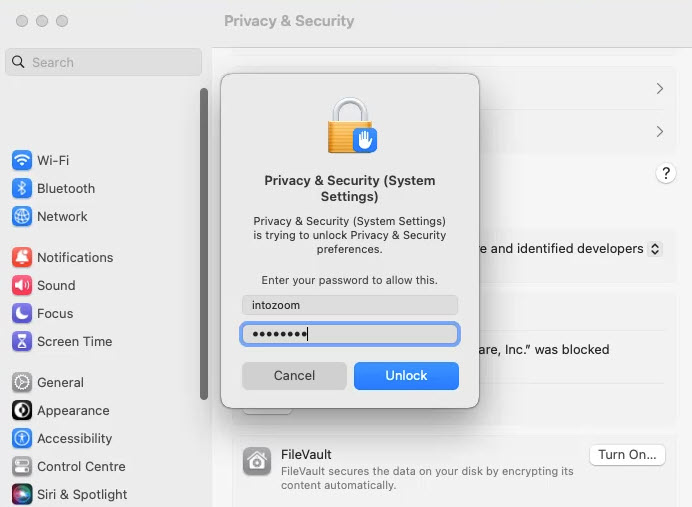
Go to the security and privacy, Scroll down to the end, Under the security above the FileVault, you will see “System software from developer “VMware, Inc” was blocked from loading” Click on Allow.
For confirming to allow the extension, you have to enter your password and click Unlock.
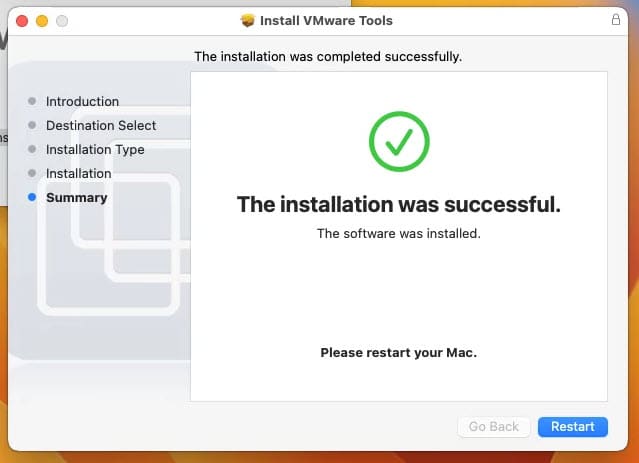
Close the System Settings and go back to the VMware tools installer page. Wait until the installation should be completed, once it is done, click on restart.
Fix Could Not Find Component on Update Server. Contact VMware support or your System Administrator
Unfortunately sometimes when you go to the VM menu> click on install VMware tools, you will face an error called “could not find a component on update server”. Well, this is the error because it cannot find the VMWare tools in drive C where the VMWare workstation is installed. So it is saying that you have to contact the VMware support team or your administrator so they should fix the issue.
To be very clear, the VMWare tools for MacOS are called Darwin but for Windows and Linux, it is called VMWare tools. You have to get the Darwin.iso from the VMWare servers and then insert it through this CD/DVD ROM and install it.
Steps to download Darwin.iso and Attach it to the Virtual Machine:
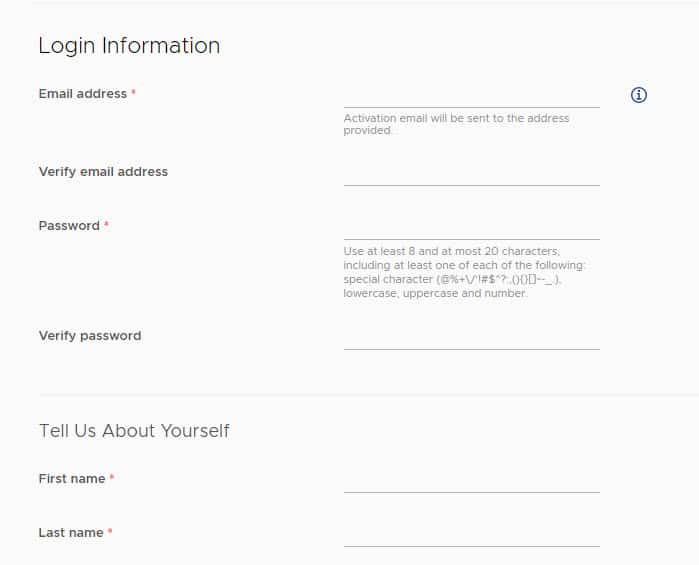
1. To get the Darwin ISO also known as VMWare tools for MacOS, you have to create an account in VMWare. So all you have to do is insert your e-mail address, create a password, enter your phone number, enter your title job, and so on as the registration requires.
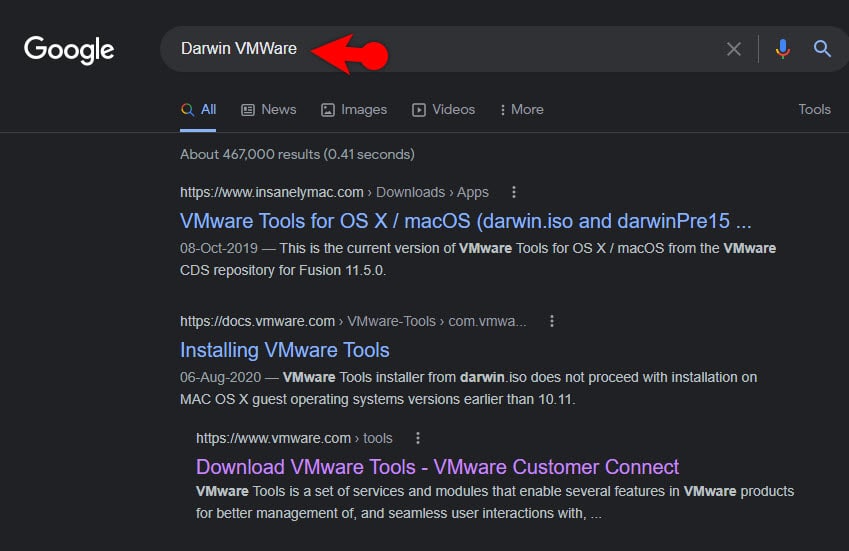
2. Once you are signed up inside VMWare, open a new tab and search for Darwin VMWare on Google. Then open the link called “Download VMware Tools – VMware Customer Connect“.
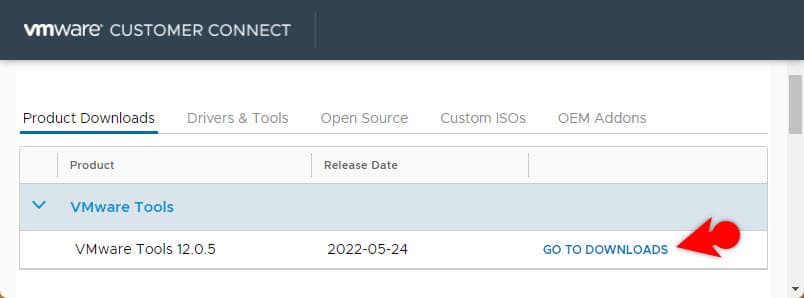
3. Click on the “Go to the downloads”
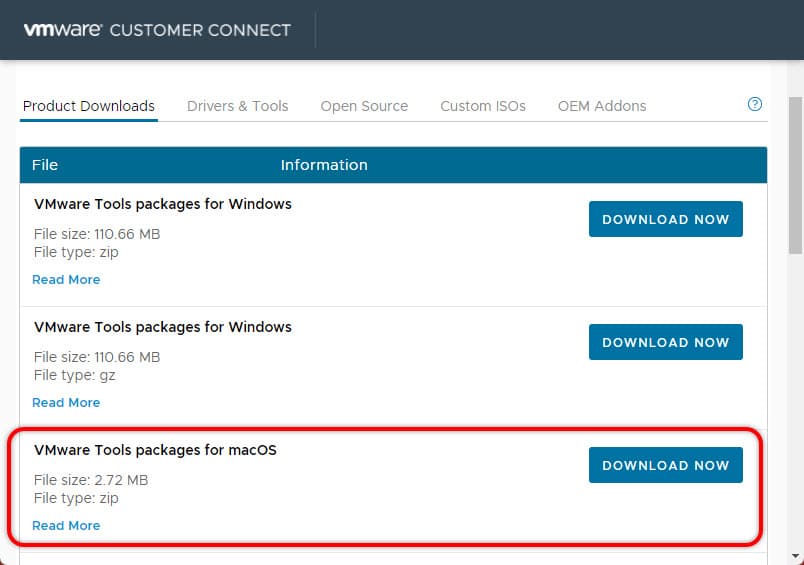
4. Find VMWare tools packages for macOS and click on “Download Now“.
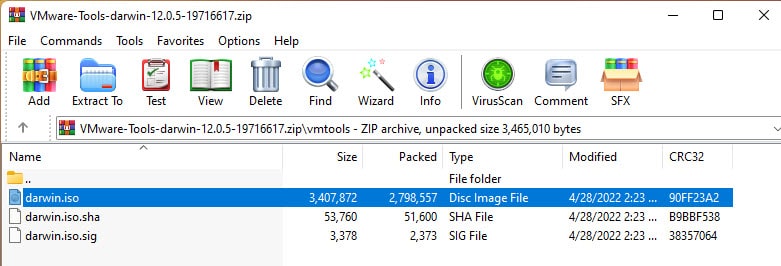
5. Once the VMWare tools for MacOS are downloaded, open it and extract the Darwin.iso in any place that you’re comfortable with.
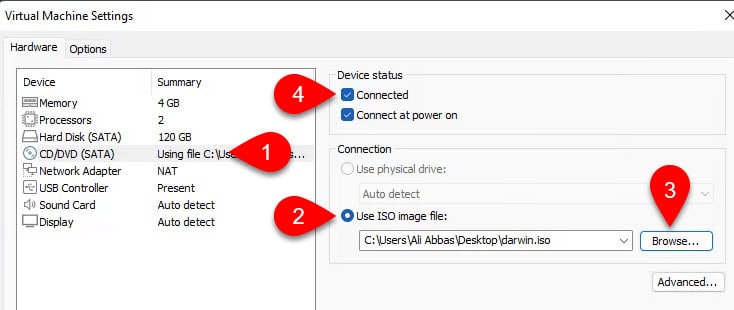
6. It is time to add the extracted VM Ware tools to the virtual machine. To do it make sure that your macOS virtual machine is powered on. Go to the VM menu> Settings.

Go to the CD/DVD (SATA) tab, select “Use ISO Image“, click browse and locate the darwin.iso. Once the darwin is added to the CD/DVD ROM, make sure that the “Connected” box is checked.
Now the VMware Tools installer appears on your Desktop and starts installing VMware tools to fix the issue.
Also Read:

