macOS 11.0.1 Big Sur is yet the best operating system apple has ever offered. This operating system is available with Apple M1 chip for macBook Pro, Air and Mac mini. However Macbooks after the mid 2013 has the ability to upgrade to this operating system. But the other users can use patcher to install macOS Big Sur on their unsupported macbooks.
Window users can test in on Virtual machine (VMware and VirtualBox). Those who are trying to perform a clean installation, they can follow the open core guideline.
How to get macOS Big Sur with GibmacOS?
Note: GibmacOS is a small script which is developed using the Python 2 and 3. It can download the macOS High Sierra upto the latest version of the macOS, called macOS big Sur. However it’s full potential can’t be used inside windows, but you use it to download macOS but for combination you need to have a macOS Running.
What do I mean by combination?
Well, the macOS which you are using the macOS it is downloaded in separate files. For combing them, a simple command is made which can only be run inside mac. Look at the downloaded macOS High Sierra using the GibmacOS.

I downloaded macOS Big Sur and macOS high Sierra using the GibmacOS but I combined them inside the VMware with macOS on it.
I recommend you to download it inside a mac, if you don’t have, download it on your Windows machine. Then Install macOS big Sur on VMware and combine their files their.
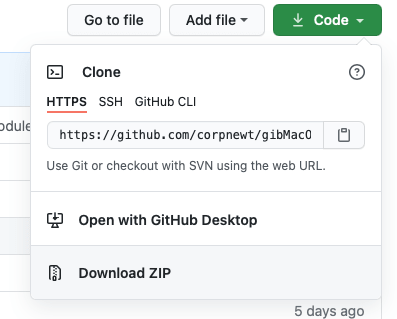
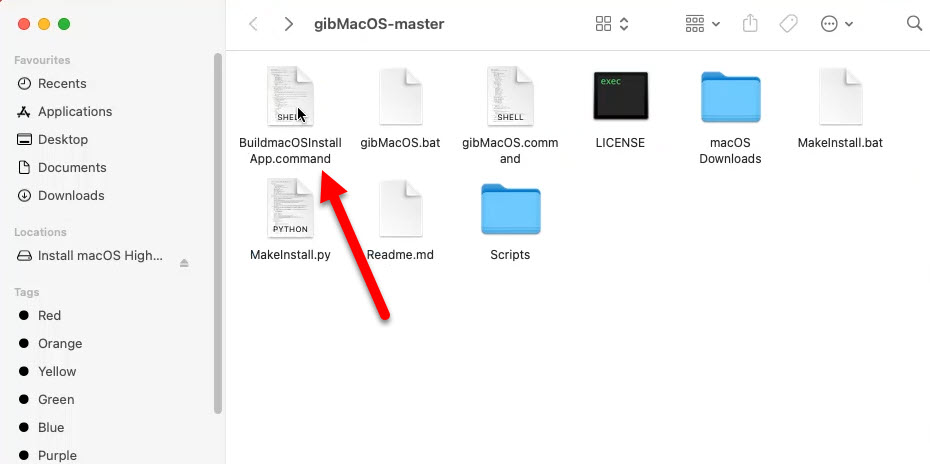
Step 1. Download GibmacOS and Extract it
Visit Github, search on Google or you may click on the below link to download the GibmacOS.
https://github.com/corpnewt/gibMacOS
Click on the code and choose download it, I prefer to download it with Zip.
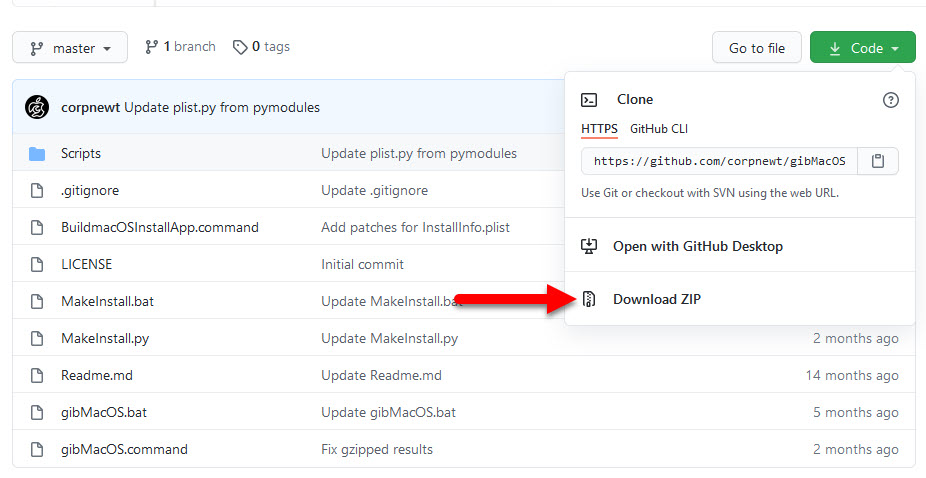
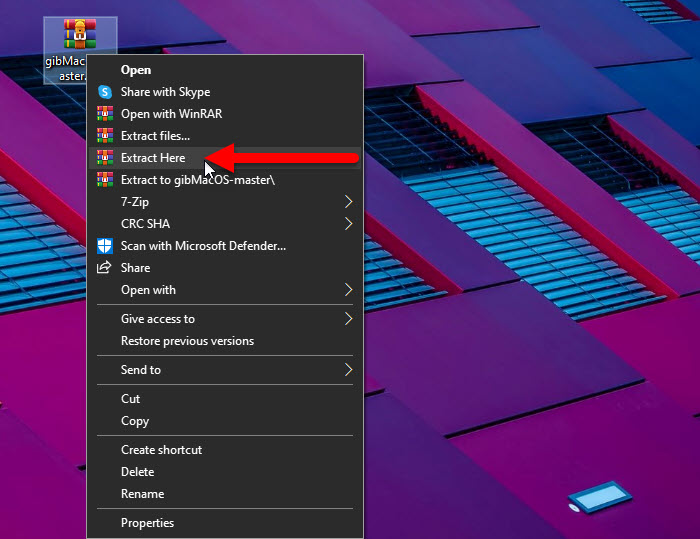
If you downloaded a zip file, you need to extract it.
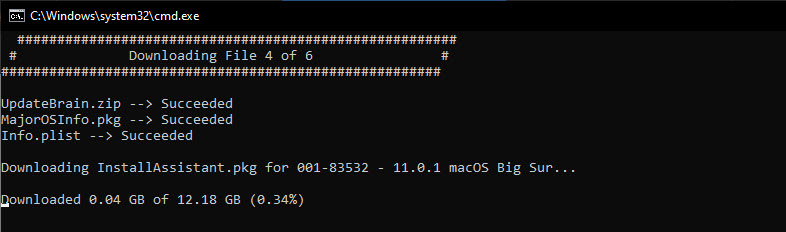
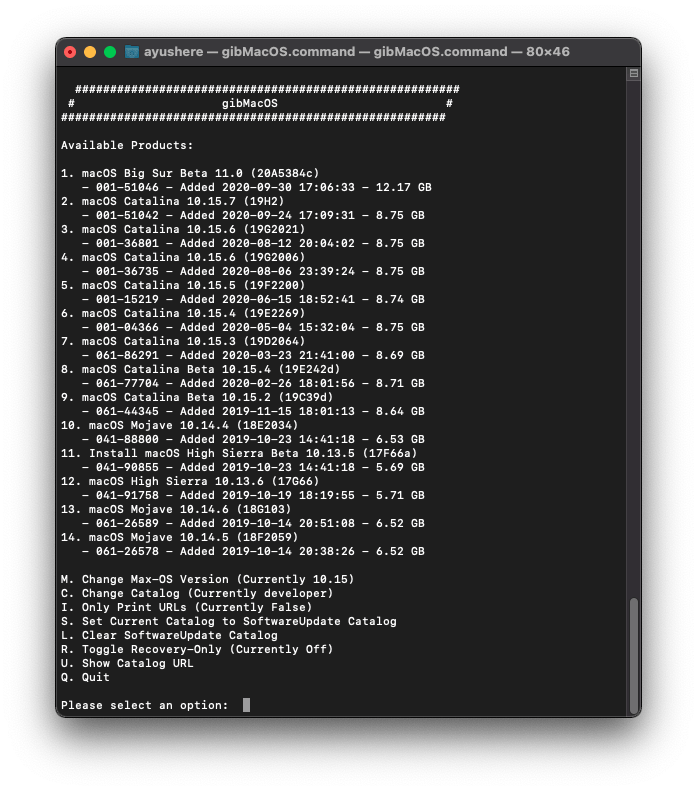
Step 2. Download macOS Big Sur Latest Version
In order to download the macOS Big Sur latest version, open the extracted folder and open the GibmacOS.bat on Windows and GibmacOS.command on macOS.
The first thing it will download is the mountainlion-lion snowleopard-leopard.merged. I don’t know what it is but I can guess that will list the macOS versions which GibmacOS can support to download.
Here is that link: https://swscan.apple.com/content/catalogs/others/index-10.15-10.14-10.13-10.12-10.11-10.10-10.9-mountainlion-lion-snowleopard-leopard.merged-1.sucatalog
Now you have to Choose a version of the macOS which you want to download. I will go with the macOS Big Sur latest version.

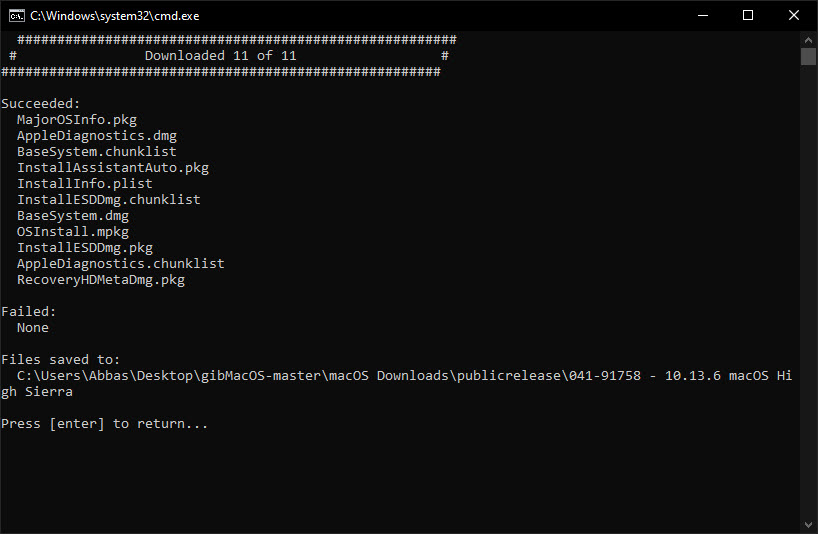
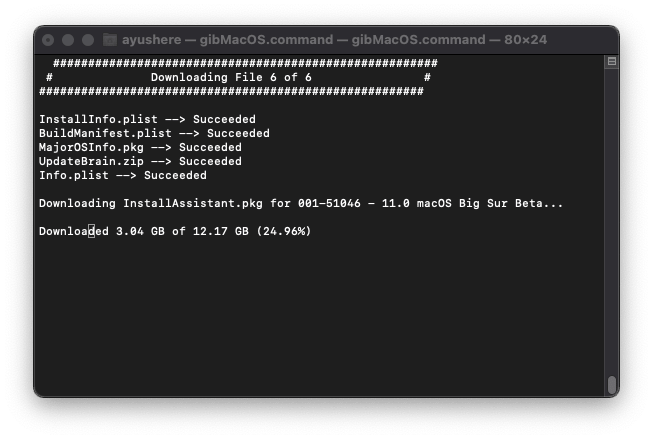
Now you have to wait until the file is downloaded, it will take some time.
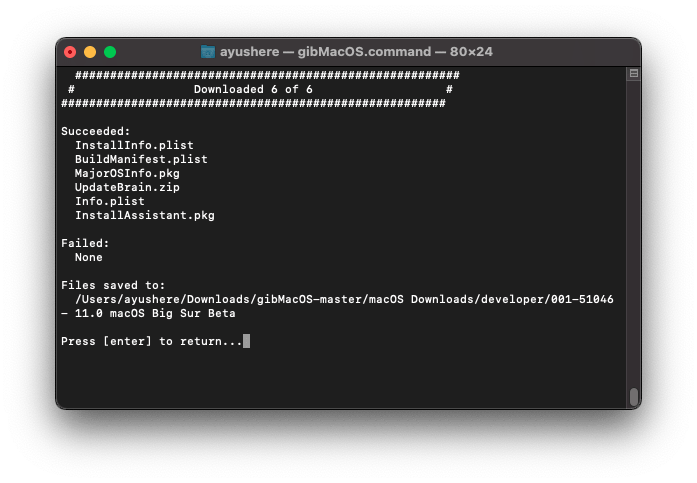
Upon the completion it looks like this.
The same steps are inside the mac, here are the photos as a slideshow.
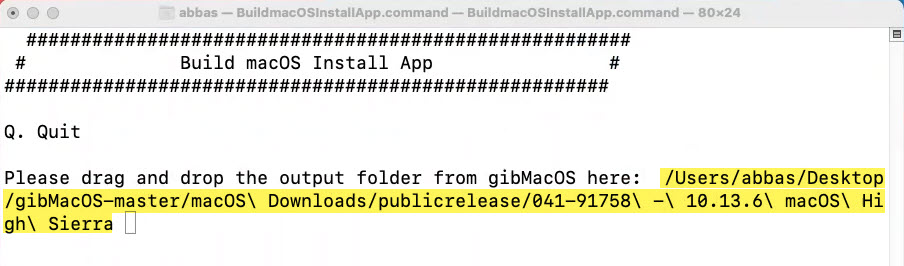
Step 3. Build macOS Installer
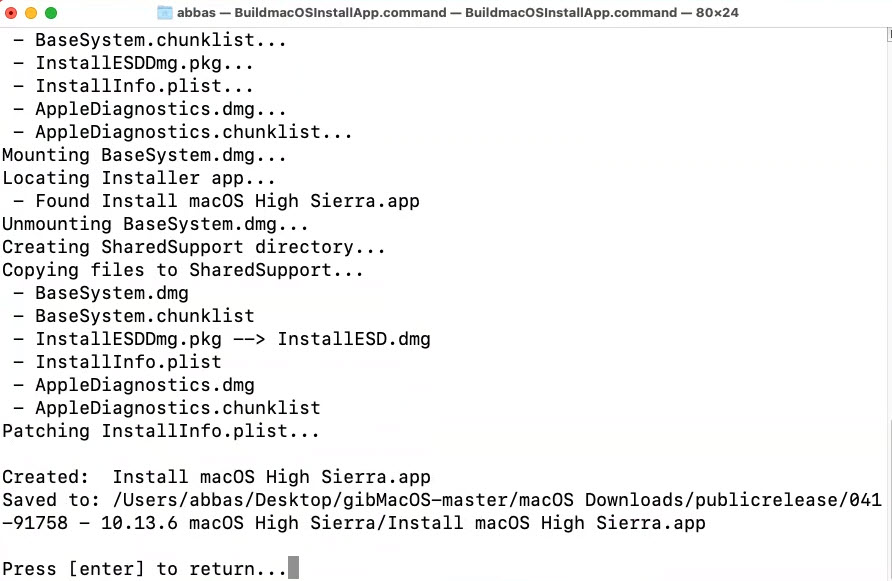
As I said before, you need to combine the downloaded files and make it an Installer. To do that, open GibmacOS inside the mac and run the BuildmacOSInstallApp.command.
Once the App is opened drag the folder which contains the downloaded macOS. The line which is highlighted is the location of macOS High Sierra.
Now have a look that the those files are combined, open the directory which you specified, their will be the installer.
Info about GibmacOS:
If you are looking for the recovery images of the macOS, you run the gibMacOS.command on mac and gibMacOS.bat on Windows. On the main menu press r, it will re-scan, then it will list just the recovery images.

Create Bootable USB of macOS Big Sur
To Create bootable USB of the macOS big Sur, you need to drag the created Installer inside the Application directory.

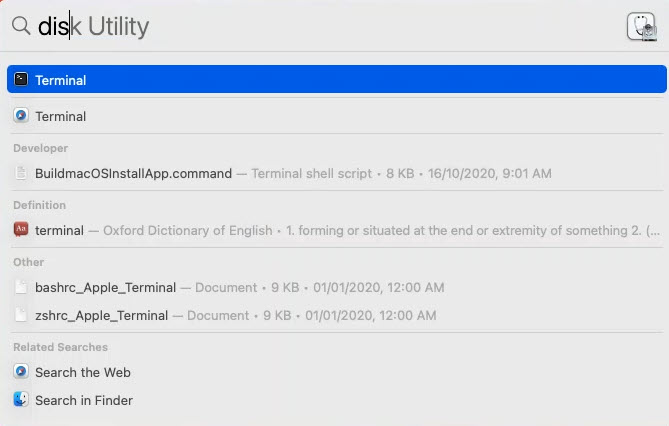
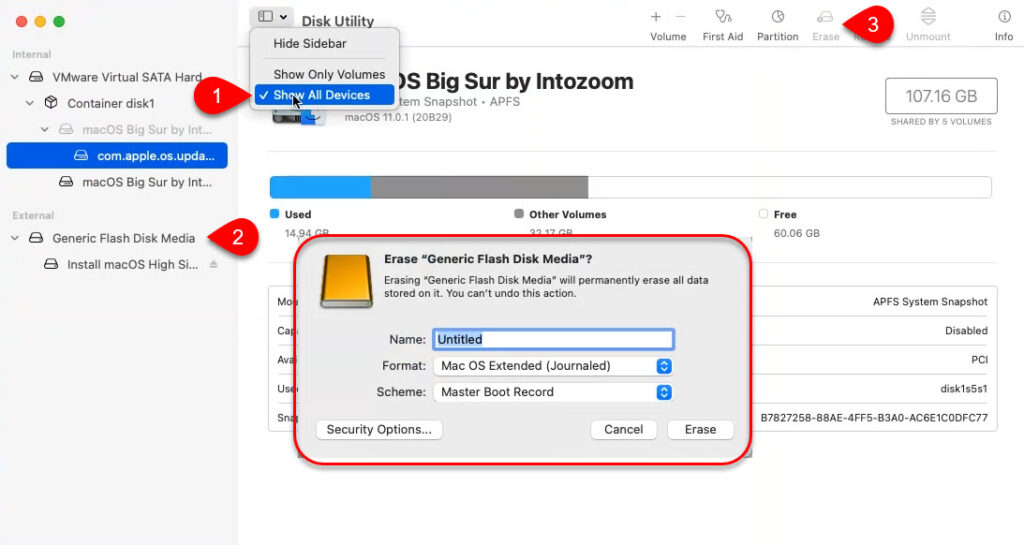
Once it is their attach the USB {at least 16 GB USB flash drive} and open disk Utility. you can hold the Windows or command + space to open spotlight, search for Disk Utility.
Choose Show all devices, choose the USB Flash drive and then press erase and clean the USB with following settings.
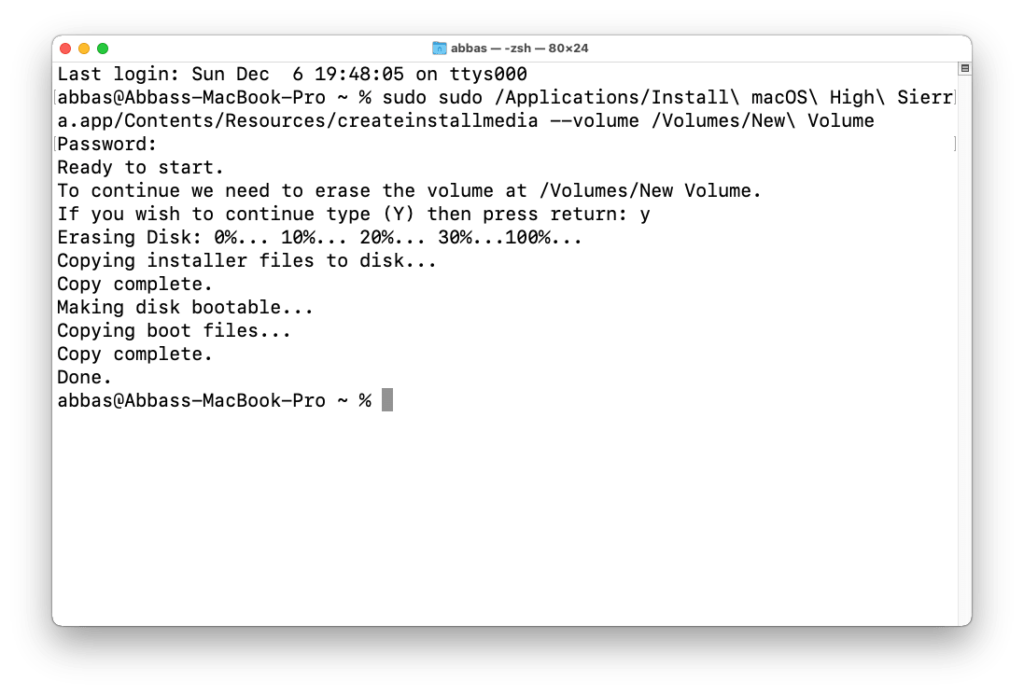
Open Terminal and paste the following command, and instead of USB Name type the USB name.
macOS Big Sur
sudo /Applications/Install\ macOS\ Big\ Sur.app/Contents/Resources/createinstallmedia --volume /Volumes/USBName
macOS Catalina
sudo /Applications/Install\ macOS\ Catalina.app/Contents/Resources/createinstallmedia --volume /Volumes/USBName
macOS Mojave
sudo /Applications/Install\ macOS\ Mojave.app/Contents/Resources/createinstallmedia --volume /Volumes/USBName
macOS High Sierra
sudo /Applications/Install\ macOS\ High\ Sierra.app/Contents/Resources/createinstallmedia --volume /Volumes/USBName
mac OS X El Capitan
sudo /Applications/Install\ OS\ X\ El\ Capitan.app/Contents/Resources/createinstallmedia --volume /Volumes/MyVolume --applicationpath /Applications/Install\ OS\ X\ El\ Capitan.app
Ending Point
There other ways to download macOS Big Sur beside GigmacOS, like the App store. Other resources like telegram, infect we are providing download links directly in telegram. Because of Apple’s recent policy we can’t provide here, so join our telegram channel.
Using this tool the downloaded files are different now:
Downloaded 6 of 6
Succeeded:
InstallAssistant.pkg
BuildManifest.plist
Info.plist
MajorOSInfo.pkg
UpdateBrain.zip
InstallInfo.plist
Any recommendation?
It doesn’t matter, the important part is that the “BuildmacOSInstallApp.command” script is available. Move all the files into a mac operating system and then run that command.
can i convert the pkg to an iso file?
Hi,
Unforrunelty, you can’t convert PKG directly to ISO Image. I have tried several lines of codes and applications, in appearance it converts but when you try to install it, it won’t work.
So, here is my suggestion to you.
First, download the macOS through the GibmacOS.
Install the PKG and you will get the macOS Installer.
Convert the macOS Installer to macOS.dmg
Then Convert the macOS.dmg to macOS.iso
The theory is a bit long, but when you execute all of them, it will take around 30 minutes.
Here is the post which can help you accomplish this goal.
Create macOS ISO Image
Note: You have to perform all of these steps in a Mac Operating System. In Windows, you can only download the macOS image.
Best of Luck