If you’re reading this, then you have a laptop or Mac computer, but want to run Windows on it? Well, its possible. Shortly after Intel’s first Macs debuted in 2009, Apple released a tool called Boot Camp that enabled Mac users to use windows as a second operating system. With Boot Camp you can switch between Mac and Windows every time you turn on your system.
Probably the most common reason Mac owners want to use Boot Camp is Windows games that don’t exist for Mac. For example, games like Star Trek Online, Tera and Star Wars that run only on Windows. Boot Camp works better on Windows software than virtual machines like Parallels or VMWare Fusion that simulate Windows on MacOS. Here’s how to set up Boot Camp and install Windows.
Prerequisites to Dual Boot macOS and Windows
Choose an Operating system:
First of all, you need a 64-bit version of Windows. Which version of it needs to know your Mac age? Those with MacBooks for mid-2012 and later can use Windows 8 and 10, while pre-2012 models can only install Windows 7 and 8.
After knowing this step you can download your desired version from Microsoft sites. However you know; Windows 7 is no longer coming with Security updates. It’s better to try Windows 8, 8.1 and Windows 10.
Since different versions of Windows require different amounts of RAM, hard drive space, and processor speed, check this out for your MacBook so you don’t have to worry about it.
- Click the Apple menu at the top right and select About This Mac.
- Compare your Mac’s specifications like the processor and memory with the Windows version you want to install.
- If your Mac does not have the required Windows specifications, select a lower Windows.
Make sure your Mac has enough hard disk space
To use Boot Camp, you must have at least 55 GB of free space on your Mac hard drive. Boot Camp says it only needs 50 GB, but Apple itself recommends 55 GB.
To check available storage follow the below steps:
- To view the available space, click the Apple menu at the top left and then select About This Mac.
- Click on Storage to see free space on your hard drive.
If you do not have 55 GB of free space, you will have to delete or move the files until this space is free.
Update and backup
Before running Boot Camp, Apple recommends that you keep your system up to date and back up your important files.
Backup MacBook Via Time Machine
The proprietary app offered by Apple to backup MacBooks is called Time Machine. With this app you can easily back up your data to an external drive. The external drive you want can be connected directly to the MacBook or via Time Capsule. It is also possible to backup from a MacBook with an external drive connected to the AirPort Extreme Base Station or a router with a USB port.
When you connect an external drive to your MacBook, you will be asked if you intend to backup it using Time Machine. If you do not find this question, you can go to the Time Machine section in Preferences and click on the Select Disk button to use the drive you want to run the machine. You can also tick the Encrypt backups option when selecting a drive for Time Machine. Your backup will then be encrypted and you will be prompted to enter the password when retrieving MacBook data via Time Machine.
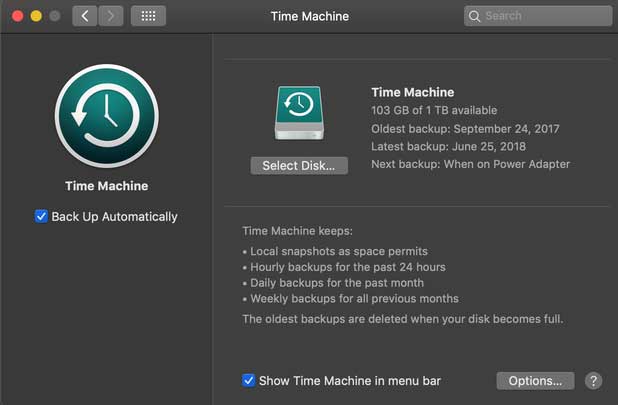
In the System Preferences section, an option called Back Up Automatically will be visible. Checking this option will automatically back up your MacBook data every time you connect a Time Machine drive to your MacBook. If the Time Machine drive is permanently connected to the network or directly to your MacBook, the Time Machine will continuously backup data. Older backups will be removed by the machine when the storage runs out, and newer versions will be replaced.
If you do not want to back up some items, click Options in the Time Machine panel in the System Preferences section. In this section you can select the items you do not want to back up. Removing items will also increase the speed of backups from the MacBook. Note that you can use your MacBook while taking backups. However, older MacBook versions may be slowed down during the backup process.
The status of the backup process can be tracked via the icon in the menu bar. You can also manually stop and resume the backup process. To restore the backup, click the menu bar and click Enter Time Machine. This will show you backups taken by the machine. After selecting the backup you want to restore, just click on Restore.
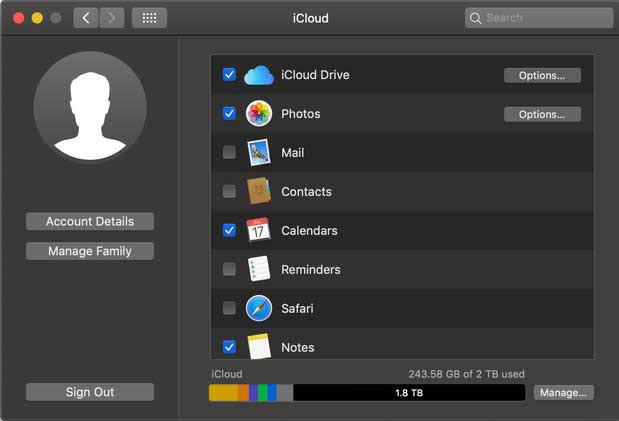
Backup Macbook via iCloud
In addition to Time Machine backups from MacBooks, you can also take backups of your MacBook data such as images via iCloud. For a backup of your images from iCloud, go to System Preferences then iCloud. Then select Photos. Next, click on Options and check the iCloud Photo Library option. This will save a copy of your images to the cloud. You can also easily access your images on your iPhone or iPad by backing up from MacBook to iCloud.
Dual Boot MacOS and Windows 10 Via Boot Camp
The time has come to install Windows on Mac. If you have a Mac system from 2015 onwards, the process is easier. But if you have an older version or have a copy of Windows on a DVD or Flash, it’s a little different.
Windows Installation Tutorial for Mac Systems After 2015: Installing Windows from an ISO File
This is probably the easiest way to install Windows, but it only works for Macs from after 2015.
- Download Windows 10 ISO
- Close all applications and then open the search window. Click Applications and then go to the Utilities folder.

3. Open the Boot Camp Assistant, and then click Continue.
4. Now select Choose and select the ISO file.
5. The next step is to devote some of your space to Windows. You will see a slider where you can specify this value.
6. Move the slider to get more space for your Windows partition. Keep in mind that any amount of space you take away from your existing Mac space.
7. Once you have specified your partition, hit Install. This allows Mac to enter the Windows installation process.
8. When the installation process prompts you to install Windows, be sure to select the drive called BOOTCAMP.
9. Windows will begin to install. Then you need to make some choices for things like language, theme and keyboard. It will take several minutes for the setup process to finish.
10. Finally, you will reach the Windows Desktop page. The Boot Camp should now appear in a new window. Accept the terms and then begin installing the necessary drivers. After it is installed, you will be prompted to restart the system, click Yes.
11. If you have Windows 10 installed, you should use Apple Software Update to prevent drivers prob;em from reorganization. Make sure you’re connected to the Internet, then click the Start button at the bottom left and open Apple Software Update.
12. At the top of the box, select all available updates, then click Install Items. Windows will ask if you allow Apple Software Update to make changes, then click Yes.
13. After the installation is complete, you will be prompted to restart. Click Ok and now your Mac should restart in a completely Windows 10 version!
14. To switch between Mac and Windows, hold the Option key during boot or restart of the computer.
2 thoughts on “How to Dual Boot macOS with Windows 10 using Boot Camp?”
Comments are closed.