Please note that currently, it’s not possible to do a clean install, the only method is to install the macOS Big Sur on any real Mac or a VMware. And then clone the installation to the target disc you wish to install. Catalina is required as to clone the image to the target disk, you need a system with a recovery. And for now booting to recovery of Big Sur is not possible at all.
For installing macOS Big Sur on PC, you’ll require VMware fusion, clover configurator, EFI presets, command file and macOS Big Sur and macOS Catalina image files. You also need a pair of USB flash drive, one with at least 8 gigabytes and
another with 16 gigabytes and also one external hard disk with at least 80 gigabytes.
The very first step is to install VMware Fusion on your mac. after installing VMware fusion close all the window, eject VMware disk and quit VMware fusion.
Before getting started, here is the PC specification where macOS Big Sur will be installed.
- Motherboard: GIGABYTE Z390 AROUS GAMING Pro WiFi
- CPU: Intel Core i5 9400F (2.9GHz) LGA 1151
- RAM: 16 GB DDR4 3200MHz
- GRAPHICS: AMD Radeon RX 580 4GB
- WiFi and BT: Broadcom BCM94360
- ETHERNET: Intel I219-V
- AUDIO: REALTEK ALC1220VB
- SSD: GIGABYTE 256GB NVMe
- macOS VERSION: 11.0
- SMBIOS: 1,1
- SYSTEM DEFINITION: iMac Pro (2017)
Step 1. Create a macOS Big Sur ISO File
Open Terminal using the spotlight, copy the first command and paste it into Terminal.
hdiutil create -size 12G -fs hfs+ -volname macOSInstaller -type SPARSEBUNDLE /Users/Shared/macOSInstallerOne the first command worked successfully, copy and paste the second command on the terminal.
hdiutil attach /Users/Shared/macOSInstaller.sparsebundleFollow up with the third and forth command.
sudo /Applications/Install\ macOS\ Beta.app/Contents/Resources/createinstallmedia --volume /Volumes/macOSInstaller --nointeraction
Once the macOS Bit installer is created, eject is by click right clicking on the desktop.

hdiutil makehybrid -o /Users/Shared/macOSInstaller /Users/Shared/macOSInstaller.sparsebundleStep 2. Install macOS Big Sur on VMWare Fusion
Close all the windows and open VMWare Fusion. You have to Install the macOS Big Sur on VMware Fusion using the ISO file you just created.
Here is a step by step guide which can help you, to create a New Virtual machine in VMware Fusion on mac.
Choose a Language once the Virtual machine turned and you passed the Apple logo.
Select Disk Utility, choose the drive where you want to install macOS Big Sur, then erase that with the below settings.
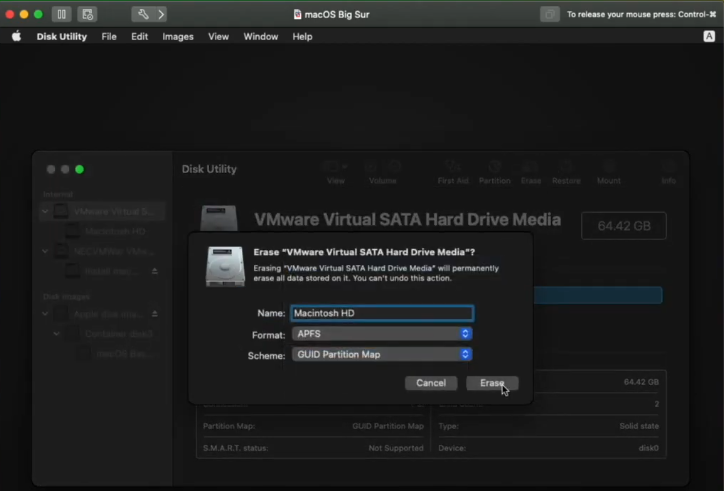
Close the disk utility and this time choose Install macOS Big Sur.
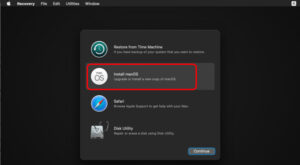
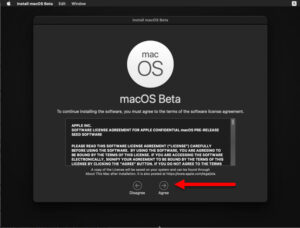
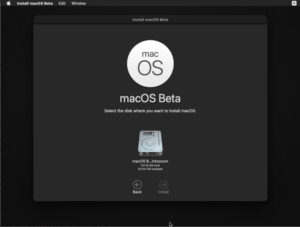
Choose the Disk to Install macOS
The other steps are easy, follow your instinct and you will end up installing macOS Big Sur on VMWare Fusion.
Step 3. Editing VMX File and cloning image
We need to make boot delay on macOS Big Sur on VWmare fusion, to do that you have to locate and open the VMX file. The VMX file is located in the following path {Your Hard Drive Name/Users/Home/VirtualMachine/Name of the VM}.
Right click on the VM and choose show package content.
Right-click on the file which has the .vmx extension and choose open with text edit.
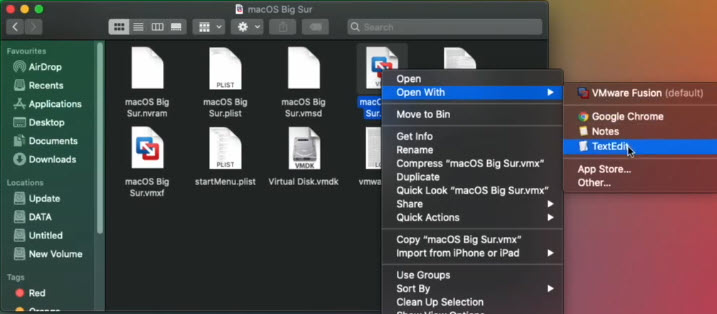
Once the vmx file is opened, type the following command to delay to boot.
bios.bootdelay = "1000"Close the VMX window and Power on the Virtual Machine on the VMWare Fusion, then click the space key to boot to the boot manager. Choose the third option which is EFI VMWare Virtual SATA CDROM Drive (1.0).
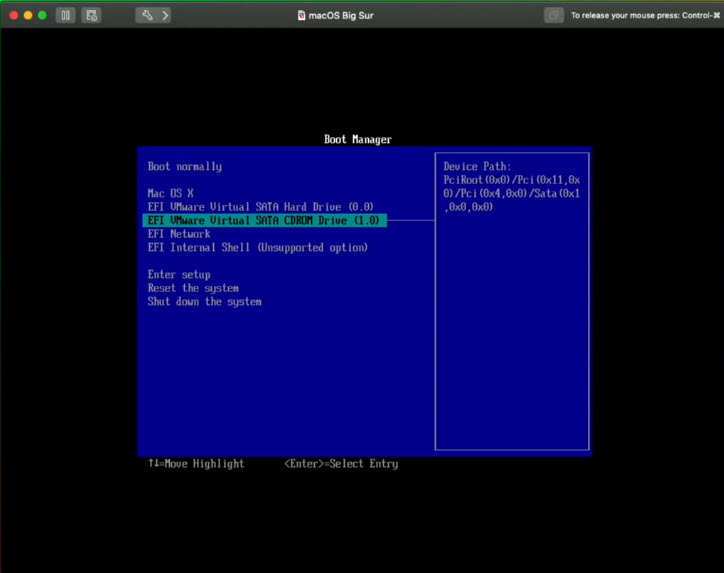
Once you reached the macOS Utilities window, choose Disk Utility.
Go to view menu and choose View all devices.
Now Connect Your hard drive to the Virtual machine and erase that with the following parameters.
- Name: Whatever you wish just put in.
- Format : Mac OS X Extended (Journaled)
- Scheme: GUID Partition Map
Choose the Container Disk 1 and unmount it.
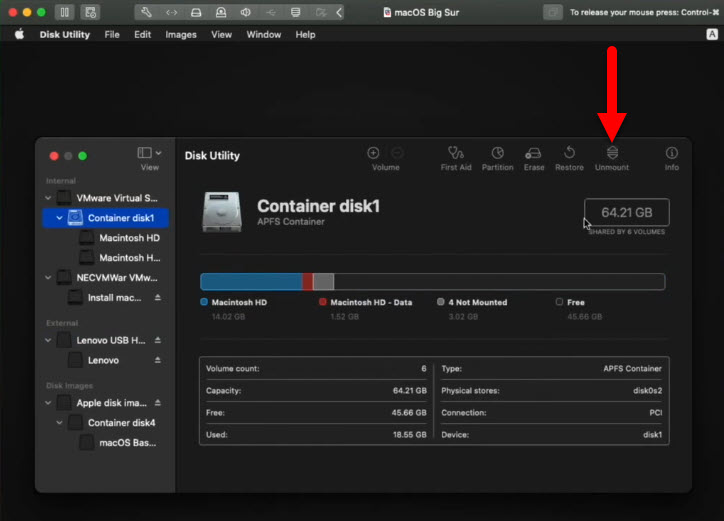
Next, choose the VMWare Hard Drive, right click and choose Image From.
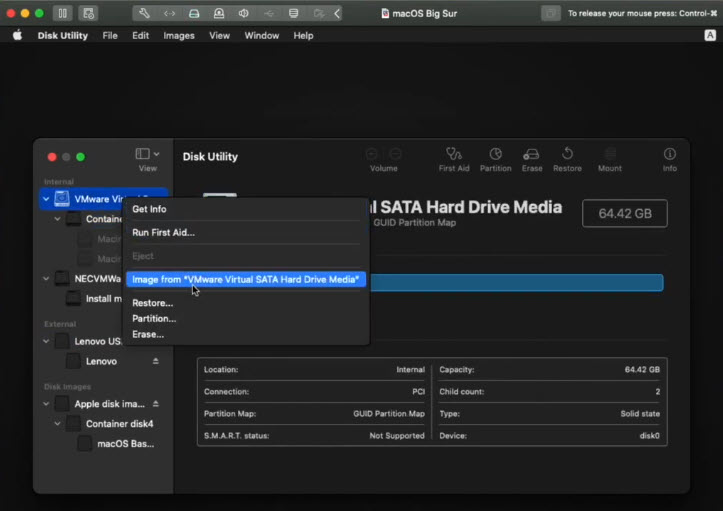
Once you clicked on the image from, a new window will pop up, there you have choose the External Hard Drive. Then change its, name and change the format to compressed.
Click on the photo to expand view.
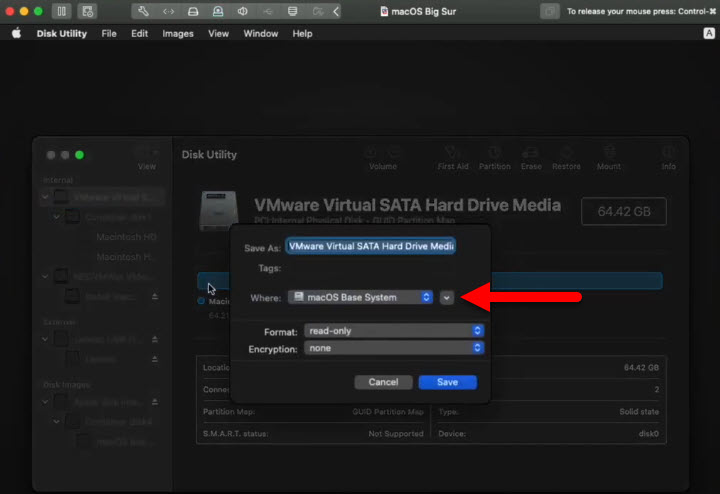
Change the Location 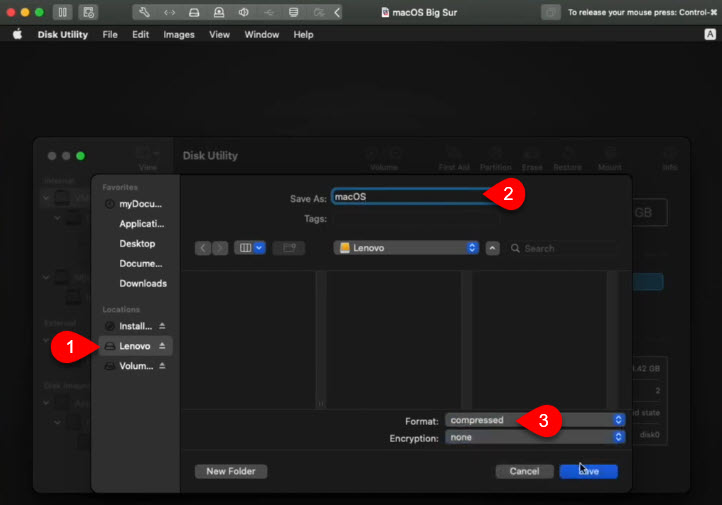
Change the Name and Format
Now shutdown the macOS Big Sur using the Apple logo menu.
Step 4. Create bootable USB and adjustments for macOS Big Sur
Attach the USB Flash Drive with minimum 16 GB of Storage, after that you have to erase the USB with Disk Utility.
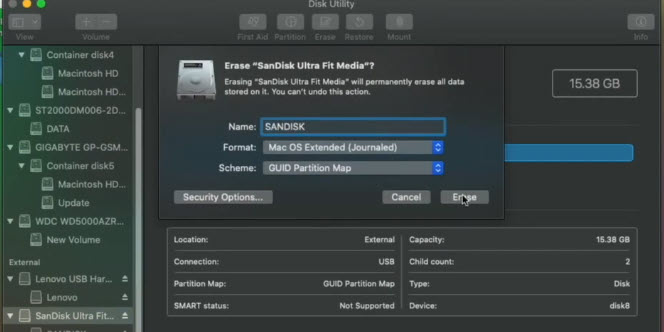
Close all the Window, now copy the macOS From External Hard Drive to the USB you just formatted.
Once it is copied, eject both the external hard drive and USB contained the macOS Big Sur. Attach a New USB Flash Drive, and erase it also with the Same settings as USB 1 using the Disk Utility.
Copy and Paste the Following Command in terminal to create Bootable USB for macOS Catalina. Remember the USB name is USB while we erased the disk.
sudo /Applications/Install\ macOS\ Catalina.app/Contents/Resources/createinstallmedia --volume /Volumes/USBNow the bootable USB of macOS Catalina is created, close the Terminal, and copy the clover configurator to the USB with macOS Catalina.
Open Clover Configurator and mount it, then copy the EFI and Paste to the EFI directory of the USB.
Restart your PC and press the delete key to access the BIOS.
First you have to reset BIOS settings to default settings, to do that go to the save & exit and choose Load optimized Defaults> then choose Yes.
Once the PC restarts, again go to the BIOS and bring the following changes.
Under the On Tweaker, choose advanced CPU Settings and make sure the VT-d is disabled. Also for Extreme Memory Profile (X.M.P), choose Profile 1 /Enabled.
Now go to the settings tab> Platform Power> USB Configuration and enable XCHI Hand-off. Apple the settings once the changes are made.
Step 5. Install macOS Big Sur on PC-Hackintosh
Attach the macOS Catalina Bootable USB to the computer and hit the boot key of your computer. Choose the USB flash drive from the boot devices lists.
Choose a language and then you will be on the disk utility window, now choose Disk Utility.
Go to the view menu and view all the devices to your computer.
Choose the hard drive and erase it with the format of mac OS X Extended (Journaled) along side the scheme of GUID Partition map.
Plug the other USB which contains the macOS 10.15 Catalina, then close the disk utility and open Terminal from Utilities.
Now type diskutil list command to list all the internal and external attach storage. This is the code just to verify if the USB is connected or not.
Now you need to mount the disk image so that you can restore the image to the target disk. To do that, you have to type the following command (Case-Sensitive). And make sure to replace the volume name in the command below.
hdid -nomount /Volumes/SANDDISK/macOS.dmgunmount the disk.
diskutil unmountDisk /dev/disk0Type the following command to restore the macOS Big Sur.
dd if=/dev/disk25 of=/dev/disk0 bs=32mThis will take some, you can check the progress by pressing Ctrl + T.
Once the restore process is successfully completed, close the Terminal and choose Disk Utility.
Unmount the macintosh partition and update.
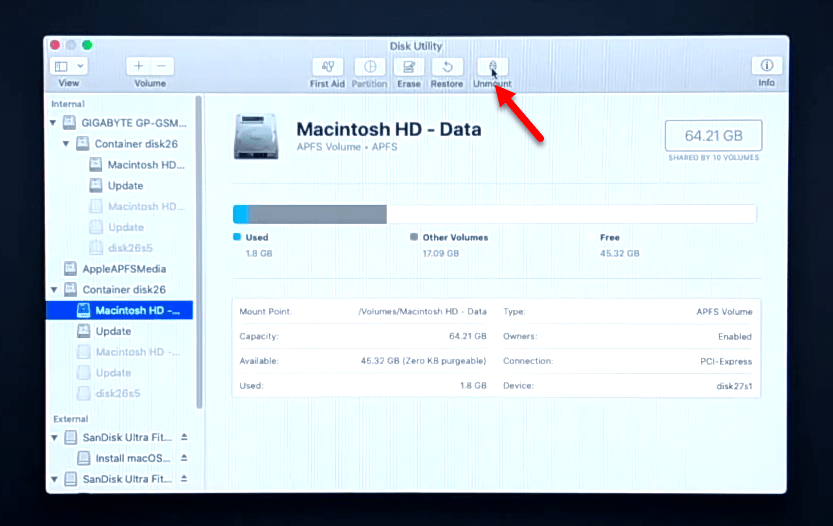
Close the disk utility and restart the system from the apple logo menu.
Unplug the macOS Catalina USB and Attach the macOS Big Sur USB, press the boot key after your PC restarts. Then choose the macintosh HD and go on.
Now you have successfully booted to macOS big Sur, choose your region, and setup the other stuff.
The last thing, you have to do, copy the clover configurator and EFI partiton the desktop. Open Clover configurator, mount the EFI and the USB.
Copy the EFI and paste it inside the macOS Big Sur EFI directory.
If you didn’t get from the article, watch the video.


sorry,… my case still warning “unsupported computer” any fix it?