I wanted to upgrade the macOS 10.14 Mojave to macOS 10.15 Catalina but I faced an error. The error was about file system, the Mojave which I am using inside the Vmware, its file system is HFS but not APFS. So, I needed to convert the Hackinsoh File System to the Apple File system.
To convert the Hackintosh File system to the Apple file system, I needed to Access the Recovery panel. on the actual pc [on Mac, Command + R] will take you to the recovery mode. Even in the VMware Fusion Command + R can do the job but in Windows, it is not working.
In the VMware what is the option that the Command + R is not working? Well, as long as you create the macOS recovery Image or macOS Boot Image, it is not impossible. So, follow the below steps to access the recovery mode of macOS Mojave on VMware on windows.
- Download macOS Catalina VMDK File
- Install macOS Catalina on VMware on Windows 10
- Install macOS Mojave on VirtualBox on Windows 10
Access macOS Mojave Recovery mode on VMware on Windows 10
Step 1. Download macOS Mojave Recovery Image
I have not created the macOS Mojave recovery image, in fact, I got it from a site known as Geekrar. This recovery image can take you directly to the recovery mode of the macOS Mojave on VMware and Virtualbox on Windows 10. But there are some steps which you must comply with so, it could access the recovery mode.
But first, you have to download the macOS Mojave recovery mode to go further.
Step 2. Edit the Virtual Machine
After downloading the macOS 10.14 Mojave recovery image, you need to add it to the virtual machine. To do that simply open the VMware and power off the Virtual Machine if it is turned on.

Step 3. Attach the macOS Mojave recovery Image
To attach the macOS Mojave recovery image to the Virtual machine, select Add, and then the dialog box will open.
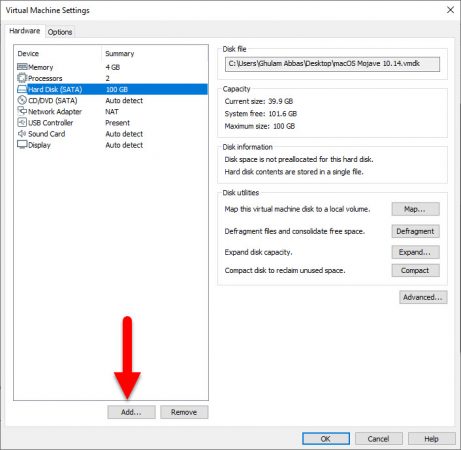
In the hardware type window, select the Hard Disk and click Next.
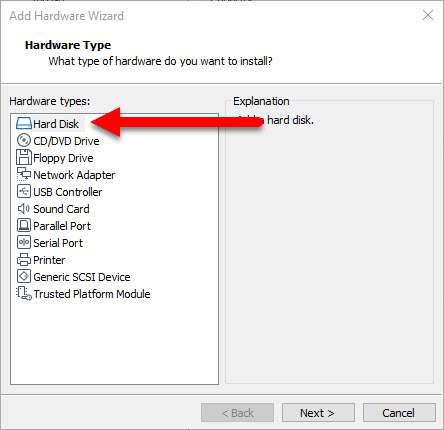
The disk type is SATA, so click continue as it is selected by default.
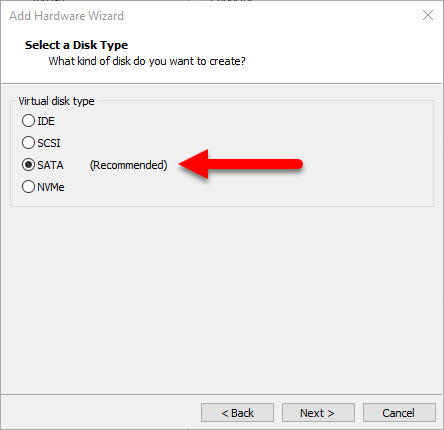
Since the macOS Mojave recovery image is already created in VMDK extension, you have to select Use an existing Virtual Disk.
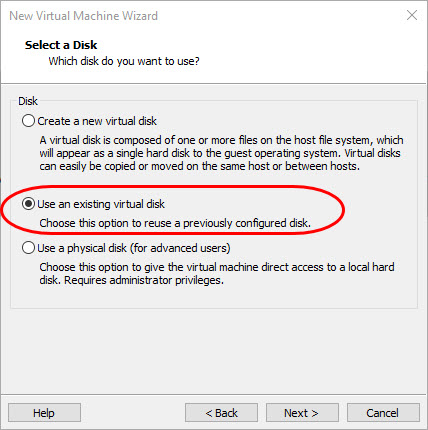
Click browse and locate the macOS Mojave Recovery Image for the VMware on Windows 10.
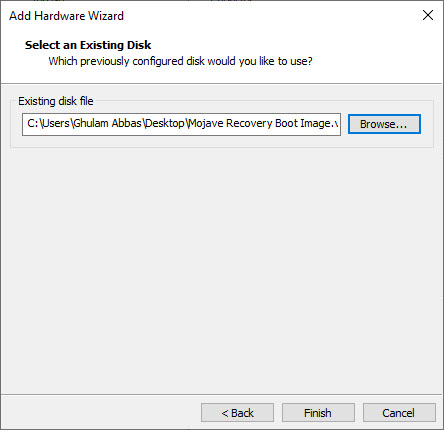
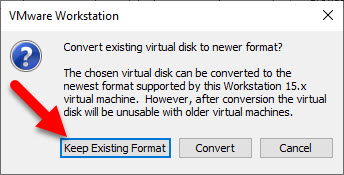
Once the macOS Mojave recovery image is selected you may face the below alert by the Virtual Machine.
The chosen virtual disk can be converted to the newest format by this workstation 15.x Virtual Machine. However, after the conversation, the virtual disk will unusable with older Virtual Machine.
Here you have to select Keep the existing format, however, I have tried the convert too. It didn’t do anything but it is good to be careful.
Step 4. Remove the CD/DVD ROM
You can simply remove the CD/DVD Room compatibility from the VMware Virtual Machine for macOS Mojave.
Here is How you can remove the CD/DVD ROM.
- Edit the Virtual machine settings.
- Select the CD/DVD ROM.
- Click Remove.
Step 5. Configure Virtual Device Node
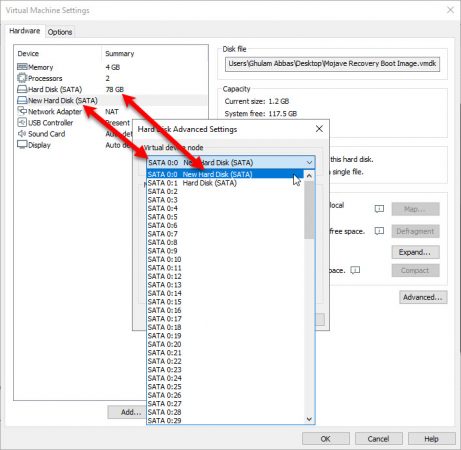
Now it is time for you to configure the virtual device node for both hard drives. So, select the hard drive that contains the macOS Mojave itself, then click on the advanced tab.
First Change the node to SATA 0:3 and click ok. Then select the macOS Mojave recovery image and change its virtual device node to SATA 0:0. After doing that select the Hard Disk that contains the macOS Mojave and changes it’s the node to 0:1.
In simple words, have a look at the screenshot and you will know which hard disk contains the virtual device node port.
Step 6. Power on the Virtual Machine
Now it is time for you to power on the Virtual machine, and it will directly take you to the macOS Mojave recovery mode. In the recovery mode, you can do the following stuff.
- Restore from Time machine backup: if you already have created a time backup inside the macOS 10.14 Mojave, here is the place where you can restore it just by some steps. However since it is a Virtual Machine, the snapshot of the Virtual Machine can handle the restore so much well, that you don’t need to use this feature here.
- Reinstall macOS: If you are not happy with the macOS Mojave running inside the Virtual machine, you can easily reinstall it from here.
- Get Help Online: Get Help if you are facing any problem with anything here.
- Disk Utility: As you know that Disk utility is the place where you can create a new partition, format a partition, change the file system of the hard drive. I mean if it is an HFS, then you can simply convert it from here to APFS. However, if the Disk utility can’t perform the task you can simply open the Terminal the menu on the top.

How to Get Out of macOS Mojave Recovery on VMware on Windows 10?
Now that you know how to access the macOS 10.14 Mojave recovery on VMware on Windows 10, you can simply get out of there easily.
Step 1. Edit the VMware settings
Open VMware, and edit the Virtual machine which contains both of the VMDK Files [macOS Mojave and macOS Mojave Boot image].
Step 2. Remove the macOS Mojave Boot Image
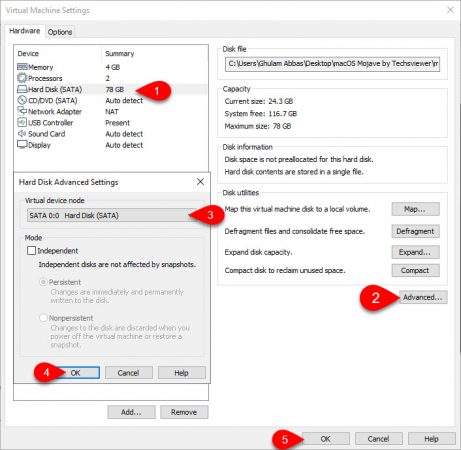
Remove the macOS Mojave Boot image and then select the Hard Disk which contains the macOS Mojave. Click on Advanced and change the virtual device node to SATA 0:0.
Step 3. Add CD/DVD ROM
You need the CD/DVD ROM, so before powering on the Virtual machine, it is good to add that. So, simply select Add and select CD/DVD ROM.
When you are done with the changes, Click ok and Power on the Virtual machine.
Summary
Download the macOS Mojave recovery image, then add that to the Virtual machine. Change the Virtual Device node and Power on the Virtual Machine. That’s all with How to access macOS Mojave Recovery on VMware on Windows 10.

