A screenshot is a picture of your screen whether you want to send it to someone or you want to insert it in a Blog Post. Just like this post, which is How to take screenshots in Windows 11 with easy steps. Inside mobile devices, you can hold the Power button + down or up volume key to take a screenshot. Do you think Windows 11 has a built-in screenshot feature, well, the answer is yes. In fact, there are multiple methods that can be used to take screenshots in Nanoseconds.

How to Take Screenshots in Windows 11?
As I said before, there are several methods to take screenshots in Windows 11 and here we are going to explore every one. What are the shortcuts, where you can customize it, and finally which third-party software you have to use to take screenshots for a blog site?
How to take screenshot with PrtScn on Windows 11?
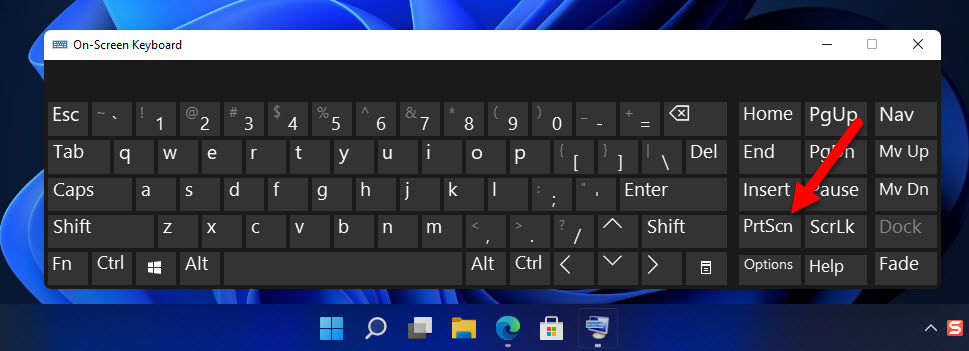
Often PrtScn is located after F12 on a Windows Laptop but on PC it is among the Pause and screen lock keys. On some PC or laptop PrtScn work by holding the Fn but on the other computers and laptops, it can work alone. So you have to figure out which way it works on your computer.
PrtScn is quite Powerful for taking screenshots in windows 11, the reason is because it can work in two ways.
- You can take screenshots as you are copying a text file, it will be in the Clipboard. Whenever, where ever you want, you can paste it. It means there is no need to take multiple screenshots of the same window or Panel.
- PrtScn can be used to take screenshots directly to the png file format. If you don’t know what is PNG, then continue reading. JPEG, PNG are both among the photo presets, and they are used most like compared to the other Photo formats.
How to use the PrtScn alone to take screenshots in Windows 11?
If you want to use PrtScn alone to take screenshots on Windows 11, just simply press the PrtScn key on the keyboard. As I said earlier, on some PC it works with the combination keys of Fn and PrtScn, Remember it.
Once you press the PrtScn Key, the screenshot is taken and saved in the Clipboard, now you have to paste it somewhere. You can not paste it directly on the desktop, you have to open an App, Like MS Paint, Microsoft Word, PowerPoint, or WordPad.
Once you opened one of those Apps simply press Ctrl + V to paste it. The next step is up to you on how to use the photo.
How to use PrtScn Key to save Screenshots as a Photo Directly?
To save Photo directly as Photo with the PrtScn key you have to hold the Windows key + the PrtScn. This will take the screenshot and will save it on the Pictures directory. The File Format will be PNG, and you can change it unless you use an App Like MS Paint.
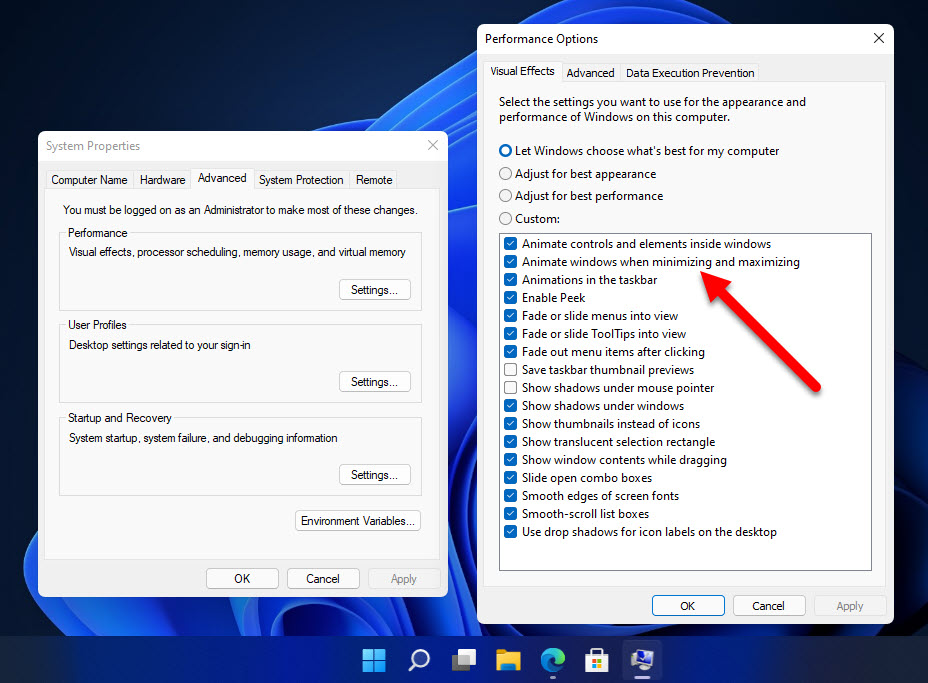
When you are using the Windows + PrtScn to take a screenshot, a dark light appears and then disappears. In simple words, it is an animation or a peek when you take a screenshot happens. You can change this setting if you don’t want it.
To access the system settings, search for system settings in the start menu, and open View advanced system settings. On the Performance tab choose settings. Now you can uncheck the box of the Animate Windows when minimizing and maximizing.
How to take screenshots with Snip & Sketch?
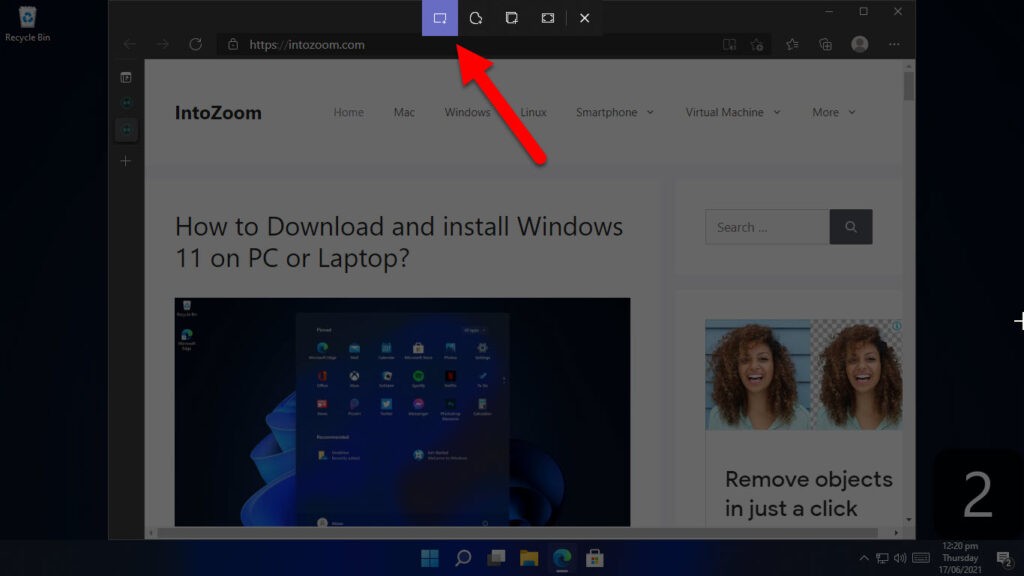
With the Windows 10 creators update a very fine and awesome feature is hidden in the Windows 10. You can use it to take screenshots very easily, just hold the Windows + Shift + S. Once the shortcut keys are pressed, the screen will turn its color to gray, then you can select any area to take a screenshot.
Now the same feature is available in Windows 11 with the same shortcut, all though it is improved a little bit.
Once the screenshot is taken, you can paste it anywhere or you can directly save it to a file from snip & sketch. You can save the picture into three formats of JPG, PNG, and Gif, there is not no other photo format.
How to Take Screenshots using Snipping Tool?
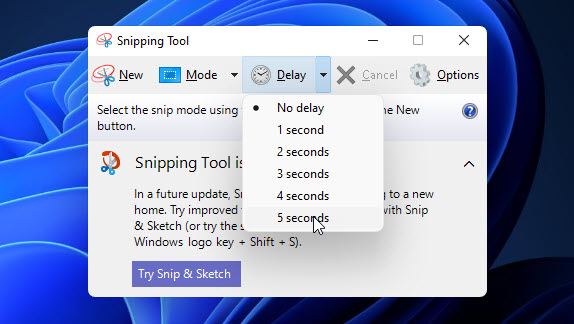
The snipping tool is one of the screenshot tools from Windows vista and over time it has gotten a little bit better. The only feature which Microsoft has added to the snipping in Windows 10 is the delay screenshot which comes in very handy. I hope Microsoft should bring changes and update to it so users should not use third-party apps.
The first step is to open the snipping tool by searching on the start menu. You can click on the new to take a screenshot or if you want to take a delayed screenshot, click on the delay and choose a second from the drop-down menu.
Take more Powerful screenshots with third-party apps
Whenever you see the Microsoft tools we are seeing a lack of features and easiness. That is why people are looking for third-party apps to fill the gap.
TechSmith Snagit
Among all the Photo capturing applications I have used, I have never encountered a Powerful App like the Snagit. This is Application is from the TechSmith company and costs per user $49.99 for individual and business users. For education, they have a relief of $29.99 and for the governmental and non-profit organization, it costs $42.99. Although based on the quantity the price changes, that’s why you have to visit their site.
This powerful application is available for Windows and macOS Series. Here are the list of features I can tell you about.
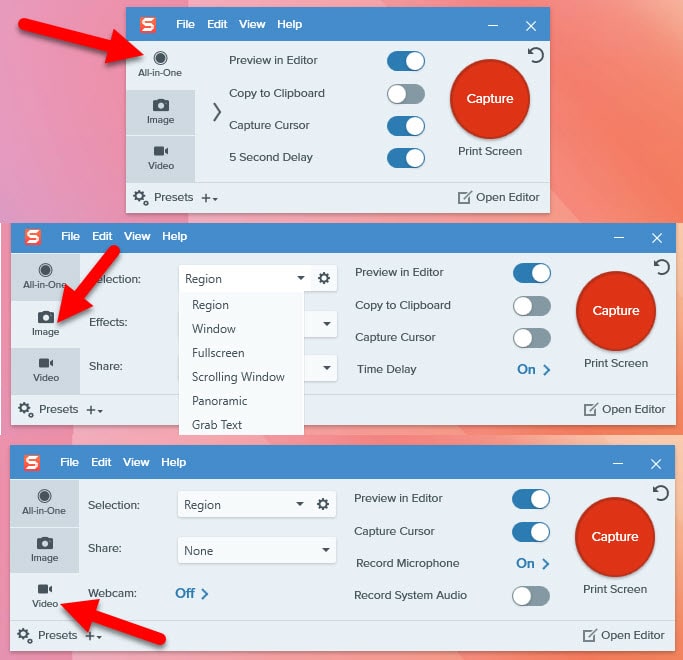
- With the all-in-one panel, It can capture a photo, save the photo to a clipboard, and delay capture.
- Their multiple choices for selection screen capturing, effects, and social sharing directly. Among the selection, screen captures are the scrolling window and panoramic too. On the web browsers, the scrolling window has so much usage you never imagine.
- And Finally, video recording: Although the basic video screen capturing is available but it is not as advanced as it has to be. For video screen capturing TechSmith offers Camtasia which is one 1 for video screen recording on Windows and macOS.
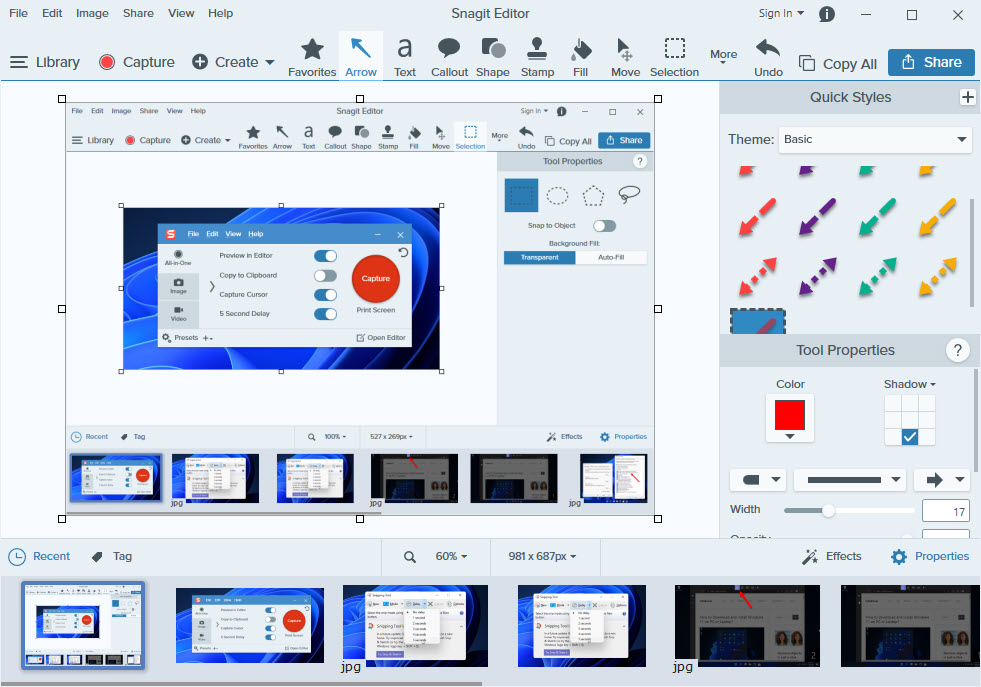
Well, the screenshot above only shows the features of the capturing window, Once the photo is captured. You can edit it on the editor panel which is also amazing with tons of features. Among those features, I use the arrow, rectangle, magnifier, step by step numbering, selections a lot. Even now every screenshot on the site is captured with TechSmith Sangit.
Its editor’s screen is divided into four panels:
- Menus and Toolbar: You choose any tool you need and you can customize the tools you use a lot.
- Property tools: The tool which you are selecting, its settings can be found on the right panel which is known as property.
- You can view the photo you want to edit on the main screen.
- And Finally, the history of your Photo screen capturing can be seen in the recent captures. If you don’t want to see them, you can turn them off from the view menu.
Since I have used the Snagit and I know a lot about its features, I am recommending you to use it. Well, there are other editors who can fill the gap on windows 10 but since I have not used them myself, I will leave the comment sections to fill it. But I am providing the names of the editors which I have collected from other sites. I hope they have to be help full.
Best Snagit Alternatives For Windows and macOS (Paid and Free)
- screenpresso: https://www.screenpresso.com/
- PicPick: https://picpick.app/
- Jing: https://www.techsmith.com/jing-tool.html
- Firshot: https://getfireshot.com/
- Ashampoo Snap: https://www.ashampoo.com/uk/gbp
- TinyTake: https://tinytake.com/
- Greenshot: https://getgreenshot.org/
- SnapDraw: https://www.snapfiles.com/get/alphascreenshot.html
- Screenshot Captor: https://www.donationcoder.com/software/mouser/popular-apps/screenshot-captor
- ShareX: https://getsharex.com/
- Lightscreen: https://lightscreen.com.ar/
- Gadwin PrintScreen: https://www.gadwin.com/printscreen/
- Skitch (For mac Only): https://evernote.com/products/skitch
- Ligthshot: https://app.prntscr.com/en/index.html
- FastStone Screen Capture: https://www.faststone.org/FSCaptureDetail.ht
Also Read: