Windows 11 has attracted millions of people’s hearts with its new refined feel and design and macOS and Linux users are also one of them. It is not just the Look, design, and aesthetics of Windows 11 that has attracted millions of people, with Windows 11 you can android apps on PC, just like running Windows Native Applications.
Officially Microsoft has introduced the Amazon Appstore to download and use Android Apps in Windows 11. But if you are a geek and interested in playing around, you can tweak a little on your PC, then you can easily download and install Google Play Store in Windows 11. This way you have access to millions of Android Apps in Windows 11 on your command.
Note: The full credit goes to the ADeltaX, which has built the WSAGAScript Script, that you can use to get and install Google Play Store in Windows 11.
Prepare Your PC for Google Play Store
Before getting it started to downloading and installing Google Play Store on windows 11, you need to set up your computer before for it. These are the prerequisites that must be enabled.
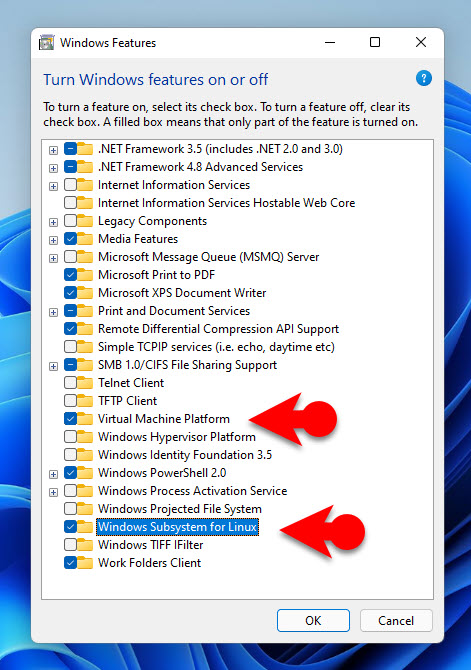
- Enable the Windows Subsystem for Linux
- Enable the Virtual Machine Platform
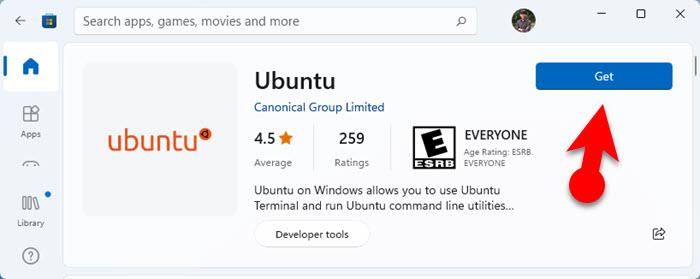
- Download and Install ubunut from Microsoft Store
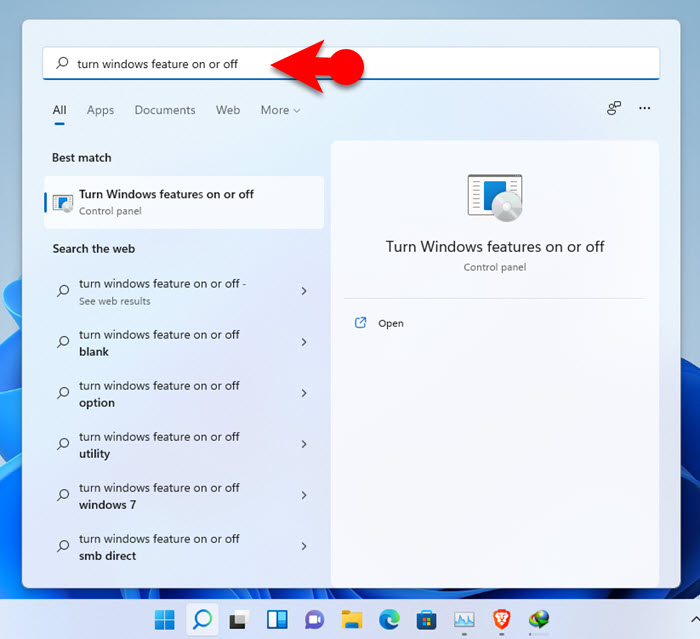
To enable the prerequisites, you need to access the Windows features. The quickest way to access them is by searching in the start menu by “Turn Windows Feature on or Off”.
Once the Windows Feature has appeared, you have to choose the Windows Subsystem for Linux and Virtual machine platform, and click ok. It is going to take a while to install the Selected Windows Feature, so, be patient.
The moment that the selected windows features are installed on Windows 11, instantly open Microsoft Store and search for Ubuntu, download and install it on your PC.
Now that the prerequisites are installed and ready, restart your computer from the start menu to apply the effects on the computer.
Install Google Play Store on Windows 11 with Windows Subsystem for Android Manually
In order to install the Google Play Store on windows 11, the windows subsystem for Android must be enabled, because it is a layer of the Linux kernel and the Android operating system that enables the machine to run Android apps in windows.
In the windows feature, we did not see the option of windows subsystem for Android, instead, we are going to tweak the windows subsystem for Android to run the Google Play store. So, a standalone installer package is required here.
Make sure you have a very fast Internet connection because this part is going to be mostly downloading.
- Download File Archiver Like WinRAR or 7-Zip.
- Google Apps Package Installer. [Intel 64-Bit, AMD 64-Bit]
- Windows Subsystem for Android.
Download Windows Subsystem for Android:
Click here to open the adGuard.net website, in the box type the {https://www.microsoft.com/store/productId/9P3395VX91NR} and change the settings from fast to slow, once you are done, click on the check box.

Scroll down to the end and choose the msixbundle file which has a huge size, in my case, it’s size 1.21 GB.
| MicrosoftCorporationII.WindowsSubsystemForAndroid_1.7.32815.0_neutral_~_8wekyb3d8bbwe.msixbundle | 2021-10-26 11:17:10 GMT | 0c4b3430bcd37be562f54322c79fb14f11ce1348 | 1.21 GB |
Install Google Play Store using PowerShell in Windows 11
Installing the Google Play store in windows 11 is not straight forward and it is not also really hard, just if you are trying for the first time it is a bit confusing for you. But I have tried my best to make it easy as possible to Install Google Play Store in Windows 11.
Before getting started I want to clear something and it should not be very confusing for you either, I created a folder on the desktop by the name of Google Play store and moved all the downloaded files inside that.
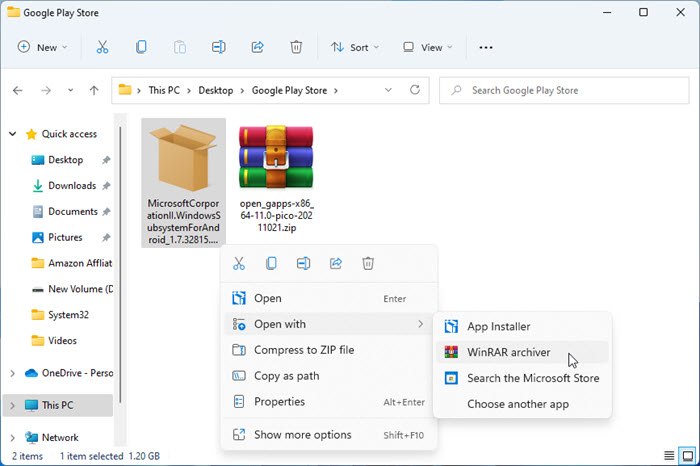
Step 1. Right-click on the MicrosoftCorporationII.WindowsSubsystemForAndroid_1.7.32815.0_neutral_~_8wekyb3d8bbwe.mixbundel and choose open with WinRAR. If you are using 7-zip, then you should choose 7-zip instead of WinRAR.
Scroll down to the end and double click on WsaPackage_1.7.32815.0_x64_Release-Nightly.msix, this is going to open another WinRAR page.
Note: To Make sure everything is going well, the Picture on the left, I will call mix bundle and the other one WSA Package.
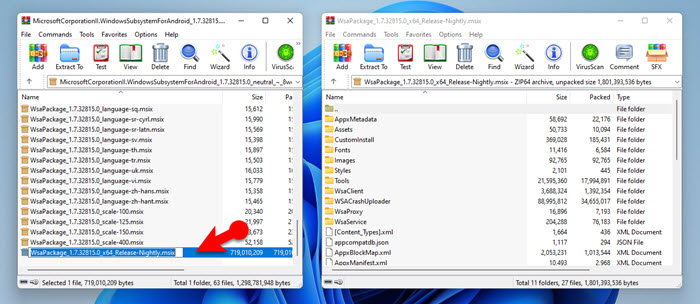
In the meantime leave them both open go to the Drive C> Windows and create a New directory by name of the Windows Subsystem for Android.
Go to the WSA Package, extract them inside a folder on the desktop, and then move all the files to the drive C> Windows Subsystem for Android and paste them.
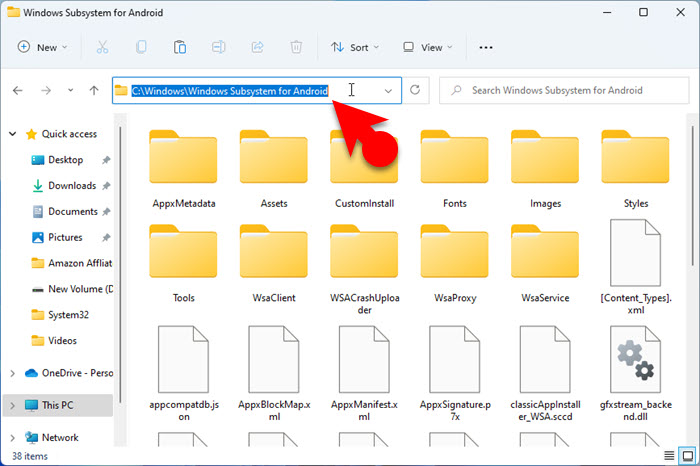
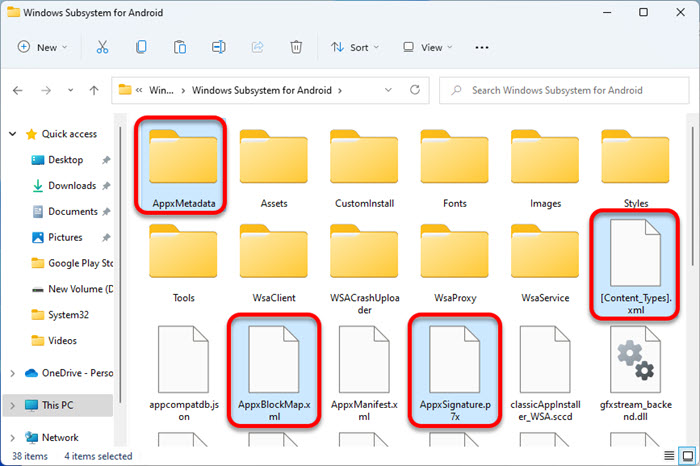
Now locate the following files in the Windows Subsystem for Android and delete them.
- [Content_Types].xml
- AppxBlockMap.xml
- AppxSignature.p7x
- AppxMetadata
It is time to get the WSA Codes from Github, click here and follow the below screenshot to download the WSAScript.
Note: After downloading I am moving it to the Google Play Store directory on the Desktop.
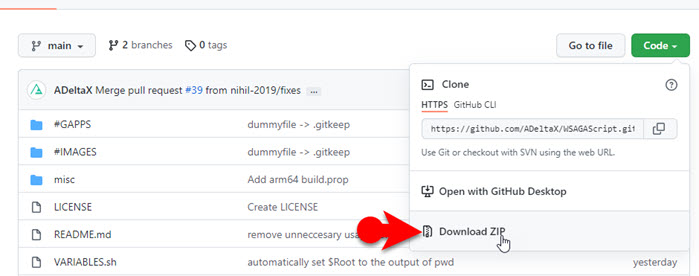
Open the WSA Script and extract it on the desktop inside a new folder.
Again to Drive C> Windows and create a New directory by name of the GAppsWSA, then paste the extracted WSA Script there.
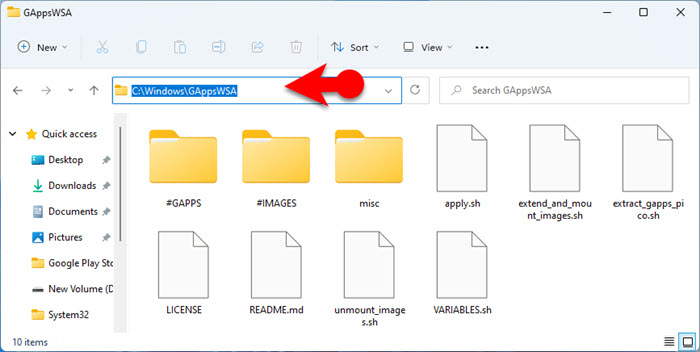
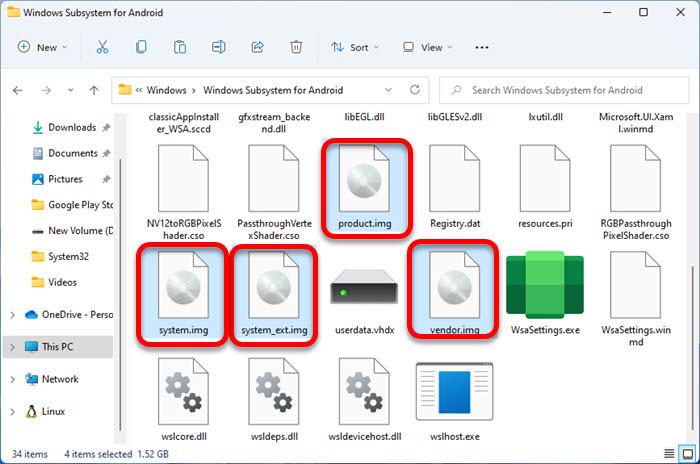
This time go to the “Windows Subsystem for Android” and copy the following files.
- vendor.img
- system.img
- system_ext.img
- product.img
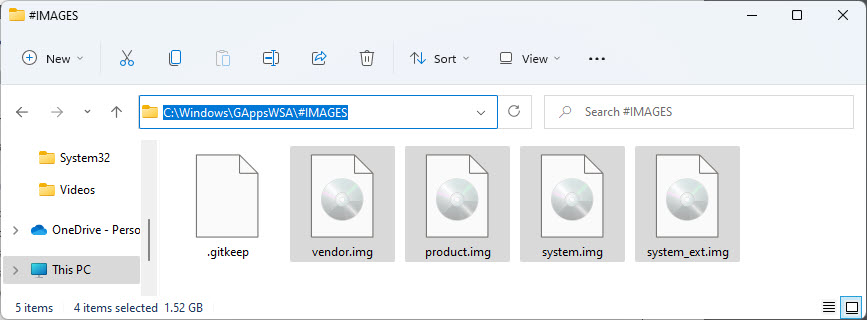
Now paste the copied images into the GAppsWSA> #images.
Now to go the desktop on the Google Play Store directory, copy the Google Apps Package Installer known as open_gapps-x86_64-11.0-pico-20211021.zip, and copy it.
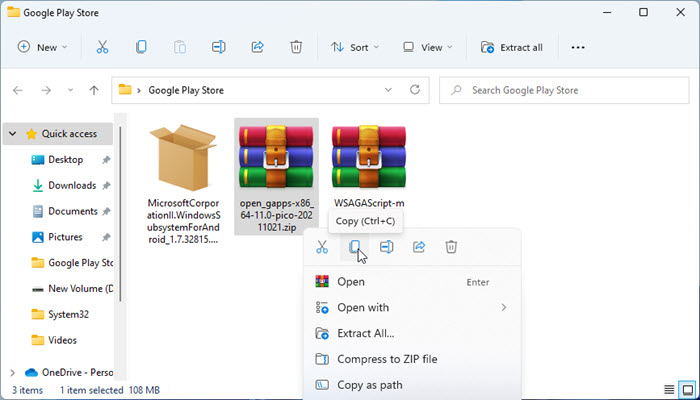
This time paste the Gapps into the GAppsWSA> #GAPPS.
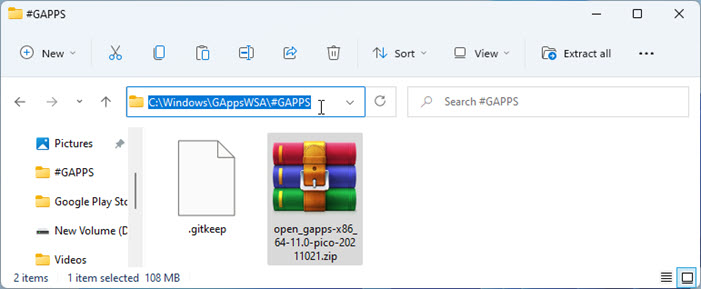
This is the place where you may face some issues regarding installing lzip unzip if you have never used Windows Subsystem for Linux.
Go back to the GAppsWSA directory, in the address bar type bash and press enter.

Type sudo su to login with root privileges.
Then install lzip unzip by typing the “apt install lzip unzip” command.
Note: Incase during installing lzip unizp you are facing the below error, type apt-get update
Package lzip is not available but is referred to by another package. This may mean that the package is missing, has been obsoleted, or is only available from another source However the following packages replace it: xz-utils

Type the following command to install dos2unix.
apt install dos2unix
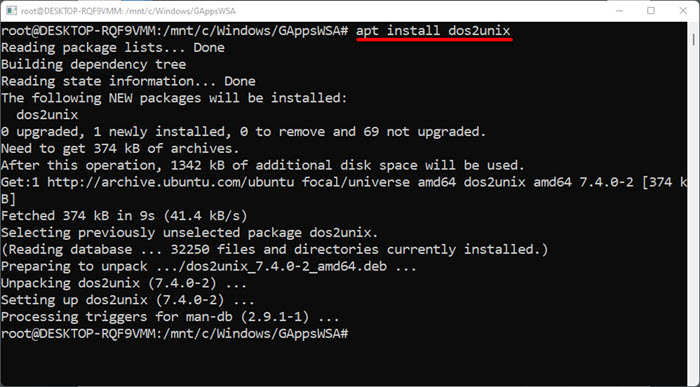
Copy and paste the following commands one by one on the WSL terminal to execute them.
- dos2unix ./apply.sh
- dos2unix ./extend_and_mount_images.sh
- dos2unix ./extract_gapps_pico.sh
- dos2unix ./unmount_images.sh
- dos2unix ./VARIABLES.sh

it is time to install Google Apps Packages on the system, to do it, type the following command.
- ./extract_gapps_pico.sh
It is time to mount the images, type the following command.
- ./extend_and_mount_images.sh

After the images are mounted, you need to execute the following commands.
- ./apply.sh
- ./unmount_images.sh
This time go to the drive C>Windows> GAppsWPS> #images, copy all of them, and then paste it inside the “Windows Subsystem for Android”. You will see a noticed of replacing the older same images, click replace.
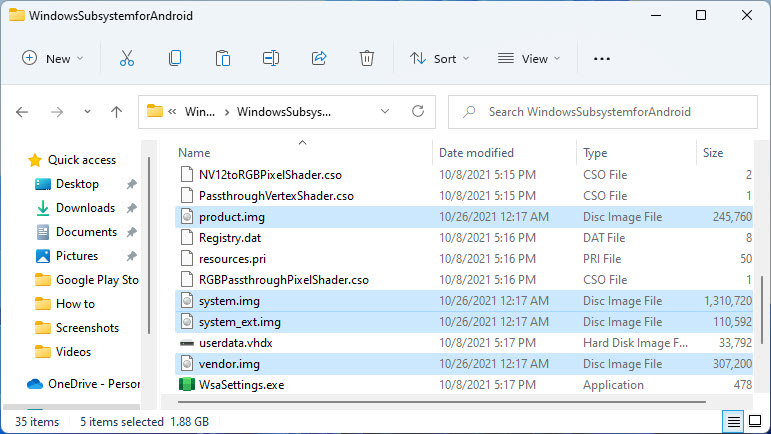
Inside the GAppsWPS>misc> copy the kernel and go to the Windows Subsystem For Linux>Tools, rename the pre-existed Kernal to kernel_bak, and then paste the Kernal you have copied.
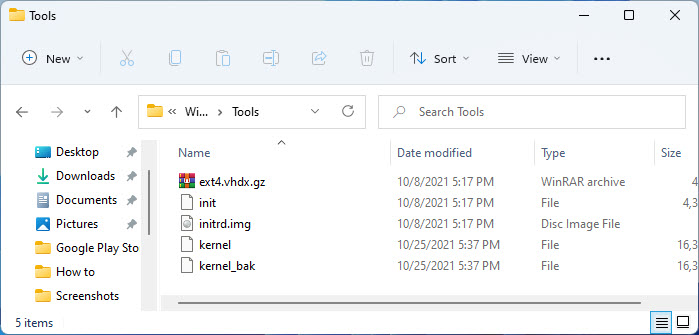
Search for Windows terminal in the Start menu and launch it as an Administrator.
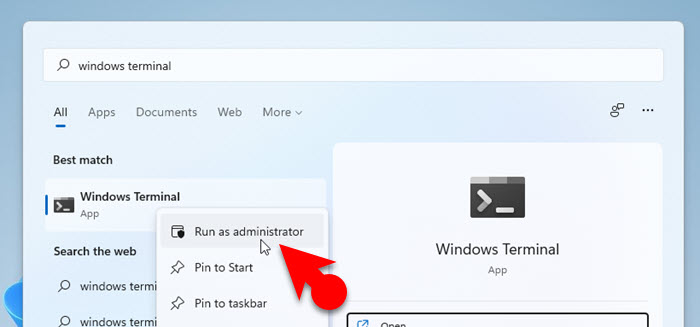
Make sure that the terminal is running as PowerShell Administrator, you have to run the following command there.
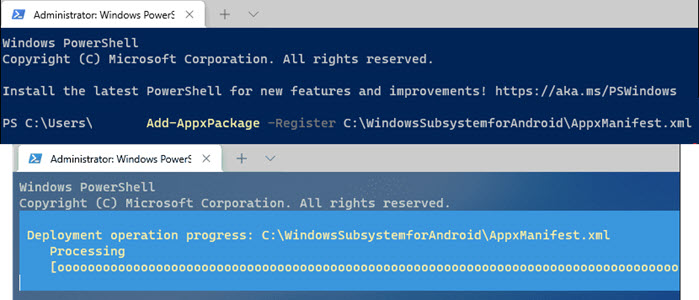
- Add-AppxPackage -Register C:\WindowsSubsystemforAndroid\AppxManifest.xml
After you execute the command, you have to wait until the package should be installed on your system.
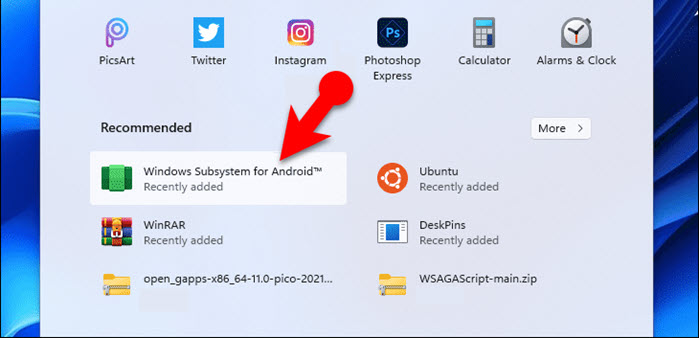
Now you will the Windows Subsystem for android has been added in the start menu, click on it to open.
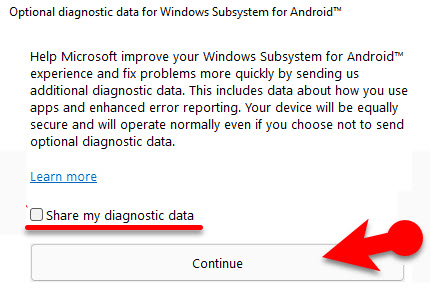
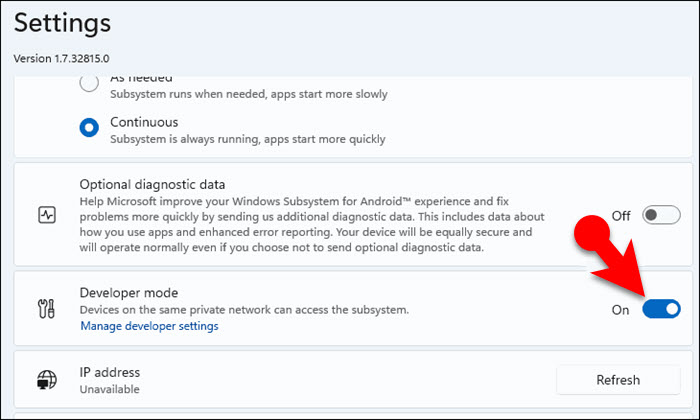
Launch the Windows Subsystem for Android from the start menu, click on the files and choose share diagnostic data.
Also, make sure that you enable the developer mode for the Windows Subsystem for Android.
It is finally time to access the Google Play Store, search for it in the start menu, and when it appears choose it to open.
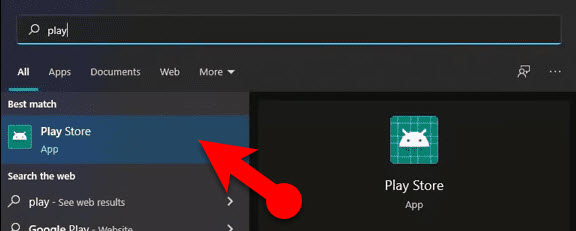
The next step is to sign in to the google play store, after signing you are able to download all the android apps on PC.
Here is the video from the developer which might help you.

